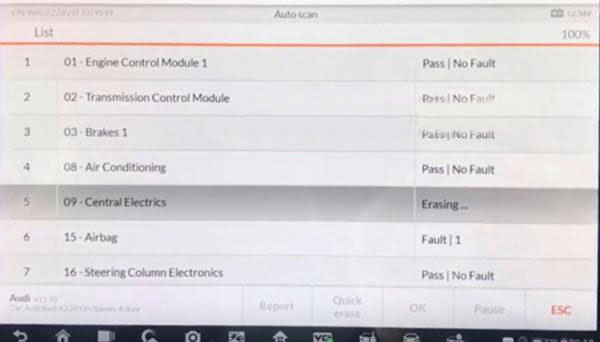
You should have a decent
VAS5054A head, ODIS, and ODIS online account.
You need FEC code for ACC.
If your car didn’t have that from factory, ODIS is useless.
You need radar with special patched firmware that will accept non-official generated FEC code.
Or put round LRR radar and just remove CP, which if you have a new 3Q0 windshield camera wont communicate with it.
The quest for the exclusive USA ACC retrofit…
Well it’s been some time since I decided to tackle something… but
I’ve never been one to shy away from a challenge assuming I have the
time to submit myself to the proper research.
Having been many years, since first thinking about retrofitting ACC
(Adaptive Cruise Control) or otherwise known as “Automatic Distance
System” or “Cruise Radar…” I gave up for a while having realized it was
going to be a painful experience trying to switch out the entire ABS
block with an ACC Programmed device, plus then the retrofit of all the
pieces… The new grille badge, the radar bracket assembly, the Radar
itself, the wires, and then the ABS….
Well… I had to do some maintenance on the ol’ girl this weekend
anyways, and replaced the subframe bolts underneath as well as
tightening up everything (which btw… ECS at one point said the factory
torque spec is 81NM + 1/4 turn on these bolts, and while that may be
true on other vehicles that is incorrect for the CC). The correct Torque
spec is 70NM + 1/2 turn… but i digress….
I decided to pull off the front grille and take a closer examination
at the ACC project…. then I took off the old VW Badge on the front, and
put in the special “ACC” VW badge and looked at the mounting for the
radar itself to understand how it all fit together. Turns out you need 6
brackets to mount the radar
3x – 3C0-907-179-A and
3x – 3C0-907-179-B
In addition to the radar unit itself.
Well I had 1 of each bracket, and decided to do a sample fit, and it
worked. Then I looked up all the wiring, and already had a harness made
from before… wasn’t the complex. A Fuse wire, a Ground, CAN Hi, CAN Low,
and a wire to the ECM or the Steering Column Control Module (either
or).
Ok… well what about the ABS??? (Remember…. the ABS software has to be able to support ACC).
As it turns out, it appears that you can trick the ABS into believing
it’s “a different ABS” by over writing to the EEPROM of the ABS a few
key HEX values, and then using an official
VAS-5054A device, flashing a firmware to it. This can be done with any “revision 25” software ABS in the USA.
I have not done this yet, but I plan to…. the trick will be removing
the “electronic” portion of the ABS module, without removing /
disconnecting the ABS itself. This will be done by carefully removing 4
torx screws from the plastic electric housing side, and then gently
prying off the cover to reveal the board and solenoids of the unit. From
here… I am uncertain if the EEPROM will be exposed at this point, or if
de-soldering the board from the housing will be required to access the
other side of the control board. I will update once I make it this far. I
am then also uncertain if I can use my special programming tools to
read the EEPROM while it’s still connected to the board, or if i will
have to de-solder it to read it. Thankfully, I purchased a high powered
electronics lighted magnifying glass for this type of work. From there,
it will be a matter of saving off the original EEPROM in case this
doesn’t work (i can just reflash it)… and then flashing the ABS with an
official VAG update, then adjusting some settings with VAGCOM.
If all goes well, I will have finally solved this puzzle, and figured
out a way to adapt ACC on a USA model that never had it available ,
which at that point, the only final thing left for me to adapt will be
the lane keeping camera.
Part 1
I would want an EEPROM dump of your 17, but since I’m sure you don’t
have the tools for that, I’m guessing that’s not an option. Also I don’t
think it would matter much. I’m adapting to a 2010 VR6 4Motion model,
that has already been upgraded to a 2013 Gateway and IMMO combination
with no errors.
In any case I have another ABS unit lying around so I decided to take
it apart before I mess with my own. Turns out that I will in fact have
to de-solder the plastic housing connection points in order to expose
the EEPROM chip to get a read.


 Part 2
Serious tools have arrived….
Not messing around anymore….

Ok, got the ABS electronics desoldered from the frame door, and able
to expose the EEPROM (this is from the spare ABS complete assembly The
was 3C0-614-109-P which I was told had previously been updated to
support ACC). Sure enough, I de-soldered the EEPROM in almost no time
flat with my new hot air and SMD station. Like literally heated the
sucker in up in 5 seconds and bam…. came right off nice and clean.
Popped it in my programmer and read out hex.
Sure enough… it was already programmed to 3C0-614-109-E and flashed. I
checked out the offsets 0x2BA – 0x2BF and there It was… the bits were
already changed to 33 CC 33 CC 33 CC which is the necessary witchcraft
needed to trick the EEPROM to take a flash of the “E” ABS.
In any case I’ve now walked through the procedure and saved off the
EEPROM in case I need it. In theory I could just take this EEPROM chip
and solder it onto my ABS board. But I think I’ll go through the whole
thing.
Who knows… maybe someone will want to buy this extra chip off me and convert their own? In any case here’s a few pictures.
I am now waiting on the final brackets to arrive for the rest of the
radar install, and then will need to hook up the harness, disassemble my
actual ABS unit, Desolder the EEPROM, write the hex, re-install it,
then flash it with a
VAS-5054a, then check the programming in VAGCOM programming. Fun stuff.


 Part 3:
Ok Folks – I finally got this working. A few bugs yet to workout that
I believe are related to the fact that I’m using a B6 Platform ABS with
a B7 Platform Gateway, and B7 Platform Radar. I’m in the process of
acquiring a B7 ABS Module that I’m going to see if I can simply just add
on the B6 Hydraulic unit rather than replace the whole thing….. but all
of that isn’t necessarily required, I’m just trying to be a
perfectionist mostly.
A few things to note before I go further, You MUST have professional
tools to do this retrofit. A simple CAN+HEX VCDS / Ross-Tech Cable
(though useful) will not cut it for completion of this. You need:
1 – A REAL Official VW
VAS5054A Head
/other decent VW Diagnostic Tool – A chinese knockoff you can get on
http://www.obd2tool.com/ will not cut it here. These go for anywhere
between $500 – $1000 at legitimate places. You need this tool to update
and flash your controllers properly. This is what the real deal looks
like and should come packages as:

2 – Legitimate VW Diagnostics / Engineering Software – I’m not going
to discuss ODIS Engineering or how you get it. But you need access to
this, along with VW Official module flash files in order to code your
stuff.
3 – A Chip Programmer – I use an ELRASOFT USB Programmer. It works
flawlessly – You can see previous posts above where I use this and what
it looks like. It will READ / WRITE Electronic chips.
4 – Wiring Diagrams – For your convenience I’ve posted the 2 below
for a B7 Platform (2011 and Up CC) ACC diagram. For 2010 and below, you
have to add in a special relay… and honestly if you’re doing the ACC
upgrade, you should probably be considering upgrading your Gateway and
everything else before doing this retrofit in the first place.


5 – Some special very thin tools to get the electronic module off the
ABS without taking out the whole hydraulics unit – I used the grey
ratchet pictured here and found this the easiest for me to gain access
to the back lower torx screw. Specifically their are 4 T20 bolts you
need to take off before the electronic module will come off the ABS.

The result of your fine work will be the culmination of this:


Here’s some fun facts…. You don’t need to replace your entire ABS
Unit. Whether it’s a 3C0 (2010 and under model) or a 3AA (2011 and Up
model) each of them can be flashed and upgraded to support ACC + Front
Assist + Full Follow Stop.
For 3C0 ABS Pumps – You must first
disassemble the Electronics module from the ABS Pump via the 4 torque
screws, remove it carefully from the vehicle around the brake hydraulic
lines, de-solder the 42 soldering points holding the plastic housing
connector to the control board, flip the board over, heat the ST EEPROM
chip soldering points up using “Hot Air” to remove the 8 pin Chip, put
it in your programmer, read it out and save it (so you have your
original settings for safe keeping). THEN
Modify the HEX range – 0x2BA-0x2BF to 33 CC 33 CC 33 CC
Save the new value and write it to the chip with your programmer. Hot
Air or Solder the chip back to the board, Put the board back on the
plastic housing and re-solder the 42 soldering points, put the control
module back into the ABS Hydraulic unit, plug it all in, then using ODIS
Engineering navigate to your ABS Module and
Flash the ABS with the file – 3C0698109__0017.sgo – This will convert your ABS Unit now to an E Version which supports ACC. You will need to go back through the basic settings
Using ODIS Diagnostics or VAGCOM (though not entirely sure how to do
this in VAGCOM) go through Guided Fault Faulting, and let it go through
and self correct and set everything for your ABS Pump – Steering,
Longitudal Access, etc. When you’re done with that you should no lights
on your dash indicating you have an issue with the ABS.
For 3AA ABS Pumps It’s the EXACT same procedure as above except
Modify the HEX range – 0x2BA-0x2BF to 45 BA 45 BA 45 BA
and
Flash the ABS with the file – 3AA614109__0023.sgo
Now using VCDS, you can start messing around with your coding. You will need to adjust a few things:
01 – Engine Module
The engine Module, I forget if you go to security access or coding.
Whichever it is, you’ll get a little popup with some available codes. I
first applied the code 16167, to remove the normal cruise, and then
applied 13377 to activate the ACC (Note that 13647, although listed and
tried, never worked). I had to dig for the correct code listed above.
03 – ABS Brakes Module
This is the guy you just changed, and in “coding” will still have
your “basic code” applied to it. Write this down, everybodies standard
equipment is different, but the code applied here is your basic coding
without ACC enabled. To enable ACC:
B6 Platform Take your Base Number (mine was 0000413) and add +8192 to
it which adds (ACC + Front Assist). Example Math: 0000413 + 0008192 =
0008605
B7 Platform Take your Base Number (mine was 0000413) and add +0016384
to it which adds (ACC + Front Assist + Full ). Example Math: 0000413 +
0016384 = 0016797
16 – Steering wheel Module – At the moment I’m using the standard
cruise control steering stalk, but I am replacing it with the ACC
Variable switch stalk. That being said, I got the normal cruise control
stalk to work with ACC regardless. Whether you replace it or not, you
need to use the following coding: 099AA70002
19 CAN Gateway In the installation List, make sure you tick the “13-Auto Dist. Reg”
13 – Auto Dist. Reg – This one you might have to play around with a
bit. This is basically the radar you installed in the front of the car
you’re interfacing with. VCDS has listed all the security codes (when
you go to security access) which will pop up with the codes to enter in
the adaptations. If you bought a used radar like I did, it’s possible
everything’s already turned on. But maybe not. So Check Channels 1 – 13
individually supplying the security codes as written in VCDS, and enable
all of them.
Note – 3AA Radars can be FLASHED (downgraded) to 3C0
Radars if necessary. However, if the Hardware was a 3C0 radar, it “may
not” be able to be flashed upwards to a 3AA version. Do this at your own
risk if you must.
The above is the most complicated stuff which I’ve outlined, and
which most people who have the proper tools should be able to tackle.
The rest, is literally just the parts and wiring. Get a radar, the radar
installation brackets, a wiring harness, and hook it all up.