Saturday, July 31, 2021

OBDSTAR MS80 Motorcycle IMMO Key Programming List


A lot of people ask if the OBDSTAR MS80 motorcycle diagnostic system will make motor keys?

Yes, OBDSTAR released new software upragde adding add key and all keys lost programming for BMW, DERBI, Aprilia, Ducati, Gilera, Harley, Peugeot, Piaggio, Triumph, Vespa motors. More motor brands and models will be released continuously.

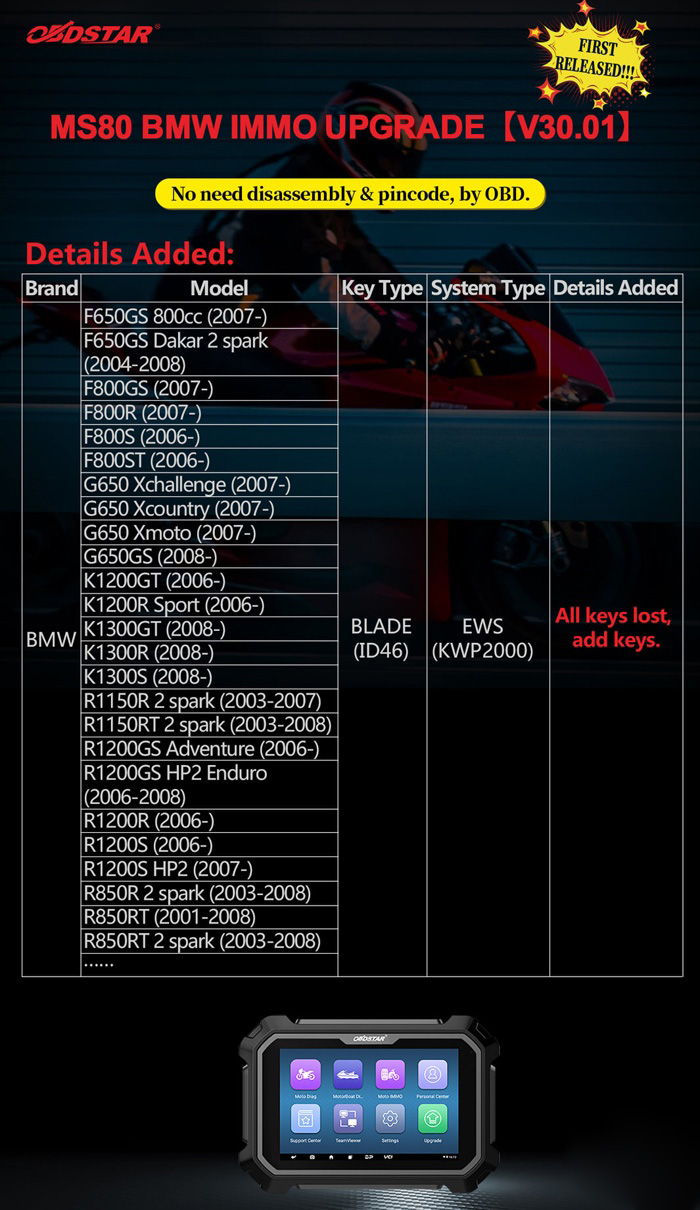
MS80 BMW IMMO UPGRADE [V30.01]

No need disassembly and pin code. via OBD directly.

Key Type: Blade ID46

System type: EWS (KWP2000)

Supports both Add Key and All Keys Lost

Supported BMW Motors
F650GS 800cc (2007-)
F650GS Dakar 2 spark (2004-2008)
F800GS (2007-)
F800R (2007-)
F800S (2006-)
F800ST(2006-)
G650Xchallenge (2007-)
G650 Xcountry (2007-)
G650Xmoto(2007-)
G650GS (2008-)
K1200GT(2006-)
K1200R Sport (2006-)
K1300GT(2008-)
K1300R(2008-)
K1300S(2008-)
R1150R 2 spark (2003-2007)
R1150RT 2 spark (2003-2008)
R1200GS Adventure (2006-)
R1200GS HP2 Enduro (2006-2008)
R1200R(2006-)
R1200S (2006-)
R1200S HP2 (2007-)
R850R 2 spark (2003-2008)
R850RT (2001-2008)
R850RT 2 spark (2003-2008)
OBDSTAR-MS80-Motorcycle-IMMO-Key-Programming-List-1

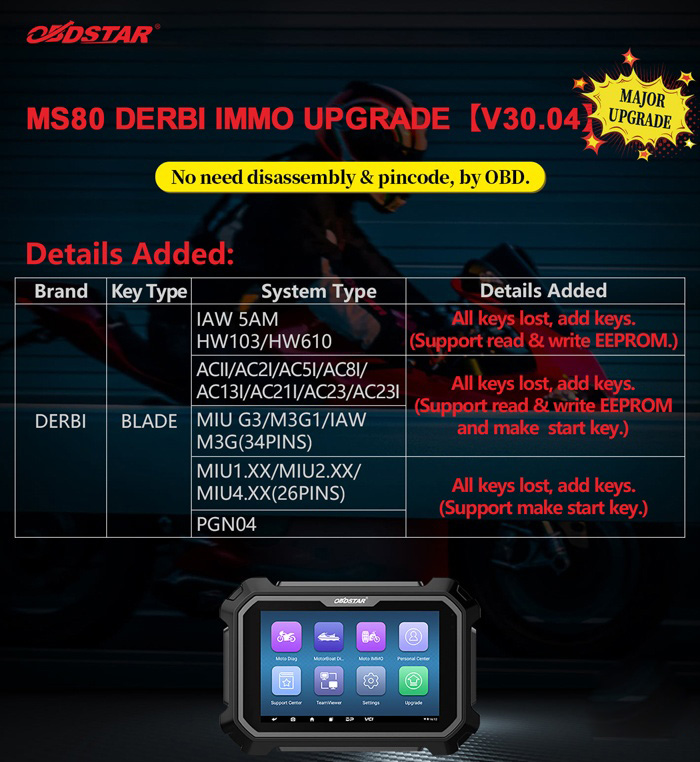
MS80 Derbri IMMO Update V30.04

No need disassembly and pin code. via OBD directly.

Models:

IAW 5AM HW103/HW610: all keys lost, add keys (read & write EEPROM)
ACII/AC2I/AC5I/AC8I/ AC13I/AC211/AC23/AC23I: all keys lost, add keys (read & write EEPROM)
MIU G3/M3G1/IAW/M3G(34PINS): all keys lost, add keys (read & write EEPROM)
MIU1.XX/MIU2.XX/MIU4,XX(26PINS): All keys lost, add keys (make start key)
PGN04: All keys lost, add keys (make start key)
OBDSTAR-MS80-Motorcycle-IMMO-Key-Programming-List-2

OBDSTAR MS80 Aprilia IMMO Update V30.04
No need disassembly and pin code. via OBD directly.
Blade key

System Type No Need PinCode Add Keys All key Lost Other Function
ACII/AC2I/AC5I/AC8I/AC13I/AC21I/AC23/AC23I ✔ ✔ ✔  Make Start Key

Advanced Functions

Read EEPROM(ST7 INTERNAL)

Read EEPROM( EXTERNAL 95040)

Write EEPROM(ST7 INTERNAL)

Write EEPROM(EXTERNAL 95040)

ECU Reset(Virgin)

IAW 5AM_HW103/HW610 ✔ ✔ ✔ Diagnostic Connector Mode

Read EEPROM (95160)

Write EEPROM (95160)

BENCH Mode

Read EEPROM (95160)

Write EEPROM (95160)

ECU Reset(Virgin)

MIU1.XX/MIU2.XX/MIU4.XX(26PINS) ✔ ✔ ✔ Make Start Key
MIU G3/M3G1/IAW M3G(34PINS) ✔ ✔ ✔ Make Start Key

ECU Reset(Virgin)

Read 95320 EEPROM (Backup)

Write 95320 EEPROM (Restore)

ECU Reset(Virgin)

PGN04 ✔ ✔ ✔ Make Start Key

OBDSTAR-MS80-Motorcycle-IMMO-Key-Programming-List-3

Ducati Motorcycle immo key programming list

Brand Area Model Key Type Year No Need PinCode Add Keys
DUCATI EUROPE Diavel EU3 IMMOBILIZER 2011- ✔ ✔
DUCATI EUROPE Diavel EU4 (NO USA / CHINA) IMMOBILIZER 2016- ✔ ✔
DUCATI EUROPE Multistrada 1200 IMMOBILIZER 2010- ✔ ✔
DUCATI EUROPE Multistrada 1200 ABS IMMOBILIZER 2010-2014 ✔ ✔
DUCATI EUROPE Multistrada 1200 D-Air IMMOBILIZER 2014- ✔ ✔
DUCATI EUROPE Multistrada 1200 Enduro IMMOBILIZER 2016- ✔ ✔
DUCATI EUROPE Multistrada 1200 Pikes Peak IMMOBILIZER 2015- ✔ ✔
DUCATI EUROPE Multistrada 1200 S/T IMMOBILIZER 2010- ✔ ✔
DUCATI EUROPE XDiavel IMMOBILIZER 2016- ✔ ✔

PIAGGIO Motorcycle IMMO Programming List

Model System Type No Need PinCode Add Keys All key Lost Other Function

ACI100 ✔ ✔ ✔ Read EEPROM (MC68HC05E6)

Write EEPROM (MC68HC05E6)


ACI500/501/502/503/504/505 ✔ ✔ ✔ Read EEPROM (MC68HC05E6)

Write EEPROM (MC68HC05E6)


ACI600/601/602/603/604/605/606 ✔ ✔ ✔ Read EEPROM (MC68HC05E6)

Write EEPROM (MC68HC05E6)

FLY

LIBERTY

ACII/AC2I/AC5I/AC8I/AC13I/AC21I/AC23/AC23I ✔ ✔ ✔  Make Start Key

Advanced Functions

Read EEPROM(ST7 INTERNAL)

Read EEPROM( EXTERNAL 95040)

Write EEPROM(ST7 INTERNAL)

Write EEPROM(EXTERNAL 95040)

ECU Reset(Virgin)(Virgin)

FLY 125

FLY 150

FLY 125

FLY 150

LIBERTY 125

LIBERTY 150

LIBERTY 125

LIBERTY 150

AC19I/AC20I/AC27I ✔ ✔ ✔ Make Start Key

Advanced Functions

Read EEPROM (INTERNAL 95080)

Write EEPROM (INTERNAL 95080)

ECU Reset(Virgin)(Virgin)

FLY 125

FLY 150

FLY 125

FLY 150

LIBERTY 125

LIBERTY 150

LIBERTY 125

LIBERTY 150

AC24I/AC25I/AC32I ✔ ✔ ✔ Make Start Key

Advanced Functions

Read EEPROM (INTERNAL 95080)

Write EEPROM (INTERNAL 95080)

ECU Reset(Virgin)(Virgin)


IAW 15 ✔ ✔ ✔ Make Start Key

Advanced Functions

Read EEPROM (MC68HC11F1)

Write EEPROM (MC68HC11F1)

ECU Reset(Virgin)(Virgin)


IAW 5AM_HW103/HW610 ✔ ✔ ✔ Diagnostic Connector Mode

Read EEPROM (95160)

Write EEPROM (95160)

BENCH Mode

Read EEPROM (95160)

Write EEPROM (95160)

ECU Reset(Virgin)(Virgin)


IMM003/IMM006 ✔ ✔ ✔ Read EEPROM (MC68HC05E6)

Write EEPROM (MC68HC05E6)

ECU Reset(Virgin)(Virgin)


MIU1.XX/MIU2.XX/MIU4.XX(26PINS) ✔ ✔ ✔ Make Start Key
BEVERLY 125

BEVERLY 300

BEVERLY 350

FLY 125

FLY 150

FLY 125 3V

FLY 150 3V

LIBERTY 150 3V

X10 125

MIU G3/M3G1/IAW M3G(34PINS) ✔ ✔ ✔ Make Start Key

ECU Reset(Virgin)(Virgin)

Read 95320 EEPROM (Backup)

Write 95320 EEPROM (Restore)

ECU Reset(Virgin)(Virgin)

LIBERTY 125 3V

LIBERTY 150 3V

LIBERTY ABS

PGN04/PGS02/PGS06/PGT01 ✔ ✔ ✔ Make Start Key
BEVERLY 125

BEVERLY 300

BEVERLY 350

FLY 125

FLY 150

FLY 125 3V

FLY 150 3V

LIBERTY 150 3V

X10 125

RIU1 ✔ ✔ ✔ Make Start Key

Advanced Functions

Read EEPROM (95320)

Write EEPROM (95320)

ECU Reset(Virgin)(Virgin)

Vespa Motorcycle key programming List

Model Key Type Year System Type No Need PinCode Add Keys All key Lost Other Function

BLADE
ACI100 ✔ ✔ ✔ Read EEPROM (MC68HC05E6)

Write EEPROM (MC68HC05E6)


BLADE
ACI500/501/502/503/504/505 ✔ ✔ ✔ Read EEPROM (MC68HC05E6)

Write EEPROM (MC68HC05E6)


BLADE
ACI600/601/602/603/604/605/606 ✔ ✔ ✔ Read EEPROM (MC68HC05E6)

Write EEPROM (MC68HC05E6)

LX 125

LX 150

BLADE
ACII/AC2I/AC5I/AC8I/AC13I/AC21I/AC23/AC23I ✔ ✔ ✔  Make Start Key

Advanced Functions

Read EEPROM(ST7 INTERNAL)

Read EEPROM( EXTERNAL 95040)

Write EEPROM(ST7 INTERNAL)

Write EEPROM(EXTERNAL 95040)

ECU Reset(Virgin)

LX 125

LX 125

LX 150

LX 150

BLADE
AC19I/AC20I/AC27I ✔ ✔ ✔ Make Start Key

Advanced Functions

Read EEPROM (INTERNAL 95080)

Write EEPROM (INTERNAL 95080)

ECU Reset(Virgin)

LX 125

LX 125

LX 150

LX 150

BLADE
AC24I/AC25I/AC32I ✔ ✔ ✔ Make Start Key

Advanced Functions

Read EEPROM (INTERNAL 95080)

Write EEPROM (INTERNAL 95080)

ECU Reset(Virgin)


BLADE
IAW 15 ✔ ✔ ✔ Make Start Key

Advanced Functions

Read EEPROM (MC68HC11F1)

Write EEPROM (MC68HC11F1)

ECU Reset(Virgin)


BLADE
IAW 5AM_HW103/HW610 ✔ ✔ ✔ Diagnostic Connector Mode

Read EEPROM (95160)

Write EEPROM (95160)

BENCH Mode

Read EEPROM (95160)

Write EEPROM (95160)

ECU Reset(Virgin)


BLADE
IMM003/IMM006 ✔ ✔ ✔ Read EEPROM (MC68HC05E6)

Write EEPROM (MC68HC05E6)

ECU Reset(Virgin)


BLADE
MIU1.XX/MIU2.XX/MIU4.XX(26PINS) ✔ ✔ ✔ Make Start Key
GTS 125/150 3V

GTS 125/300 ABS

PRIMAVE 125/150

LT 125/150 3V

LT 125/150 E1

LX 125

LX 150 3V

LXV 125 3V

LXV 125/150 2V/3V

S125/150

S125/150 3V

VESPA 125/150 3V

X10 350

BLADE
MIU G3/M3G1/IAW M3G(34PINS) ✔ ✔ ✔ Make Start Key

ECU Reset(Virgin)

Read 95320 EEPROM (Backup)

Write 95320 EEPROM (Restore)

ECU Reset(Virgin)

LX 125/150 3V

SPRINT 125 3V

SPRINT 150 3V

SPRINT ABS

BLADE
PGN04/PGS02/PGS06/PGT01 ✔ ✔ ✔ Make Start Key
GTS 125/150 3V

GTS 125/300 ABS

PRIMAVE 125/150

LT 125/150 3V

LT 125/150 E1

LX 125

LX 150 3V

LXV 125 3V

LXV 125/150 2V/3V

S125/150

S125/150 3V

VESPA 125/150 3V

X10 350

BLADE
RIU1 ✔ ✔ ✔ Make Start Key

Advanced Functions

Read EEPROM (95320)

Write EEPROM (95320)

ECU Reset(Virgin)

Write transponder key to start

Area Brand Model Data location Original transponder Allowed transponders
ASIA HONDA 38770_KTW_901 EEPROM 93C66 PCF 7936 PCF 7936
ASIA HONDA 38770_MCZ_003 EEPROM 93C56 PCF 7936 (ID46) PCF 7936
ASIA HONDA 38770_MEE_643 EEPROM 93C56 PCF 7936 (ID46) PCF 7936
ASIA HONDA 38770_MEE_702 EEPROM 93C56 PCF 7936 (ID46) PCF 7936
ASIA HONDA 38770_MFG_D02 EEPROM 93C66 PCF 7936 PCF 7936
ASIA HONDA 38770_MFN_D01 EEPROM 93C66 PCF 7936 PCF 7936
ASIA KAWASAKI 21175_0046_Denso EEPROM 93C66 TIRIS 4D TIRIS 4D
ASIA KAWASAKI 21175_0053_Denso EEPROM 93C66 TIRIS 4D TIRIS 4D
ASIA KAWASAKI 21175_0097_Denso EEPROM 93C66 TIRIS 4D TIRIS 4D
ASIA KAWASAKI 21175_0098_Denso EEPROM 93C66 TIRIS 4D TIRIS 4D
ASIA KAWASAKI 21175_0109_Denso EEPROM 93C66 TIRIS 4D TIRIS 4D
ASIA KAWASAKI 21175_0170_Denso EEPROM 93C66 TIRIS 4D TIRIS 4D
ASIA KAWASAKI 21175_0173_Denso EEPROM 93C66 TIRIS 4D TIRIS 4D
ASIA KAWASAKI 21175_0220_Denso EEPROM 93C66 TIRIS 4D TIRIS 4D
ASIA KAWASAKI 21175_0227_Denso EEPROM 93C66 TIRIS 4D TIRIS 4D
ASIA KAWASAKI 21175_0341_Denso EEPROM 93C66 TIRIS 4D TIRIS 4D
ASIA KAWASAKI 21175_0356_Denso EEPROM 93C66 TIRIS 4D TIRIS 4D
ASIA KAWASAKI 21175_0363_Denso EEPROM 93C66 TIRIS 4D TIRIS 4D
ASIA KAWASAKI 21175_0789_Denso EEPROM 93C86 TIRIS 4D TIRIS 4D
ASIA KAWASAKI 21175_0811_Denso EEPROM 93C86 TIRIS 4D TIRIS 4D
ASIA KAWASAKI 21175_0017_MITSUBISHI EEPROM 24C02 TIRIS 4D TIRIS 4D
ASIA KAWASAKI 21175_0079_MITSUBISHI EEPROM 24C04 TIRIS 4D TIRIS 4D
ASIA KAWASAKI 21175_0101_MITSUBISHI EEPROM 24C04 TIRIS 4D TIRIS 4D
ASIA KAWASAKI 21175_0158_MITSUBISHI EEPROM 24C04 TIRIS 4D TIRIS 4D
ASIA KAWASAKI 21175_0242_MITSUBISHI EEPROM 24C04 TIRIS 4D TIRIS 4D
ASIA KAWASAKI 21175_0712_MITSUBISHI EEPROM 24C08 TIRIS 4D TIRIS 4D
ASIA KAWASAKI 21175_0762_MITSUBISHI EEPROM 24C04 TIRIS 4D TIRIS 4D
ASIA KAWASAKI 21175_0770_MITSUBISHI EEPROM 24C04 TIRIS 4D TIRIS 4D
ASIA SUZUKI 32920_01HX0 EEPROM 93C66 TIRIS 4D TIRIS 4D
ASIA SUZUKI 32920_02H00 EEPROM 93C66 TIRIS 4D TIRIS 4D
ASIA SUZUKI 32920_05H00 EEPROM 93C66 TIRIS 4C TIRIS 4C
ASIA SUZUKI 32920_05H01 EEPROM 93C66 TIRIS 4C TIRIS 4C
ASIA SUZUKI 32920_05H02 EEPROM 93C66 TIRIS 4C TIRIS 4C
ASIA SUZUKI 32920_08J00 EEPROM 93C66 TIRIS 4D TIRIS 4D
ASIA SUZUKI 32920_10GA0 EEPROM 93C66 TIRIS 4C TIRIS 4C
ASIA SUZUKI 32920_10GF0 EEPROM 93C66 TIRIS 4C TIRIS 4C
ASIA SUZUKI 32920_10GG0 EEPROM 93C66 TIRIS 4C TIRIS 4C
ASIA SUZUKI 32920_14GA0 EEPROM 93C66 TIRIS 4C TIRIS 4C
ASIA SUZUKI 32920_15GA0 EEPROM 93C66 TIRIS 4C TIRIS 4C
ASIA SUZUKI 32920_15H00 EEPROM 93C66 TIRIS 4D TIRIS 4D
ASIA SUZUKI 32920_15H30 EEPROM 93C66 TIRIS 4D TIRIS 4D
ASIA SUZUKI 32920_21H50 EEPROM 93C66 TIRIS 4D TIRIS 4D
ASIA SUZUKI 32920_23H00 EEPROM 93C66 TIRIS 4D TIRIS 4D
ASIA SUZUKI 32920_31J00 EEPROM 93C66 TIRIS 4D TIRIS 4D
ASIA SUZUKI 32920_37HX0 EEPROM 93C66 TIRIS 4D TIRIS 4D
ASIA SUZUKI 32920_38HX0 EEPROM 93C66 TIRIS 4D TIRIS 4D
ASIA SUZUKI 32920_41G50 EEPROM 93C66 TIRIS 4D TIRIS 4D
ASIA SUZUKI 32920_41GX0 EEPROM 93C66 TIRIS 4D TIRIS 4D
ASIA SUZUKI 32920_44GX0 EEPROM 93C66 TIRIS 4D TIRIS 4D
ASIA SUZUKI 32920_47H00 EEPROM 93C66 TIRIS 4D TIRIS 4D
ASIA SUZUKI 32920_47H30 EEPROM 93C66 TIRIS 4D TIRIS 4D
ASIA SUZUKI 32920_42FX0 EEPROM 24C02 TIRIS 4C TIRIS 4C
ASIA YAMAHA YAMAHA_ECU_MITSUBA EEPROM 24C04 Temic12 (ID12) T5(TK5551)
ASIA YAMAHA YAMAHA_IMMO_MORIC EEPROM S29190A Tiris DST 4D (ID62) Tiris DST 4D
EUROPE APRILIA DORSODURO EEPROM 24C16 Temic12 (ID12) T5(TK5551)
EUROPE APRILIA SCARABEO EEPROM 24C16 Temic12 (ID12) T5(TK5551)
EUROPE APRILIA ATLANTIC EEPROM 24C16 Temic12 (ID12) T5(TK5551)
EUROPE APRILIA MANA EEPROM 24C16 Temic12 (ID12) T5(TK5551)
EUROPE APRILIA SHIVER EEPROM 24C16 Temic12 (ID12) T5(TK5551)
EUROPE APRILIA MANA EEPROM 24C16 Temic12 (ID12) T5(TK5551)
EUROPE APRILIA RSV EEPROM 24C16 Temic12 (ID12) T5(TK5551)
EUROPE APRILIA SR50 EEPROM 24C16 Temic12 (ID12) T5(TK5551)
EUROPE BMW Motorcycle Flash M58BW016 PCF 7936 PCF 7936
EUROPE PIAGGIO Immobox(68HC705) Motorola Processor processor

MC68HC705E6

Temic 11 T5(TK5551)
EUROPE PIAGGIO Immobox(ST72334) Processor ST72334 Temic 11 T5(TK5551)
EUROPE PIAGGIO ECU68HC05 Motorola Processor processor

MC68HC05B16

Temic 11 T5(TK5551)
EUROPE PIAGGIO Immobox(25080) EEPROM 25080 Temic 11 T5(TK5551)
EUROPE PIAGGIO VESPA_GTS 125(ST10F269) Processor ST10F269 Temic 11 T5(TK5551)
EUROPE PIAGGIO VESPA_GTS 125(95320) EEPROM 95320 Temic 11 T5
EUROPE PIAGGIO VESPA_GTS 250 Processor ST10F269 Temic 11 T5(TK5551)
EUROPE PIAGGIO X9 500(MC68HC11F1) Motorola Processor

MC68HC11F1

Temic 11 T5
EUROPE DUCATI DUCATI_1199_PANIGALE Motorola Processor

M9S12P128

TIRIS 4D TIRIS 4D
EUROPE DUCATI DUCATI_DIAVEL_ZADI EEPROM 24C04 Tiris DST 4D Tiris DST 4D
EUROPE DUCATI DUCATI_MONSTER_400 Motorola Processor processor

MC68HC705E6

Temic 11 T5(TK5551)
EUROPE DUCATI DUCATI_MONSTER_696 EEPROM 24C16 Temic 11 T5(TK5551)
EUROPE DUCATI DUCATI_MONSTER_696 EEPROM 24C16 Temic 12 T5(TK5551)
EUROPE DUCATI DUCATI_MONSTER_796 EEPROM 24C16 Temic 11 T5(TK5551)
EUROPE DUCATI DUCATI_MONSTER_796 EEPROM 24C16 Temic 12 T5(TK5551)
EUROPE DUCATI DUCATI_MONSTER_1000 EEPROM 24C02 Temic 11 T5(TK5551)
EUROPE DUCATI DUCATI_MULTISTRADA EEPROM 24C16 Temic 11 T5(TK5551)
EUROPE DUCATI DUCATI_SCRAMBLER_800 EEPROM 24C02 Temic 11 T5(TK5551)
EUROPE DUCATI DUCATI_SUPERBIKE_748 EEPROM 24C16 Temic 11 T5(TK5551)
EUROPE DUCATI DUCATI_SUPERBIKE_749 EEPROM 24C16 Temic 11 T5(TK5551)
EUROPE DUCATI DUCATI_SUPERBIKE_848 EEPROM 24C16 Temic 11 T5(TK5551)
EUROPE DUCATI DUCATI_SUPERBIKE_848 EEPROM 24C16 Temic 12 T5(TK5551)
EUROPE DUCATI DUCATI_SUPERBIKE_948 EEPROM 24C16 Temic 11 T5(TK5551)
EUROPE DUCATI DUCATI_SUPERBIKE_948 EEPROM 24C16 Temic 12 T5(TK5551)
EUROPE DUCATI DUCATI_SUPERBIKE_996 Motorola Processor processor

MC68HC05B16

Temic 11 T5(TK5551)
EUROPE DUCATI DUCATI_SUPERBIKE_999 EEPROM 24C16 Temic 11 T5(TK5551)
EUROPE DUCATI DUCATI_SUPERBIKE_1049 EEPROM 24C16 Temic 11 T5(TK5551)
EUROPE DUCATI DUCATI_SUPERBIKE_1049 EEPROM 24C16 Temic 12 T5(TK5551)
EUROPE DUCATI DUCATI_SUPERBIKE_1098 EEPROM 24C16 Temic 11 T5(TK5551)
EUROPE DUCATI DUCATI_SUPERBIKE_1098 EEPROM 24C16 Temic 12 T5(TK5551)
EUROPE DUCATI DUCATI_SUPERBIKE_1198 EEPROM 24C16 Temic 11 T5(TK5551)
EUROPE DUCATI DUCATI_SUPERBIKE_1198 EEPROM 24C16 Temic 12 T5(TK5551)
EUROPE DUCATI DUCATI_SPORTTOURING_ST3 EEPROM 24C16 Temic 11 T5(TK5551)

The operation demo guide will be added soon.

Thursday, July 29, 2021

How to Update firmware of Rover DOIP

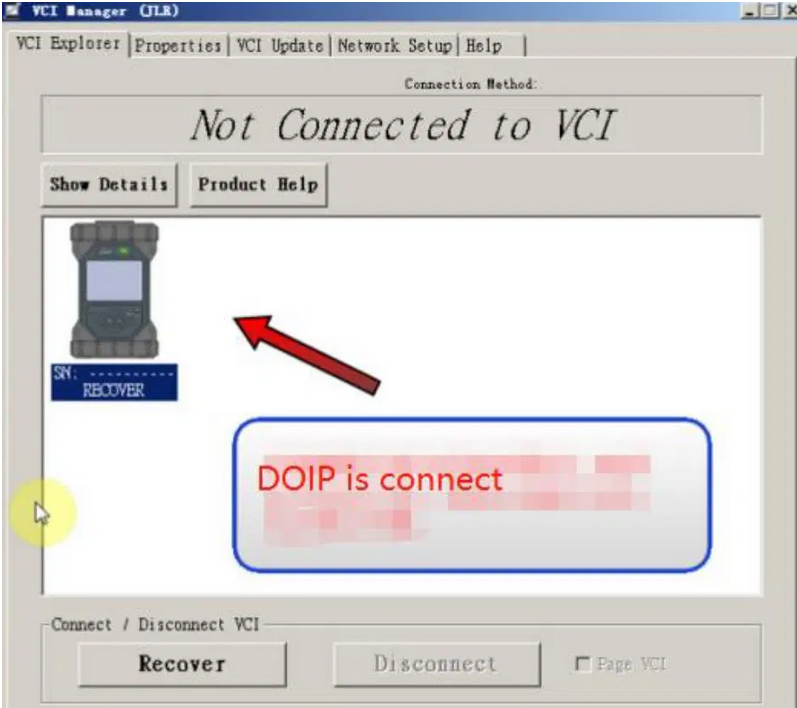
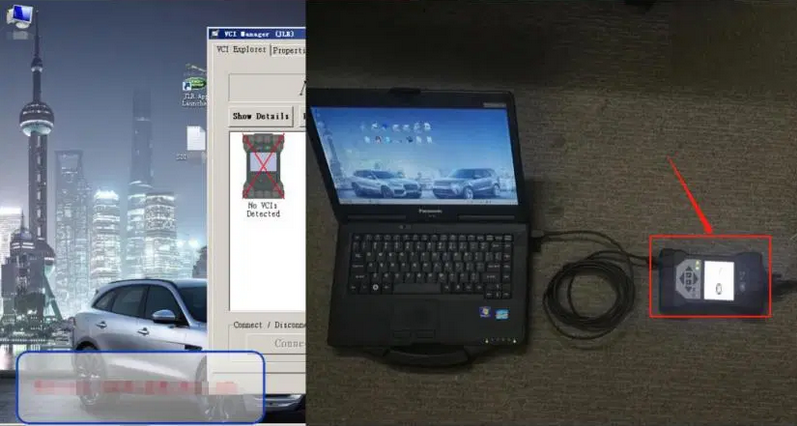
 1.JLR Pathfinder VCI DoIP connects car and computer;

How-to-Update-firmware-of-Rover-DOIP-1

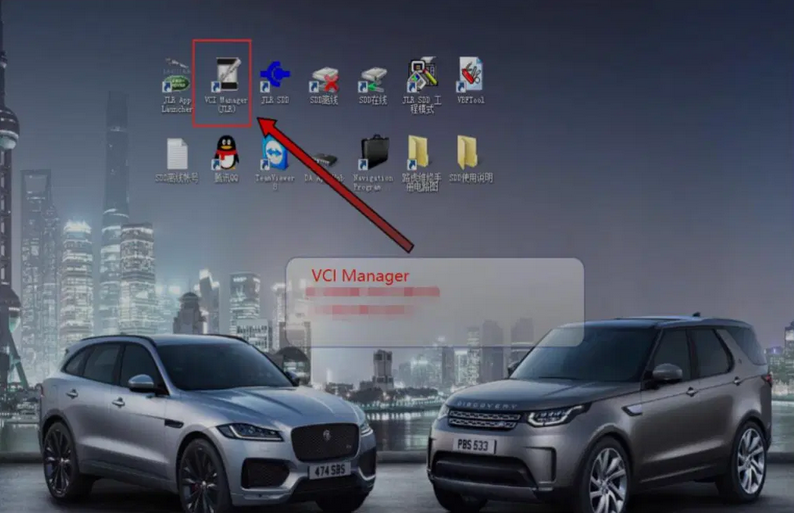
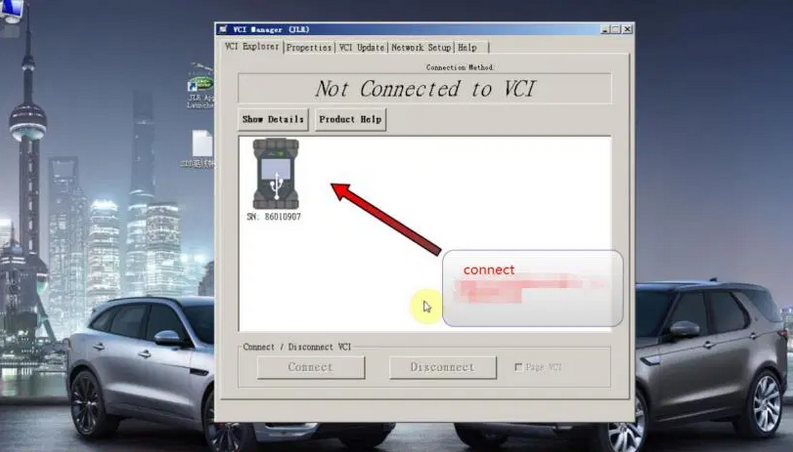
2.Open VCI Manager;

How-to-Update-firmware-of-Rover-DOIP-2
How-to-Update-firmware-of-Rover-DOIP-3

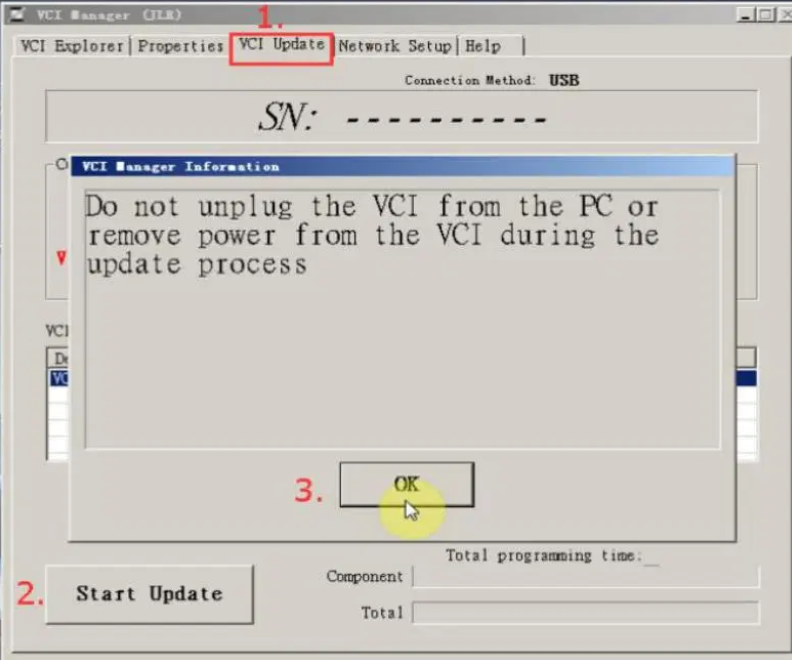
4.Start to update DOIP firmware

How-to-Update-firmware-of-Rover-DOIP-4
How-to-Update-firmware-of-Rover-DOIP-5

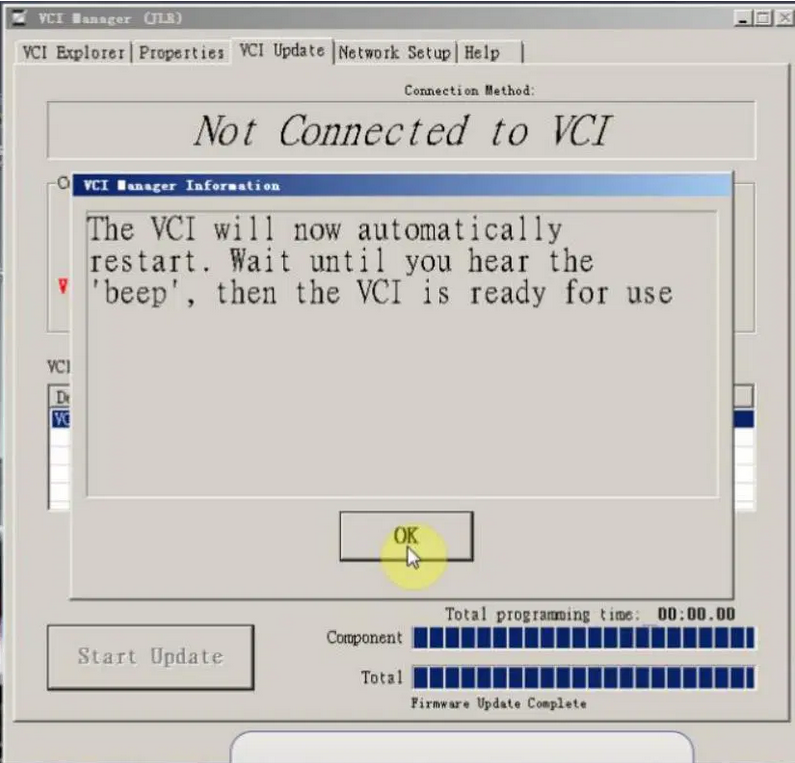
5.After the firmware update is complete, DOIP will restart, and the DOIP screen will display a Land Rover Jaguar picture.

How-to-Update-firmware-of-Rover-DOIP-6
How-to-Update-firmware-of-Rover-DOIP-7

Launch X431 Pro3s+ Unboxing 2 years free update works like X431 V+


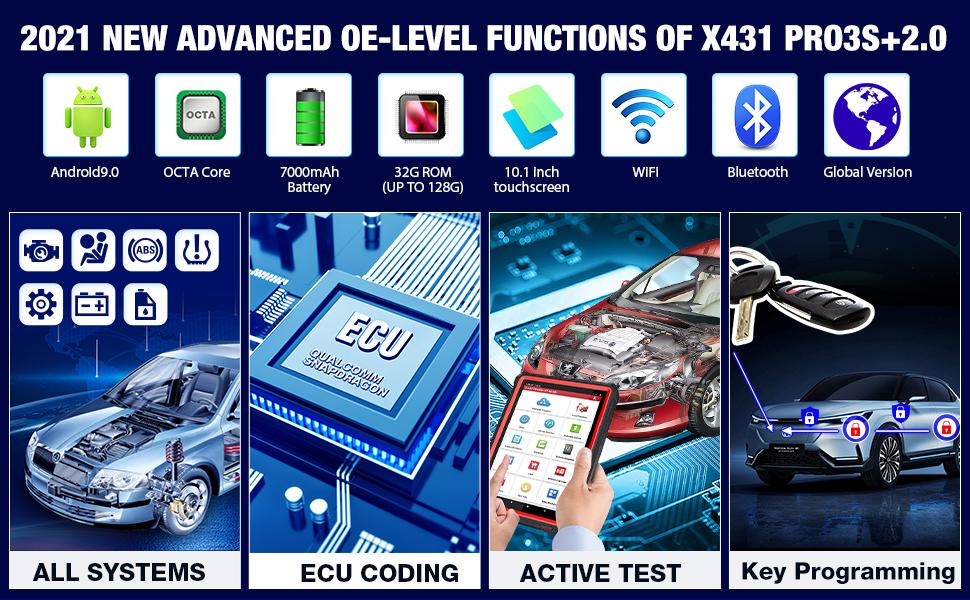
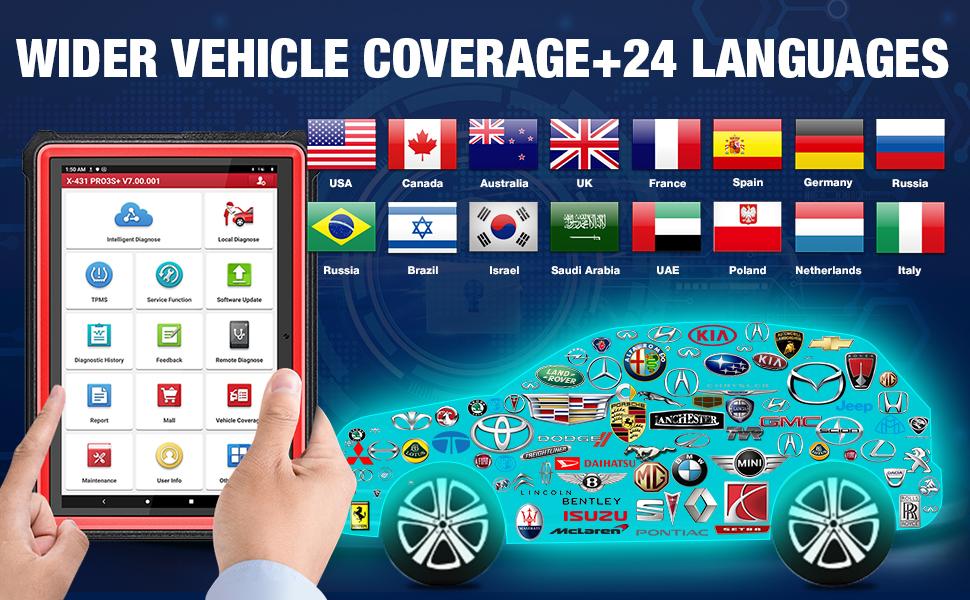
New Arrival LAUNCH X431 PRO3 S+ Professional diagnostic tool, 10.1’inch Android 9.0 system , ECU coding , Matching , Actuation test , Guide function for BMW/ Benz , RAM 3GB+ ROM 32GB(can extend up to 128GB), can work with launch heavy duty to diagnostic 24V Truck

2021 LAUNCH X431 PRO3S+,LATEST VERSION of Launch X431 (Upgrade Version of X431V/V+)

Launch-X431-Pro3s+-Unboxing-2-years-free-update-works-like-X431-V+1

1.Compatible Heavy Truck Module: you can purchase additional heavy-duty truck diagnostic module (a Bluetooth adaptor that works with LAUNCH X431 PRO3S+ to diagnose all systems on trucks

2.LAUNCH X431 PRO3S+ supports more advanced functions, including Bi-directional Control, Actuation Test and Guiding Functions (compatible with VW,AUDI,SKODA,SEAT).

3.The guide function of X431 PRO3S+ is free, but Launch x431 pro needs to be used for a fee

4.Optimized HIGH-END Hardware Configurations:

*   The screen size of X431 PRO3S+ (10.1 inches) based on Andoird 9.0 is larger. One screen can display 15 data stream (Graphic and textual), which is easy to navigate.
*   X431 PRO3S+ with 2.4GHz&5GHz dual-band Wi-Fi, the transmission rate is 4 times faster than the old version.
*   7000mAh rechargeable battery (up to 15 hours or more of battery life) to avoid frequent charging.
*   32+ 128gb (expandable) storage to save more vehicle documents and customer data.
*   CPU processor updated from 1.4GHz to 2.0 GHz quad-core to perform diagnostics quickly and efficiently.
*   Multi-PID Live Data Graphing IN 1 Screen: One screen can display 15 data stream (Graphic and textual), which is easy to navigate.
*   8XFAST AUTO VIN technology.

Launch-X431-Pro3s+-Unboxing-2-years-free-update-works-like-X431-V+2

https://launchscanner.blogspot.com/


Monday, June 21, 2021

How to get EVAP not ready IM to pass with Tech2

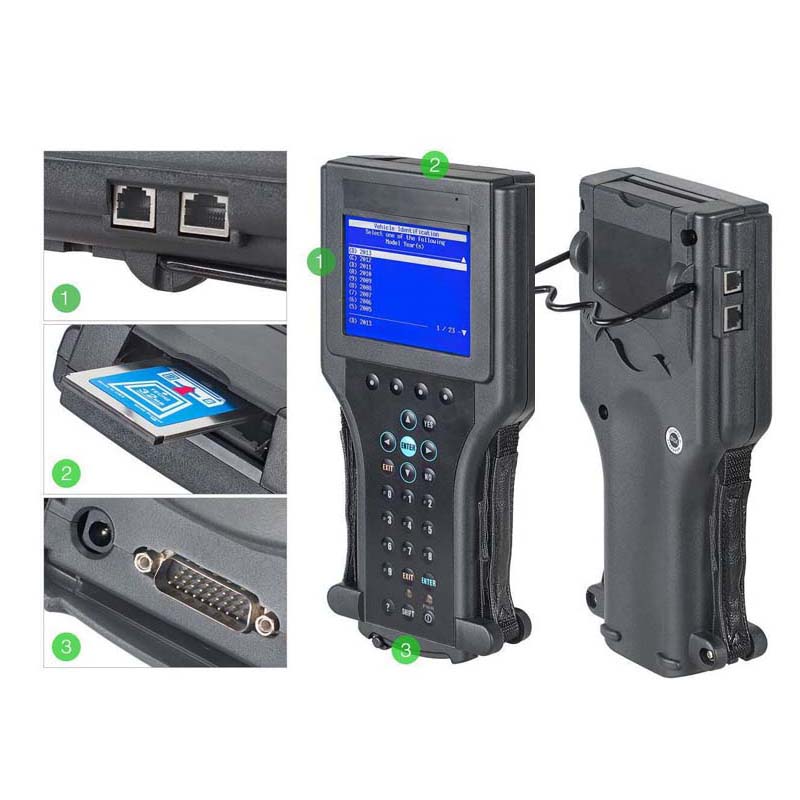
I've been struggling with this for months now and I came across a post of the Cadillac forum where someone mentioned using the GM Tech2 handheld scanner and running the "Evap service bay" test. First you will need the VCX Nano from obd2tool, it comes with the software for GM Tech 2 and GSD2 emulators and install it on a laptop. The Evap test should be done from a cold start so have everything ready. The reason I failed the Tech2 EVAP test first time was you must keep RPM between 1800-2200 for 8 minutes it was impossible to do that with foot so it failed and i had to wait overnight for a cold start. What i did to fix was I found a piece of wood and placed it between the seat and gas pedal and move the electric seat until RPM is 2000. This worked perfectly I used this when doing brake light testing for inspection as well.


*   Have everything set up, I opened hood so it wouldn't get too hot, connect the VCX Nano to the OBD2 port and your laptop and go to the F2: Special Functions->F4: Service Bay Tests->EVAP System Bay Test
*   Have your piece of wood ready so you can hold the RPM constant. After the Tech 2 has read the info it needs and validates you can proceed with the test, it will guide you step by step
*   First, you'll be told to leave the ignition key off for 10 seconds
*   After that, you'll turn on the key (but don't start the car). Once the Tech 2 has read the Data port, it will prompt you the EVAP test can start (or NOT)
*   start the car, idle between 1800-2200 rpm (steady!) this is where you need the wood and move seat against it to push pedal down and hold at 2000 RPM. This is very critical and if it cannot be held between 1800 and 2000 you will need to stop test and wait overnight for it to cool off so you can do a cold start. Then press [Enter] to begin.
*   Once you press [Enter], you need to maintain 1800-2200 RPM for about 6-8 minutes (it has a counter) and it will perform a series of EVAP tests (11 data points are watched). You'll hear the Solenoid working and seeing the '%'


*   After about 8 minutes @ 2000 RPM, you'll be told to take it for a drive. Disconnect the laptop power source, then press [Enter] to start the drive test.
*   The Tech 2 shows 15 KM and 600 seconds to do the drive -- don't worry about the seconds, the KMs are what's important.
*   After you've reached '0's, you'll be told to return to the 'Service Bay' for engine off EVAP Test
*   Here you plug in the external power source for the laptop 'BEFORE' you turn off the car. Once that is done, turn off the car and press [Enter] to start the engine off test. This test will take about 5 to 10 minutes (and yes, you're in the car and waiting d). You see the Fuel Tank voltage change and here the solenoid working.
*   Once you've waited, the Tech 2 will show you your status whether it passed or failed


Overall it takes about an 45-60 min to do the Engine On, Drive, and Engine off EVAP Service Bay Test. I wish I knew about this iI spent dozens of hours researching and trying to drive the 17 step EVAP drive cycle many times requiring the overnight for cold start.

Checked the Ready Monitors with my regular scanner and Im ready for inspection!

The drive cycle takes FOREVER to get done, but this one is ready in about an hour and this does work! Well worth the $90 from Amazon and now I also have great Tech2 scanner and GDS emulator. Also with the GDS it appears it uses a cloud based database and looks like there is every manufacturer supported you would just need the license to turn it on. Very happy with the way this turned out and if anyone is stuck with trying to set EVAP this is the way to go!


https://gmscantool.blogspot.com/2021/05/how-to-get-evap-not-ready-im-to-pass.html

Tuesday, May 25, 2021

GM Tech 2 TIS2000 Crack Download&How To Install On WIN XP/7/8


GM-Tech2

This guide of where to donwload GM Tech2 TIS2000 software and how to install it.Free version all from Customer support,Big thanks!

GM-Tech2

TIS2000 free Software

http://www.mediafire.com/file/bc92by7ao7fp1la/GM+2000NAO.7z
Tis2000 Dongle Crack

http://rg.to/file/a081c4c028aa1fb80ea98e15a540b9a9/TIS2000_Dongle_Crack.7z.html

Tested version:

How to install TIS2000 software:

Customer solutions.. here you go…try on your own risk

TIS2000 Window XP:

*   Installed a fresh copy of Windows XP SP3. I didn’t bother with updating anything else as far as security updates to Windows or install a virus scan because this computer will never be connected to the Internet or used for anything else.2. Installed ALL the required drivers until there were no more yellow check marks in Device Manager. I failed to do this at first and caused a lot of headaches later, including a BSOD during software installation.3. If you’re using a USB to serial adapter, plug it in now and set it up. Go into Device Manager and make note of the COM port used by the adapter.3. Install the Tis2000 software from the CD included with the Tech2. During the install, it will ask you to specify the COM port. If you have a serial port on the computer, it’s probably COM 1 or use the one from the USB adapter.4. Before you can use Tis2000 with your Tech2, you have to make it “think” that there is a dongle connected that authorizes it. You can download the crack below. Follow the read me file for instructions on how to use it.

*   That’s it.

TIS2000 Windows 8 32 bit:

However, if you have a 32-bit copy of Windows 8 installed (I don’t wanna know why you do), running 16-bit applications are disabled by default. You can enable it by going to Control Panel and clicking on 16-bit Application Support then clicking Enable.

TIS2000 Windows 7 with XP Virtual PC:

For those of you with genuine copies of Windows 7 Professional, Enterprise, or Ultimate with a multi-core processor (who doesn’t run Win7 on a multi-core these days); these versions of Windows 7 allow you to use Windows Virtual PC, which lets you virtually run Windows XP Pro without a disc or OS installation. You need to install Windows XP Mode and Windows Virtual PC in order to use it. Before you can download these updates, M$ makes you run a little .exe that checks if your OS install is legitimate. Anyway, after you get that all installed and XP Mode is booted, you can copy the OP’s cracked TIS2000.zip over to the WinXP Desktop and follow the README.txt inside to install it. Here is a link with the cracked TIS2000http://www.obd2eshop.com/wholesale/tis2000-cd-and-usb-key-for-gm-tech2-gm-car-model-software.html…I have tested this on my desktop running Windows 7 Ultimate 64-bit and the cracked copy of TIS2000 the OP posted installed and ran with no problems. Instructions for Win7 XP Pro virtualization mode here: http://windows.microsoft.com/en-us/w…e-in-windows-7

TIS2000 software Window 64 bit or 32 bit:

64-bit versions of Windows contain backwards compatibility with 32-bit applications, but not with 16-bit applications. And 32-bit versions of Windows are backwards compatible with 16-bit applications. The problem with installing TIS2000 on newer machines is that, while the TIS2000 program itself is 32-bit, the installer and drivers are 16-bit. Therefore, you are able to install TIS2000 natively on ANY 32-bit Windows system. This will just work, without having to run anything in compatibility mode.

Now to the most common problem:

If you are running a 64-bit version of Windows XP, Windows Vista, Windows 7 Home Premium or lower, or ALL versions of Windows 8 and 8.1, I guess any version of Mac or Linux too, you have a couple of more involved and more risky options…

You can obtain a copy of Windows 2000 or XP Pro 32-bit. It includes two programs for making a bootable CD or USB drive. Pop the bootable device you created into your laptop, reboot to the device, then install that operating system onto a seperate partition of your hard drive, or a different hdd altogether. Or you can install Virtualbox (free software), and run the cracked Windows copy via a virtual machine… The method I took to test this was to create a separate partition on my ssd and install it there. When the computer reboots, it will ask you what OS you would like to run. Select Windows XP Pro, then continue installing TIS2000 software. If you’re gonna be writing to the main drive on your computer, I suggest first creating a bootable USB with Clonezilla on it and creating a drive backup with that http://clonezilla.org/downloads.php  …This allows you to make a complete backup image of your hard drive, and allows you to flash it back to that drive at any time. A good thing to have around anyway.

VXDIAG VCX NANO GM + TIS2000:

IT works!! ok for anyone trying to use the VXDIAG GM nano with SPS this is what you need to do (order is important):

*** please note you cannot use the VM that the VXDIAG package comes with (GDS2 VM). It’s configured in such a way it won’t work with the dongle crack and caused me a lot of head scratching to find this out.

*   Create awindowsXP 32bit VM using VMWare Player
*   Make sure you add an LPT port (set to auto, not connected on startup). It doesn’t matter if your actual PC has an LPT port or not this is needed for the dongle crack later.
*   Install VMWare tools for your VM
*   After you have the windows VM up and running install the BOSH MDI drivers found here: http://www.boschdiagnostics.com/pro/soft…-and-mdi-2(the MDI drivers on the driver disk andvxmanagerinstaller wouldn’t install on myxp32bit VM but the one from bosh does).
*   From the driver disk or from allscanner.com install the VXDIAG MDI package with pass thru driver (VXDIAG MDI manager or VXDIAG Manager

*   (files / instructionsin the updated.txt you may need to click the link more than once if you get an error when downloading)
*   Mount the tis_data_1.iso in your VM (use the virtual cdrom in vmware player and attach to iso file) this will start the auto install of the TIS2000 2007.3 software)
*   All options can be installed using the default selectionshowevermake sure you check the install checkbox above the parallel security device on the one screen.
*   After installation is complete you can extract the TIS2000DongleCrack.rar and copy the folder to the desktop of your VM
*   Go into the TIS2000DongleCrack folder locate the drivers folder and open it, run the DDINST32.EXE (if you get a registry error you didn’t install an LPT port in your VM), select Express and it should install the files then click ok / Exit to close.
*   Go back to the main TIS2000DongleCrack folder and copy SCAControlUI.exe and Id.dll to c:\Program Files\cosids\bin\ (it will prompt to replace id.dll select yes).
*   Go back to the main TIS2000DongleCrack folder into the Dongle folder and copy the 2 files in there to c:\windows\system32\ (the dongle crack is now installed)
*   Now mount the tis_data_2.iso in your VM (use the virtual cdrom in vmware player and attach to iso file) and open TIS2000 (double click the icon on your desktop) when TIS opens it will ask you if you want to upgrade click yes.
*   After the upgrade completes mount the GM-NAO-TIS200-3_2008.iso in your VM (use the virtual cdrom in vmwareplayer and attach to iso file) and open TIS2000 ( double click the icon on your desktop) when TIS opens it will ask you if you want to upgrade click yes.
*   After the upgrade completes you have successfully installed TIS2000 2008.3 and the Dongle crack, now we need to configure TIS to use the VXDIAG GM nano
*   Open TIS2000 from the icon on your desktop, select Configuration menu from the top and select IO Management.
*   Click the Driver button, click the Browse button, locate the j2534.dll file in the window and click open (installs the J2534Pass Thru Driver)
*   Now click the Add button (in IO management) enter exacly “Generic Pass Thru” in Logical Name and select “J2534Pass Thru Driver” in the Driver drop down, click OK.
*   Select Generic Pass Thru in the list and click Properties, in the Device Name drop down select VXDIAG, (ALLScanner) and click ok then click close to close IO Management.

Now TIS2000 software is installed and configured all you have to do is connect your VXDIAG device to the PC / VM. To do this first use a usb and connect it to the PC then in the VMWare player menu go in removable devices and connect the Future Devices USB to serial converter. At this step my windows install didn’t have the basic usb to serial drivers so I connected the VM to the network (if not connected use the VMWare player menu to connect the network) and windows downloaded them from the net and installed the device as com3. you are now good to go.

At this point you can now click on SPS in TIS2000 select Generic Pass Thru as your device and your good to program!!

Satisfied, VXDIAG VCX NANO GM device works as a clone to the GM MDI.

Credits to wizzardsl writing for the how-to’s for us.

(Solved) MB SD C4 Plus cannot access the service


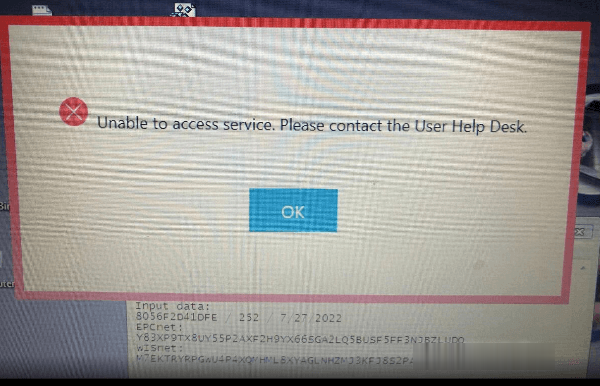
When you are using MB SD C4 Plus diagnostic tool, the following warning screen suddenly pops up. Don’t worry! Just follow the solution offered by obd2tool.com engineer to operate.

mb-sd-c4-plus-unable-to-access-service-solution-1 (2)

The solution:
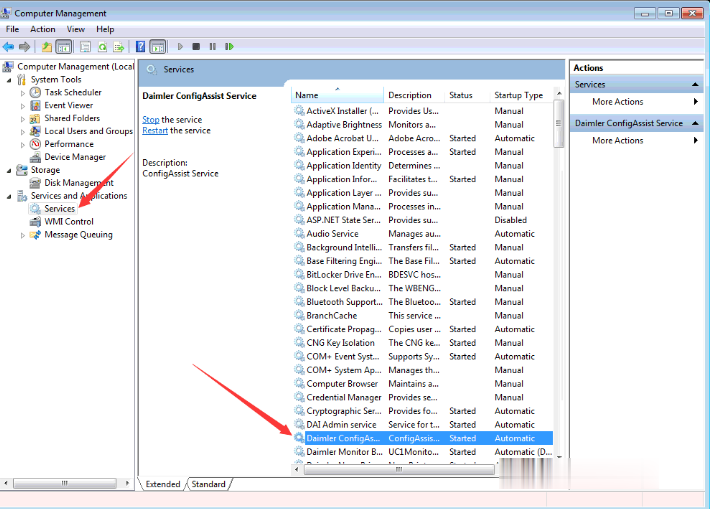
Go to Computer Management-> Service and Applications-> Services
Find Daimler ConfigAssist Service and start it.

mb-sd-c4-plus-unable-to-access-service-solution-2 (2)


More MB SD C4 problems & solutions:

MB SD C4 ewa-net Activation Unknown ID Error Solution

MB SD C4 Plus DOIP WiFi Connection Error Solution

MB SD Connect C4 Software Problems and Solutions

Wednesday, May 12, 2021

How to Programming Ford Diesel ECU by Autel MaxiSys Elite


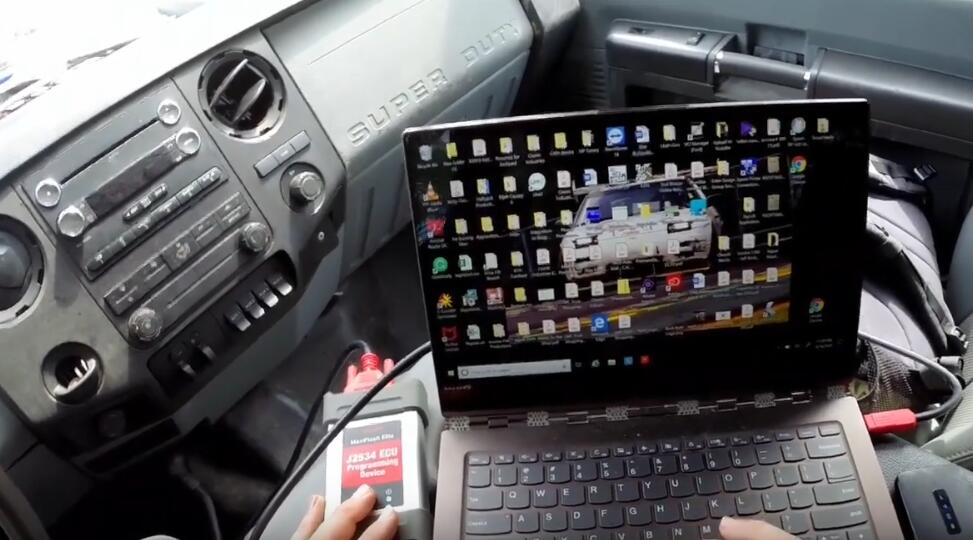
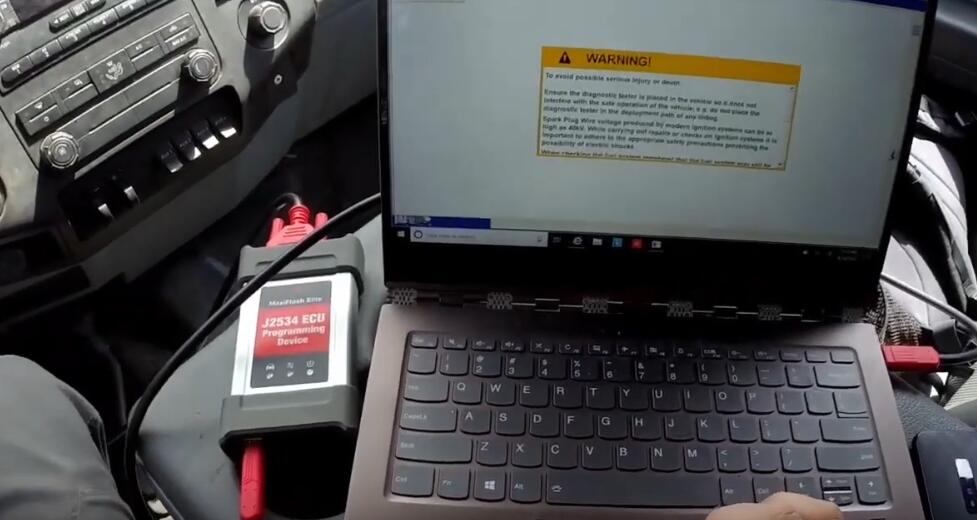
In this articel I’m going to show you how you can program a 2015 Ford f-450 with a diesel motor using an auto tell maxiflash JBOX programming device and a laptop so we have our Wi-Fi hotspot.

You can also do Programe Ford Diesel ECU by Autel Maxisys Elite

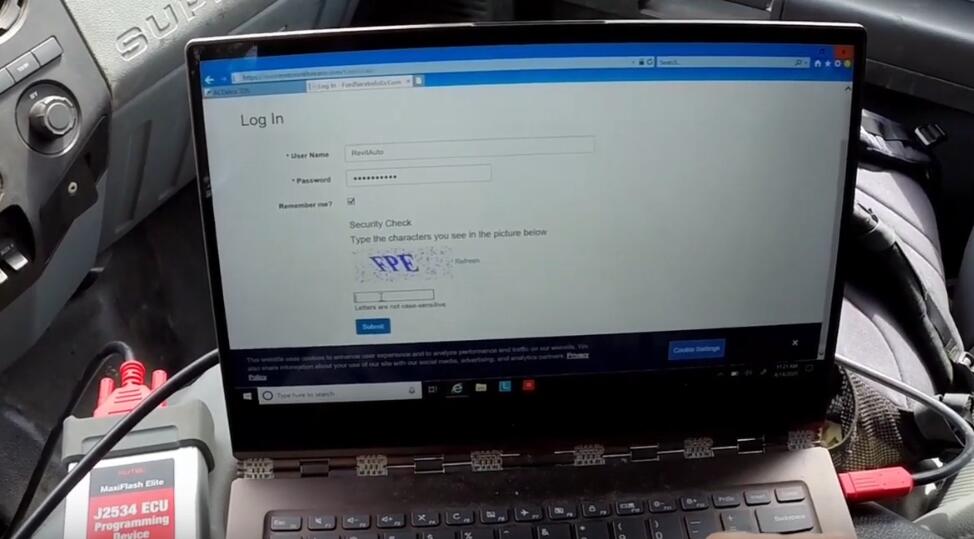
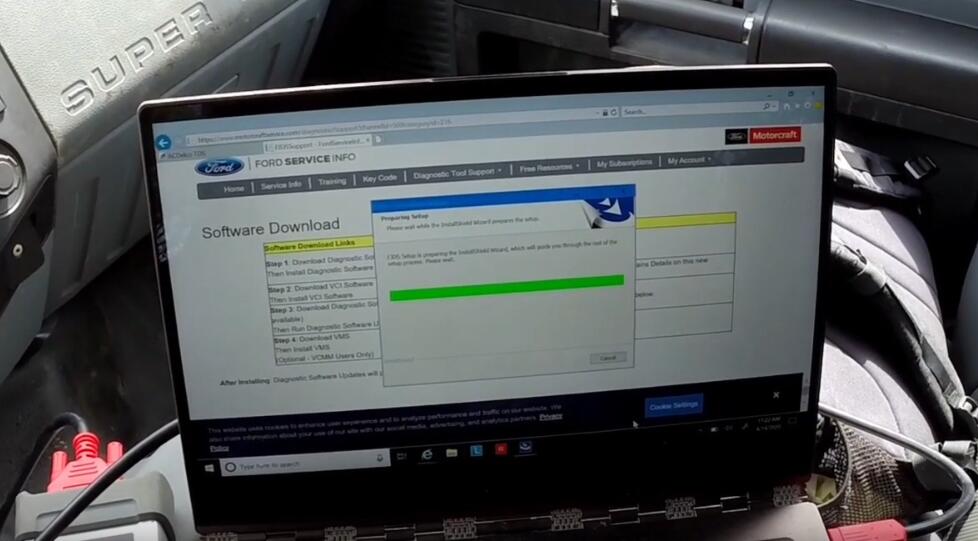
The first thing that I do is I go to the motor craft service website https://www.motorcraftservice.com

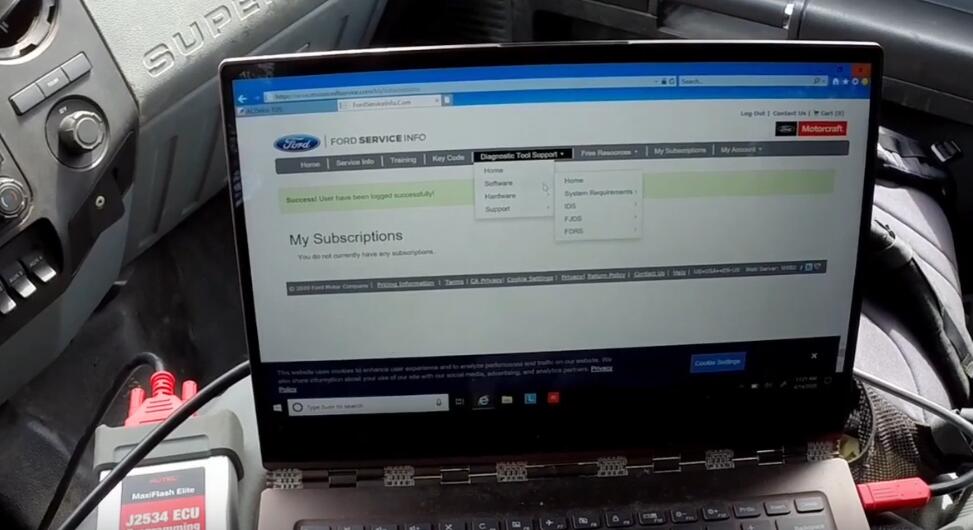
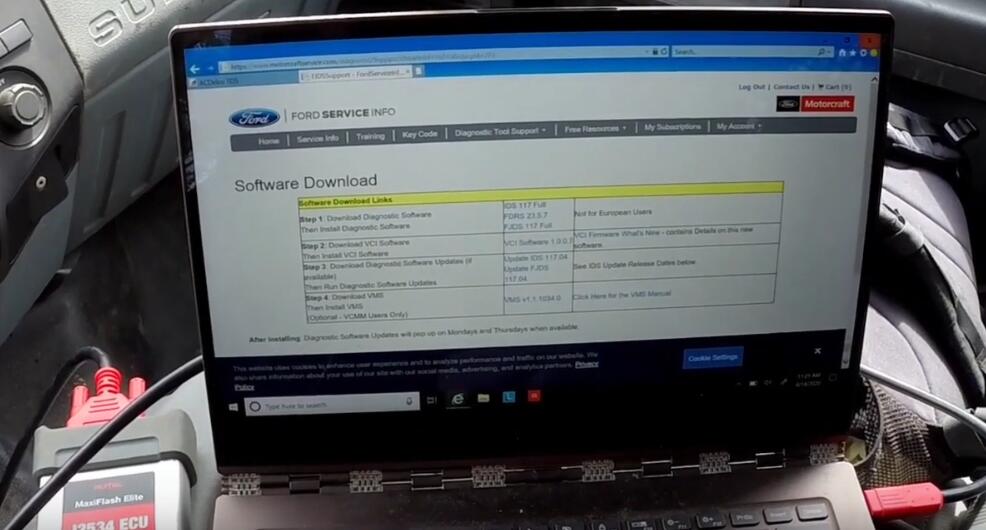
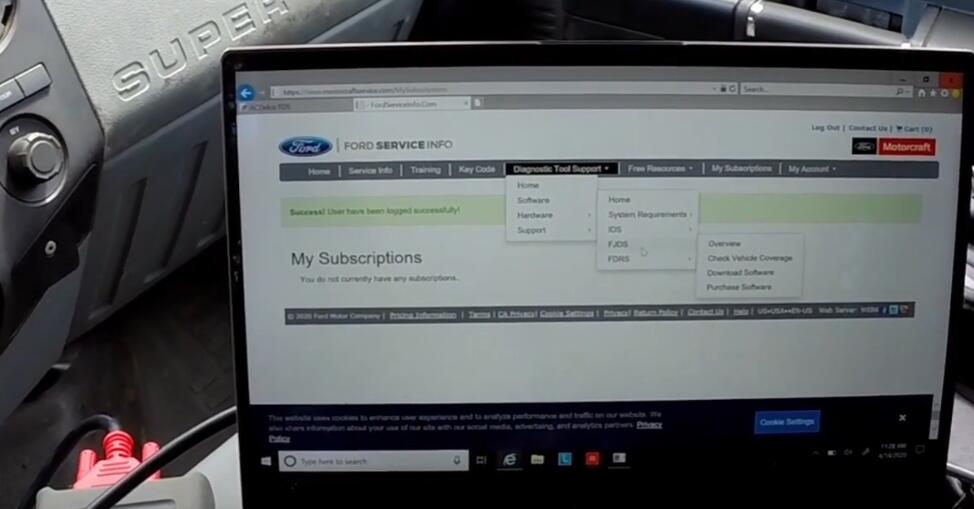
I’m logged in I’ll go ahead and do my diagnostic tool support my software my F JDS and then I’ll click download software


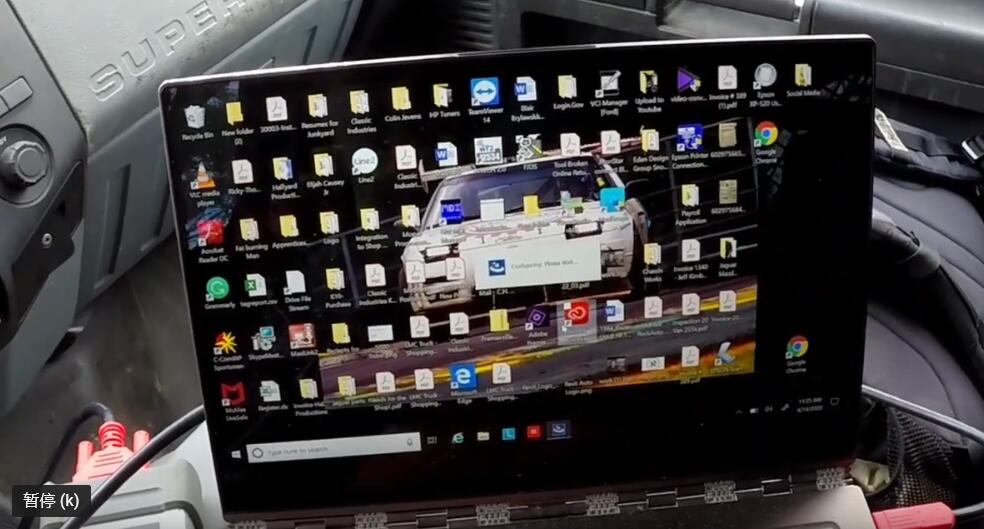
let it run through its system


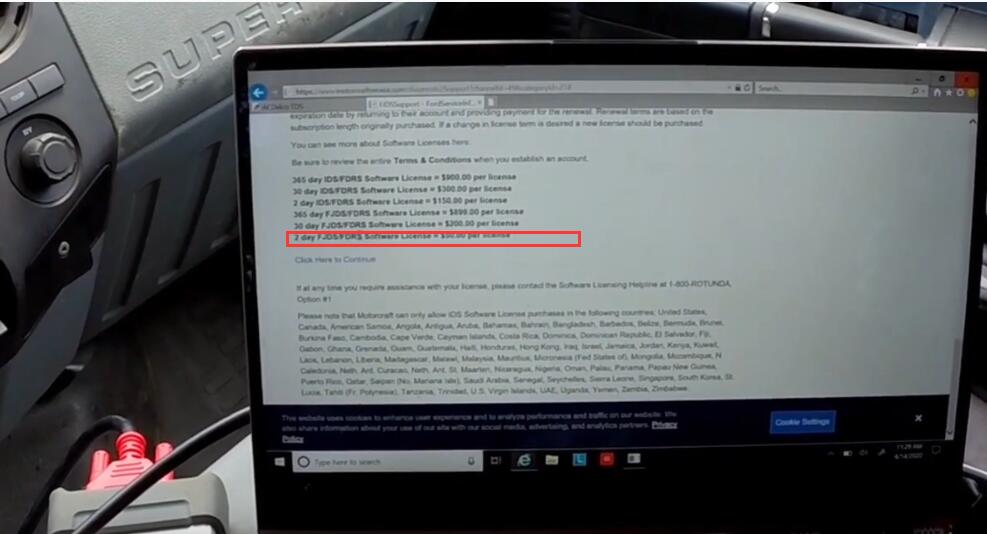
Open the program back up you’ll see here that it says that you need to obtain a license, when you click it, it doesn’t give you the option to click a little bit lower just says activate product license. So what you’ll have to do is go to your internet explorer and go back to your motor craft service

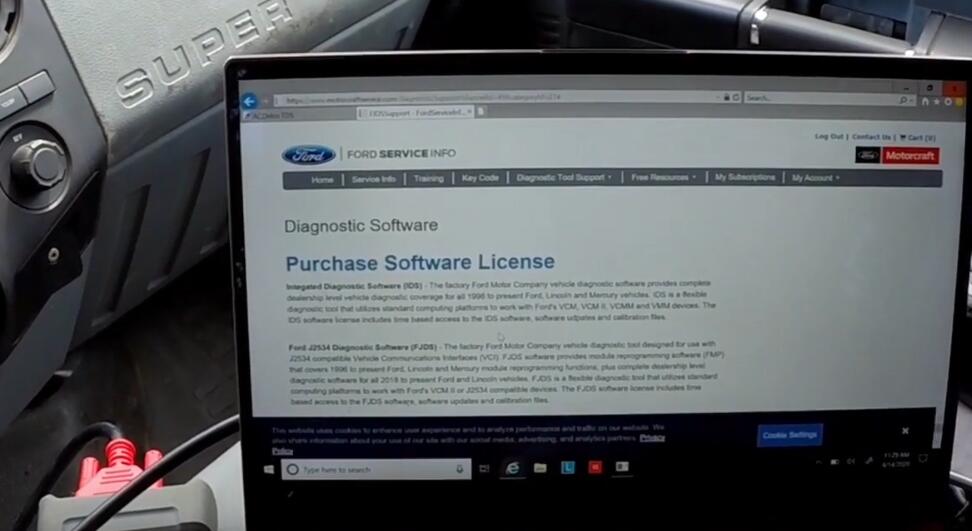
you’ll come back over to F JDS you go back over again and then you’ll see where it says purchase software

I’m gonna buy the 2-day F JDS software license for $50

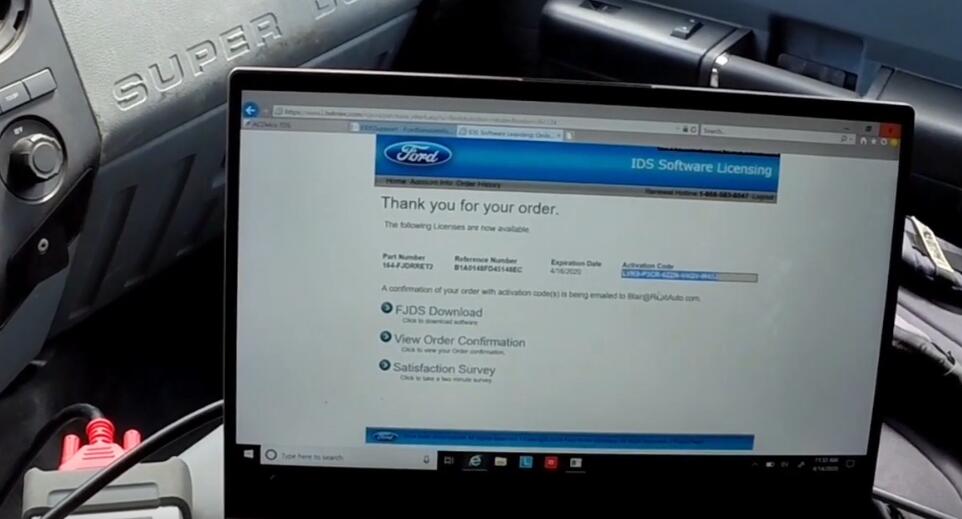
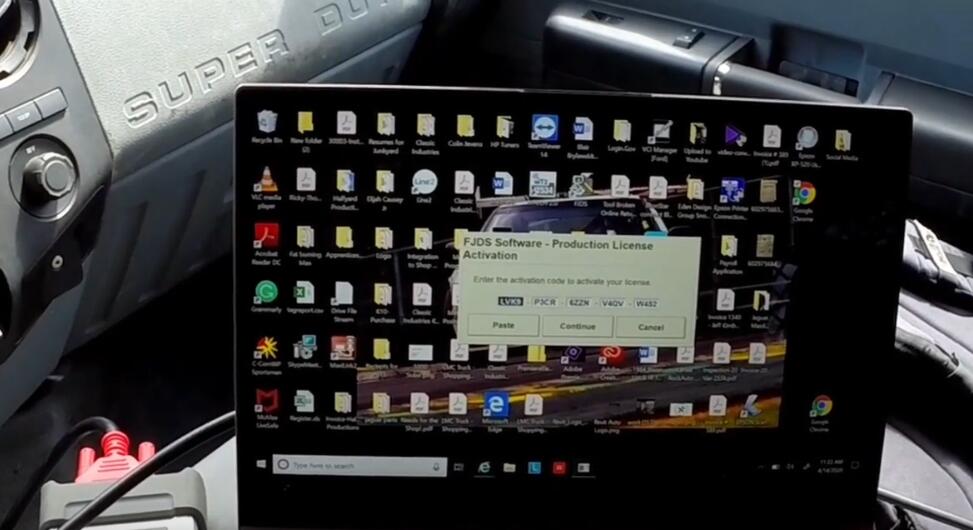
Through all your billing information and stuff, I have my activation code

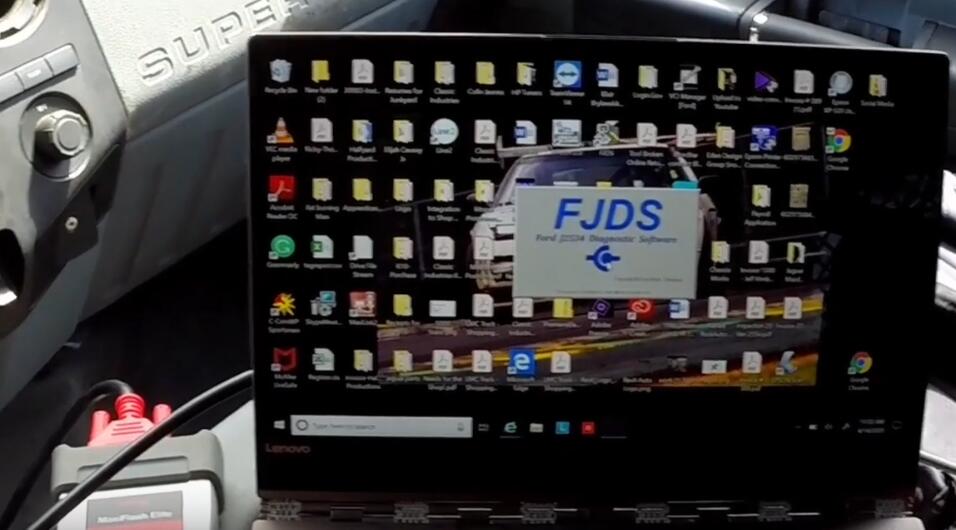
It will bring us to our F JDS which has now been ready to rock and roll so we’ll let the software
open and once it opens we’ll go ahead and start with the actual programming


So we’ll let the software open and once it opens we’ll go ahead and start with the actual programming

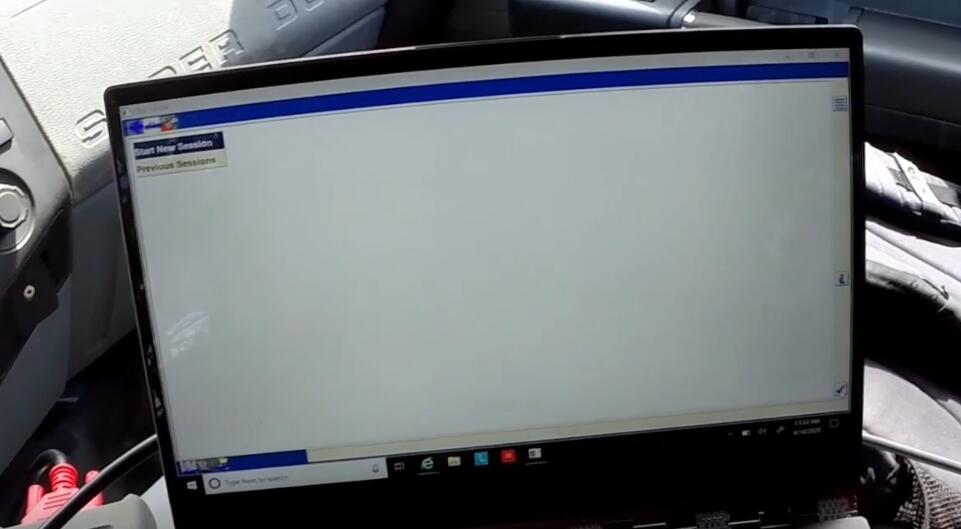
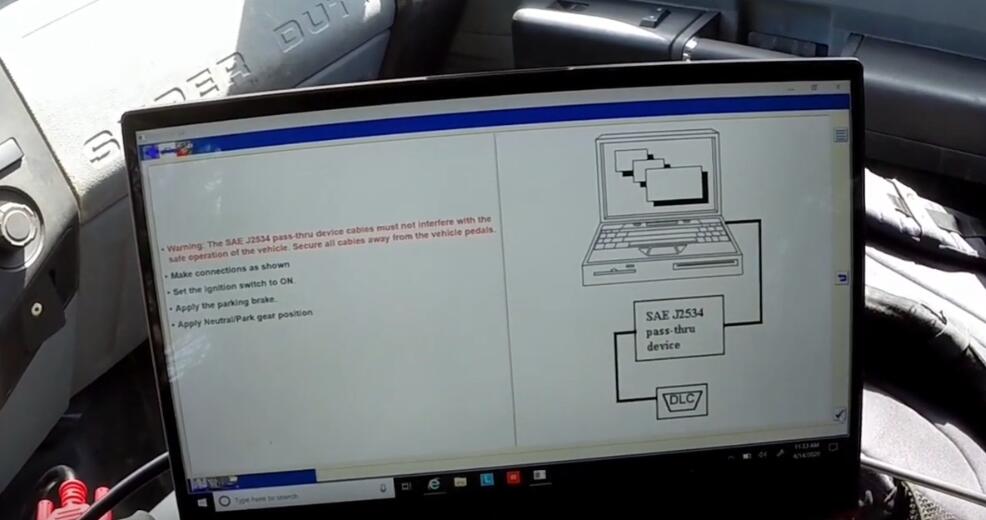
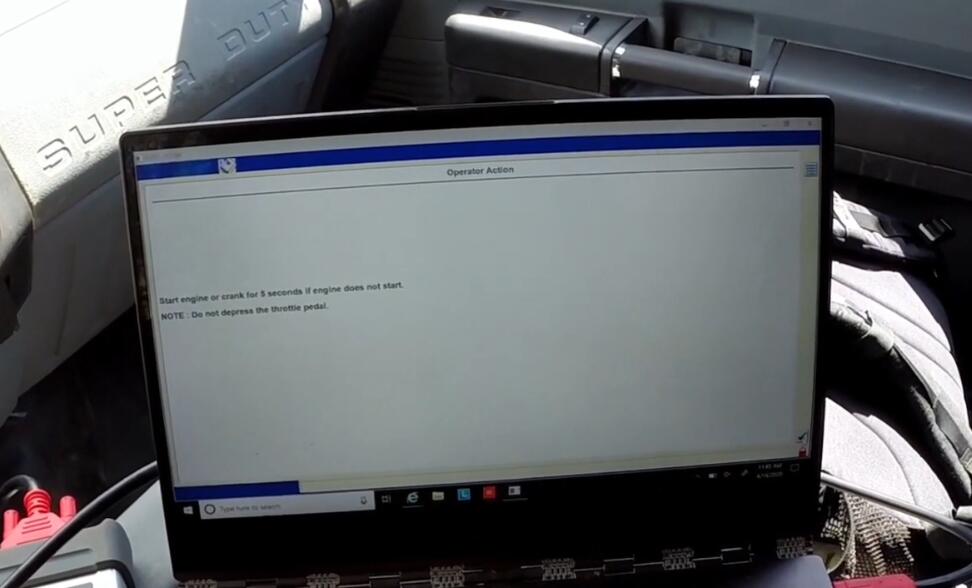
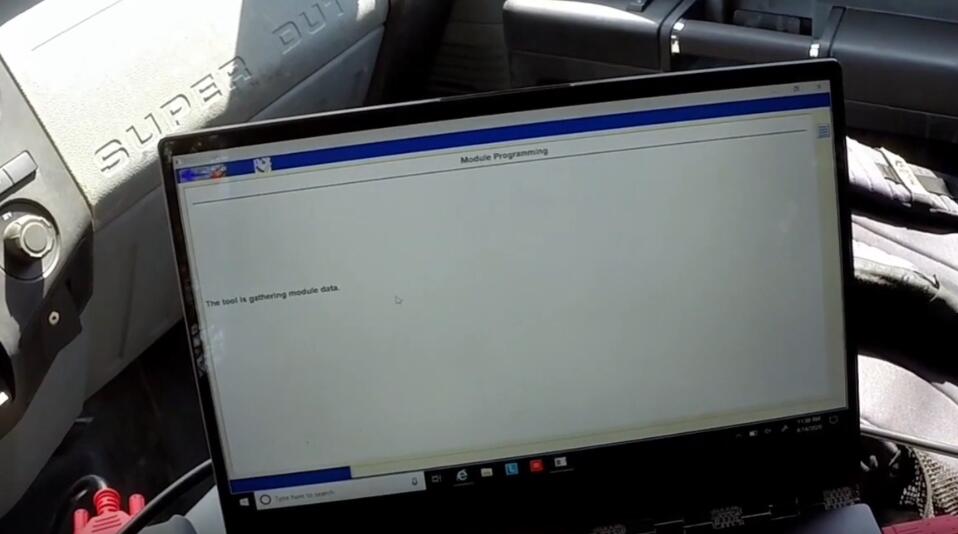
Now I’ll go ahead and click start new session, I’ll click the checkmark in the bottom right hand corner and I’ve made my connections as shown and I’ll make sure that my key is in the on position


Make sure a battery tender attached to the truck

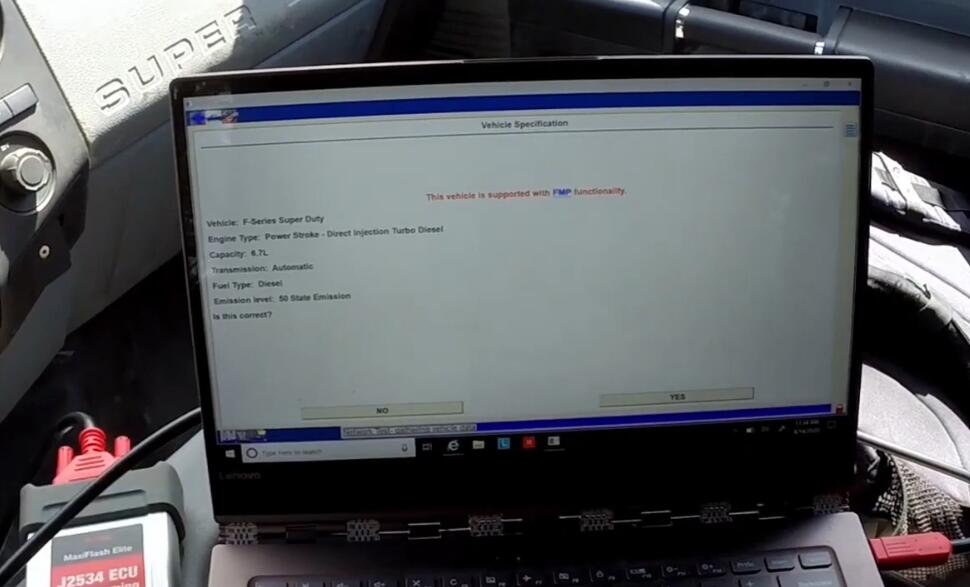
so this is our correct vehicle

click yes so now my computer is communicating with the JBOX from autel

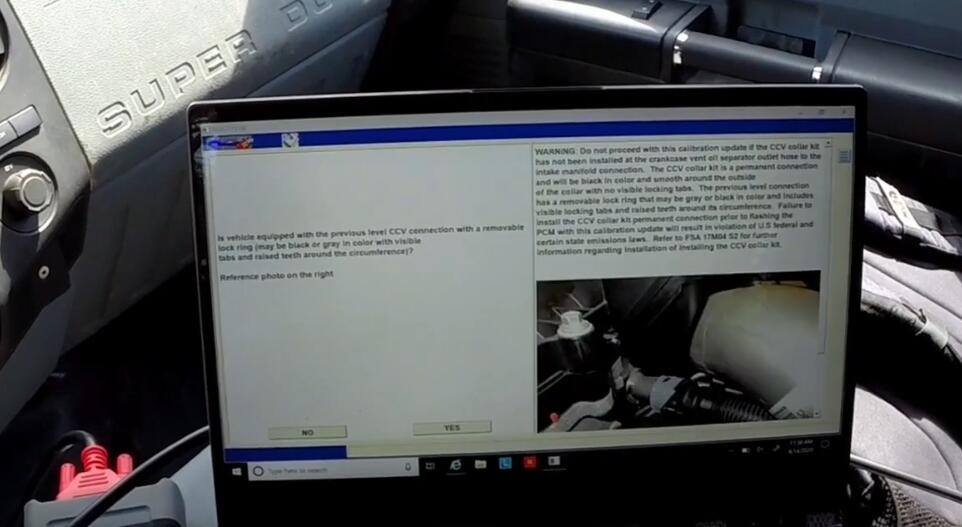
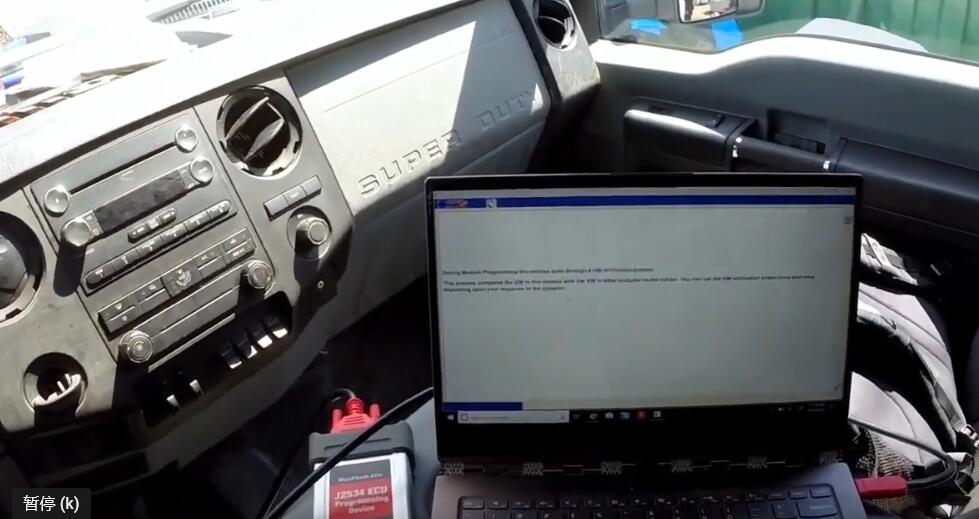
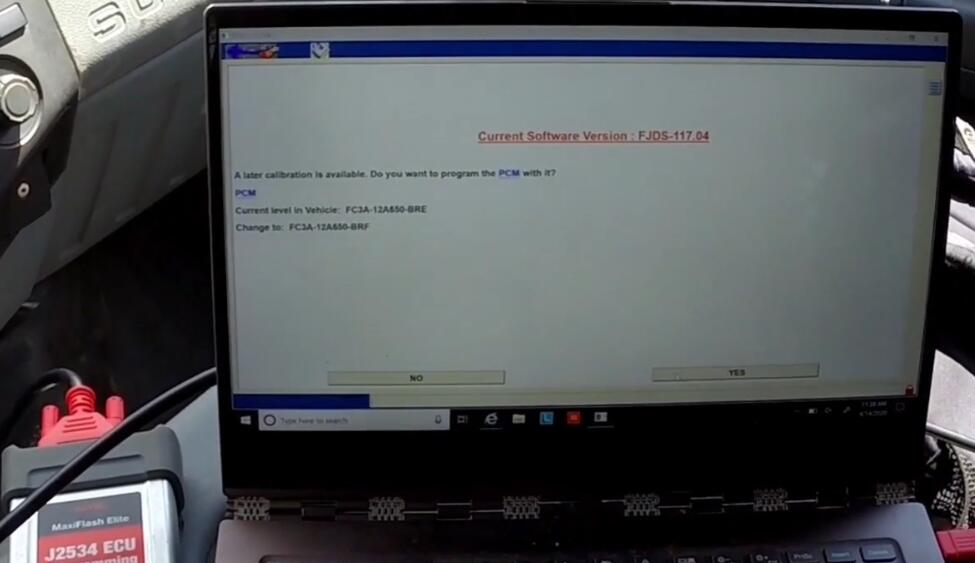
the vehicle and we’ll go ahead and update the PCM after it grabs all the necessary data that it needs to see before we can continue

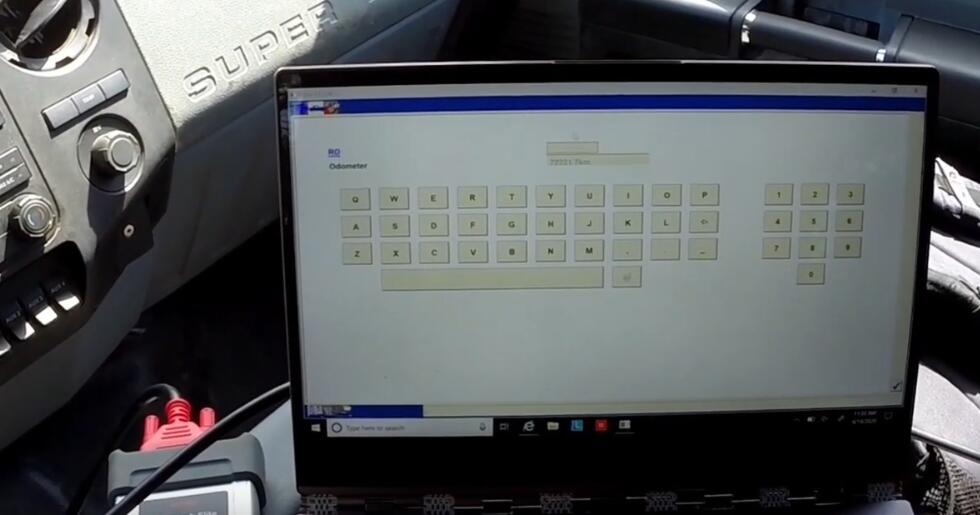
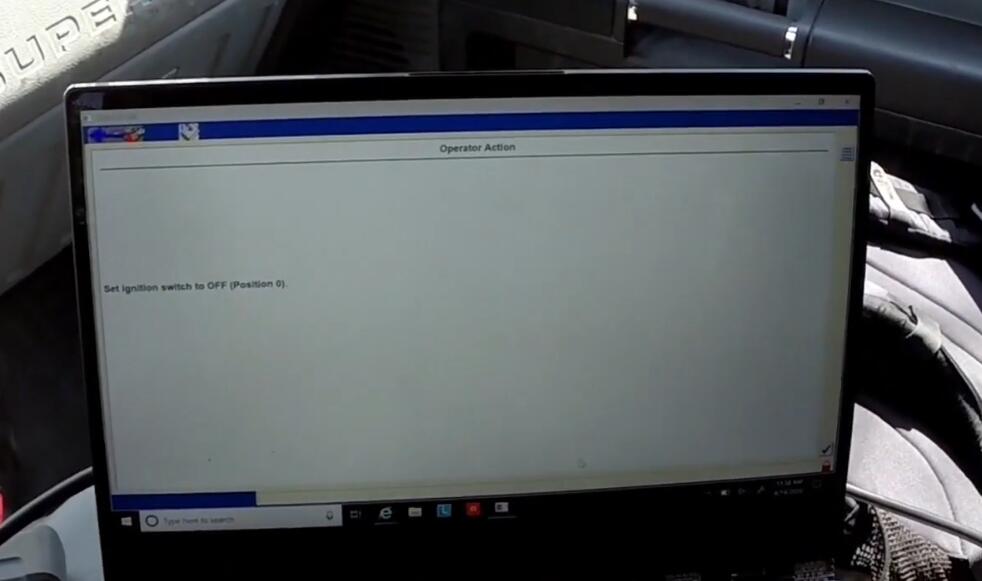
you’ll hear the fuel pump cycle a few times and from here you just have to type in your RO number so on this vehicle

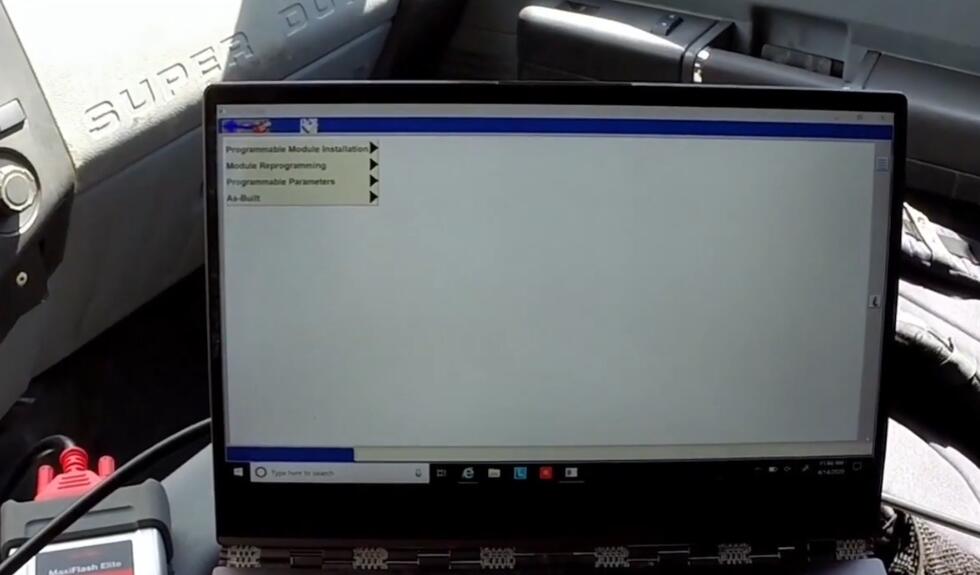
So now I can go to my toolbox and I can click module programming and we want to do the powertrain so I click module programming and program a module installation module reprogramming


If you want to know more about autel scanner, please visit our website: www.obd2tool.com