Showing posts with label tech ii scanner. Show all posts

Monday, February 8, 2021

How to OTC GM Tech 2 Scan Tool

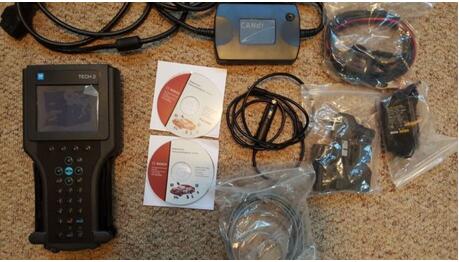
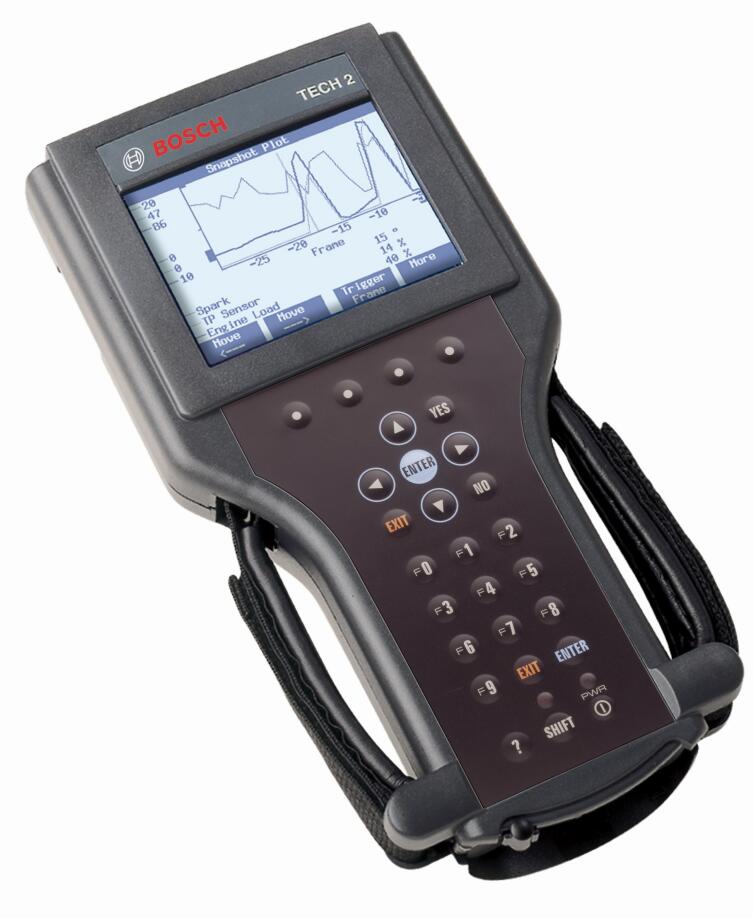
The GM Tech 2 Scan Tool is the best option for working on GM vehicles. We carry the Tech 2 with or without the CANdi module. The CANdi module can also be purchased separately. The Tech 2 is a hand-held computer designed to aid in diagnosis and repair of automotive systems with electronic controls and interfaces. The Tech 2 has been designed as a rugged, shop-ready tool by having a sturdy case, a sealed keypad and heavy-duty cables and connectors. The GM Tech 2 Scan Tool’s diagnostic menu gives you access to four major systems: Powertrain, Body, Chassis, and Diagnostic Circuit Check. Authentic GM software in OTC’s Tech 2 Flash means you have the same information as GM dealers.

How-to-OTC-GM-Tech-2-Scan-Tool

GM’s Service Programming System merges your Tech 2 Flash, a required PC*, and GM’s SPS CD-ROM, and lets you reprogram controllers on ’93 and newer GM/ reprogrammable controllers. With your PC and the Tech 2 Flash, you will be on the receiving end of software subscription updates via CD-ROM disks. Now, different service programming system products are available so you can choose the solution that makes the most sense for your business. The Service Programming System (SPS) updates the flash calibration files that are stored in a vehicle onboard controller (e.g. PCM, ABS, VTD). The calibration file custom-tailors a module to a certain vehicle. The calibration file contains data for things such as spark curves and fuel control. When troubleshooting a driveability condition, diagnosis may call for reprogramming the controller with newer calibration information to correct a customer concern.

The primary function of the CANdi module is to add CAN (controller area network) capability to the Tech 2. The basic characteristics of the CANdi module are that it supports simultaneous communications on three CAN buses and provides high-speed UART communications with the Tech 2. The CANdi module connects between the Auto Diagnostic Scanner Tech 2 Flash’s Diagnostic Link Cable and the OBD adapter. Once the CANdi module is connected, it can be used on all GM vehicle applications, even those vehicles using other platforms such as OBD I and II.

OTC, The One Tool Company that professional technicians trust. Over 75 years commitment to quality has earned that trust. They are continuously adding new technologies and features to the GM Tech-2 Flash line. Features include Flash reprogramming, the CANDi Module, GM’s SPS Service Programming Systems, and GM MDI Tool with TiS SPS Subscription. This innovation enhances the the diagnostic power of the scan tool and provides you with the very best value for your money. When you look at the true cost of ownership – the purchase price, cost of updates, cost of add-ons, range of features, reliability, training and much more – OTC Scanners stand out as the very best value for your money. OTC provides the affordable diagnostics technology you need today and to grow your shop tomorrow.

Keywords: GM, Tech, 2, tech2, two, flash, reprogram, reprogramming, candi, module, mdi, bundle, subscription, otc, scan, tool, scanner, update, software, spx, OBDI, OBD, OBD1, OBD-I, OBD2, OBD-II, OBDII, diagnostic, diagnostics, trouble, code, codes, engine, transmission, ABS, airbag, domestic, updates, kit, OTC3649, 3649, OTC-3649, OTC3648, 3648, OTC-3648, vetronix

Saturday, November 14, 2020

How to Enable Chevrolet Impala Afterblow with GM Tech2


Problem:

I am getting a funky smell when I turn the AC on in my 2007 Chevrolet Impala. I figure the cabin air filter has gotten something bad in it. Just wondering where to get them and how complicated they are to swap out.  Does enabling the Afterblow require a GM Tech2 scanner or can it be done with a hand-held? (Actron CP9580 is what I have).

Solution:

Requires a Tech 2. You need to able to access and modify the BCM parameters. Even HPTuners can’t do any of that. Tech II is the only device I know of that can do it.
However, a dealership should enable it for you for free under the bumper-to-bumper warranty.  Just tell them you have a “dirty sock” smell at time when turning on the A/C and they should do it.

This is assuming that the 9th gens have the required hardware “built in” – not all cars do – some require a “kit” for the added parts needed… I would assume the 9th gens do, but not 100% sure.

This is a known issue (seems to be more and more common on newer vehicles) and there is even a TSB that covers it. The TSB addresses the problem by cleaning the A/C system with some sort of deodorizer (smell is caused by mold) and then enabling an “afterblow” option, which will run the interior HVAC fans for a few minutes about 45 minutes after you park the car (as an attempt to “dry out” condensation from the A/C system.
I’ve had the TSB done to my 2012 Impala, including enabling the afterblow option.

Regarding the “Afterblow option”, when enabled, here is how they enable it and the circumstances under which it will operate (TSB #99-01-39-004C):

Use the following procedure in order to enable the afterblow mode:

Connect the GM Scanner tech 2 scan tool.

Turn ON the ignition, with the engine OFF.

Select HVAC Module.

Select HVAC Systems Automatic.

Select Special Functions.

Select HVAC.

Select Afterblow Option.

Select ENTER to enable the afterblow.

When done, use the soft key to save changes.

When afterblow has been enabled by the scan tool the blower motor will operate between medium and high speed for 4 minutes after the engine has been turned off.

The following conditions must be met for the HVAC module to operate the afterblow:

The outside air temperature must be at least 21°C (70°F).

The A/C compressor must operate for more than 2 minutes.

The engine must be turned off for at least 45 minutes.

The system voltage must be at least 12 volts.

Hope it helps.

Tuesday, April 7, 2020

How to setup GM Tech2 Tis2000 patch

This article is on why need to crack Tis2000 software and how to crack TIS2000 for GM / Opel.
Why need to crack GM Tech2 Tis2000?
For GM Opel tis2000: use D630 computer, you can insert the USB dongle to use or use the patch to crack.
For Saab TIS2000: usually use IBM T30, for other computer you may get error message, need to insert the USB dongle, can’t use the patch to crack.
How to crack TIS2000 for GM / Opel:
Part 1: Insert CD2.
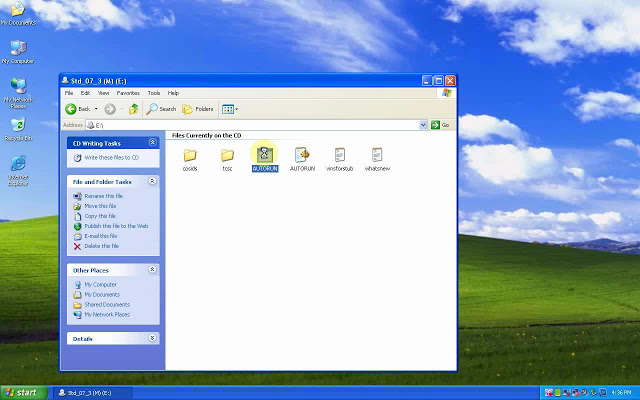
Insert TIS2000 CD into the computer, open DVD.
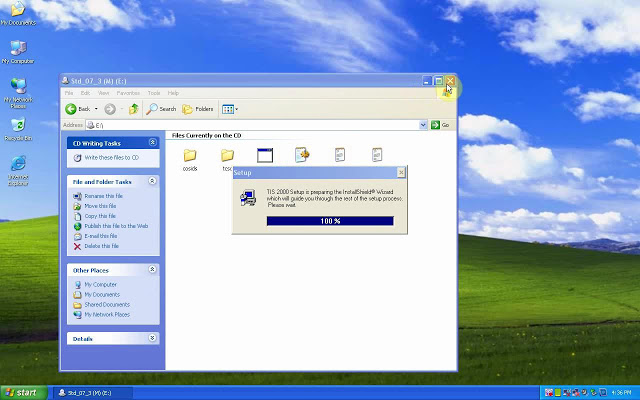
Open “AUTORUN” to setup.
crack-tis2000-01
crack-tis2000-02
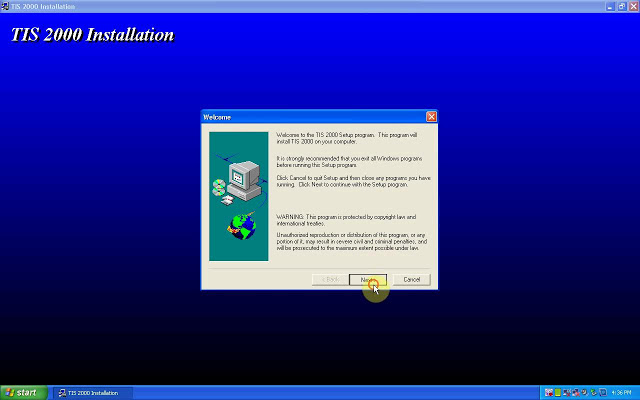
Next.
Select language.
Next;
COM1.
Standalone;
NAO;
crack-tis2000-03
crack-tis2000-04
crack-tis2000-05
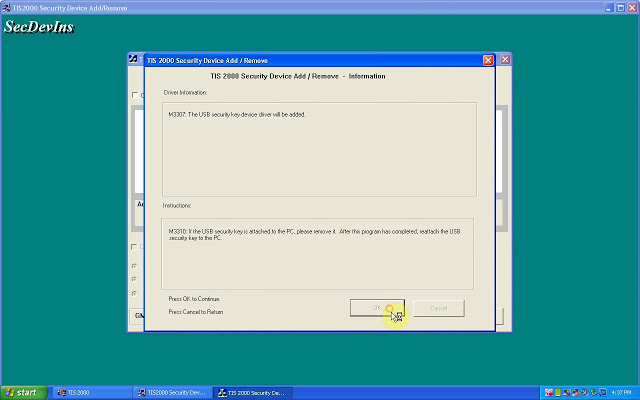
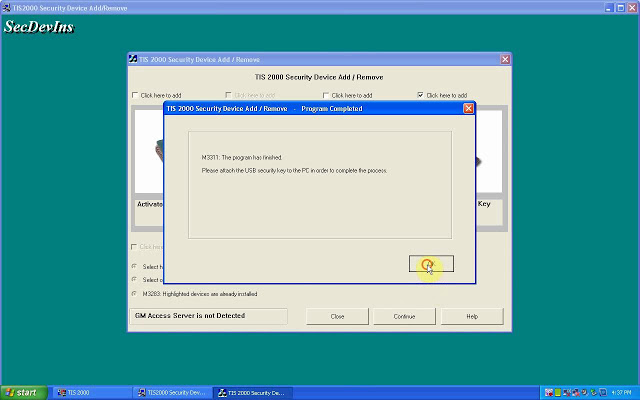
Tick “Click here to add”, then “Continue”.
crack-tis2000-06
Click on “Ok”.
M3311: the program has finished.
Please attach the USB security key to the PC in order to complete the process.
crack-tis2000-07
crack-tis2000-08
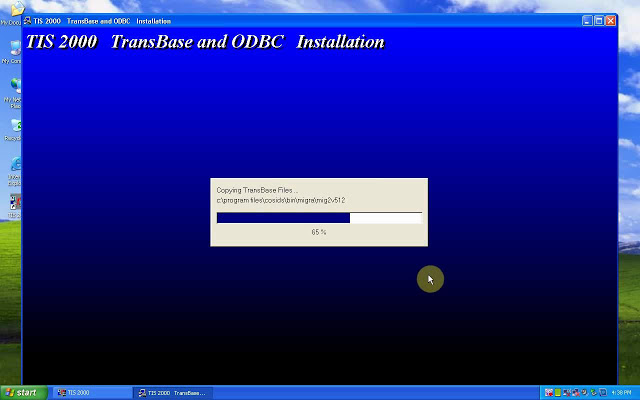
TIS2000 Transbase and ODBC installation.
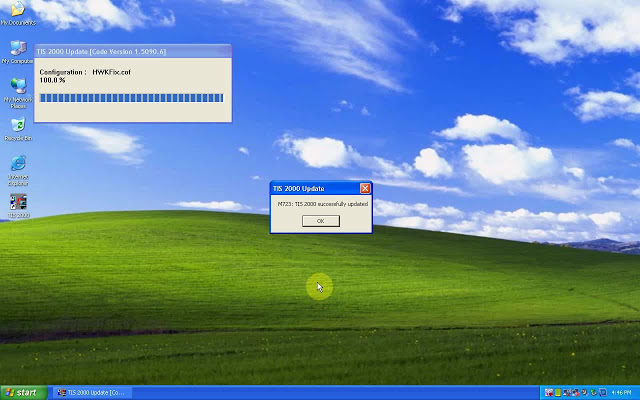
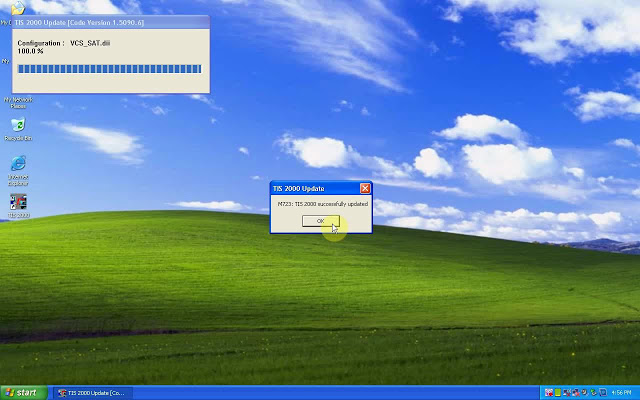
M723: TIS2000 successfully updated.
crack-tis2000-09
crack-tis2000-10
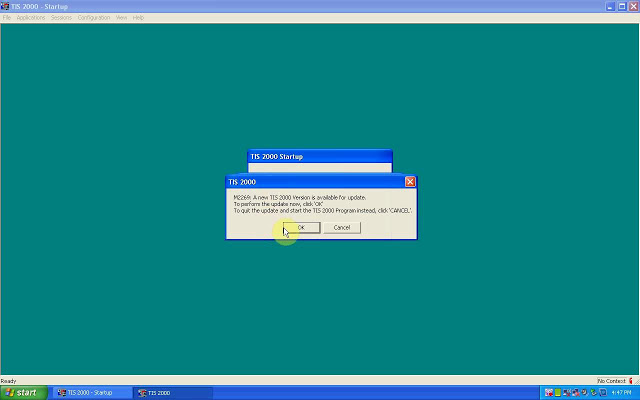
Part 2: Insert CD2.
M723: Tis2000 successfully updated.
crack-tis2000-11
crack-tis2000-12
Part 3: Insert CD3.
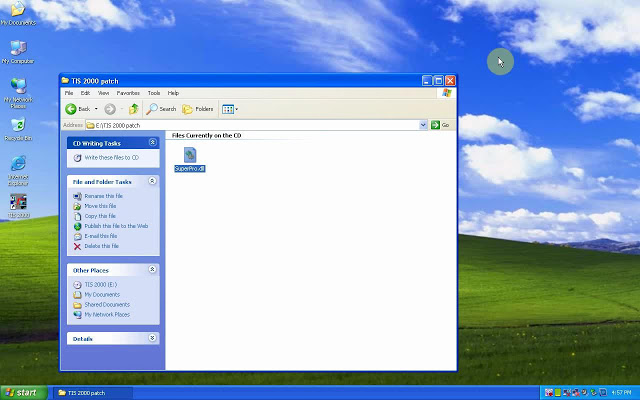
Open the cd, then “TIS2000 patch” to copy “SuperPro.dll”.
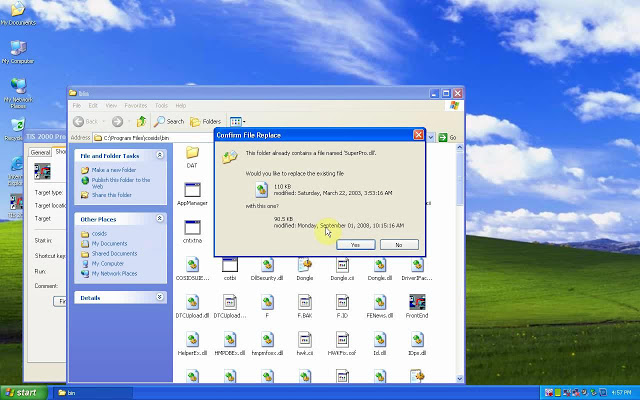
Right-click on “TIS 2000″, then “Find “Find target”, then paste “SuperPro.dll” here.
crack-tis2000-13
crack-tis2000-14    4
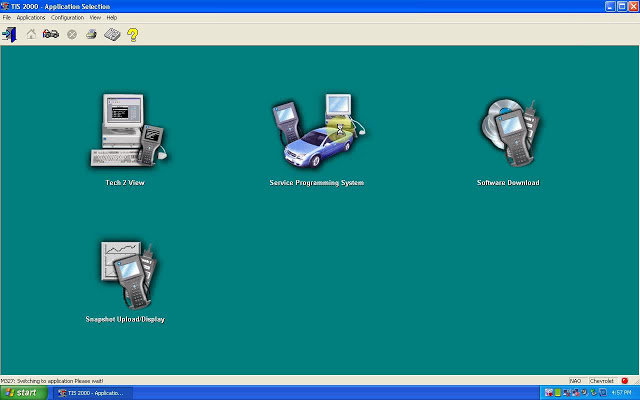
Part 4: open TIS2000.
Enter the “Service Programming system”.
crack-tis2000-15
crack-tis2000-16
crack-tis2000-17
Done.
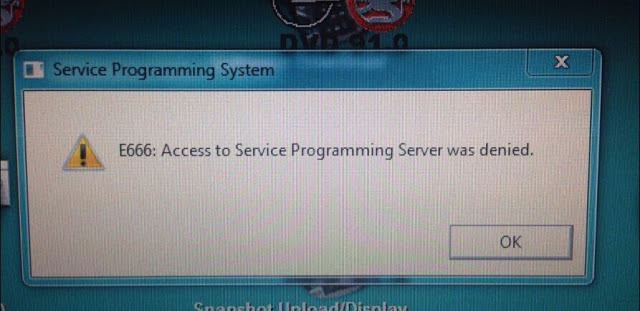
Note: If you done by following the above procedure one by one, you won’t get error ” E666: Access to Service Programming Server was denied”.
crack-tis2000-18
Good luck

Tech2 Clone ensure Corvette C6 steering wheel at zero … and more

Device: GM Tech2 Clone
Car: Corvette C6 2005- 2013
Feedback:
First Impressions
this scan tool is a massive beast, in the pictures it looks smaller but damn! This thing is hefty and looks like one of those TV walkmans’s from the 80’s. hahaha
It can do so so much more than a simple OBD2 Scanner:
Overall technical ability of this GM Tech2 Clone is amazing, I bought it to ensure my steering wheel was at zero after steering rack removal for a harmonic balancer; works great! After pulling DTCs from every single module in the car, I soon realized I had fault codes that a regular OBDII reader would never capture which is pretty awesome!
While playing around with it more, I found where you can adjust the engine idle RPM speed and adjusted it up to 625 from the pre-set 550 RPM. This minor adjustment to the idle speed actually made my Corsa Sport exhaust sound more throaty and aggressive at idle, you should try it. I wouldn’t think this small idle adjustment would damage anything.
FYI, I purchased Tech2 Clone came with the latest GM software version 33. something….This version covers GM vehicles up to 2013. Keep in mind the Tech2 is only a diagnostic tool, used to test different modules and perform numerous tests as well as special functions which are extremely useful. If you want to program or re-flash a module such as the BCM, the Tech2 serves as a pass thru device and you need a subscription from the AC Delco website to perform calibrations or updates to modules.
tech2-clone-corvette-c6-sps-programming-01 tech2-clone-corvette-c6-sps-programming-02
A word: Tech2 Clone can do so much more than a simple OBD2 scanner.
Enjoy!

Wednesday, July 31, 2019

GM Tech 2 Clone Reliable or Not Purchase – Package – Programming Tips

This is advice for those have problems:
– what do you think of Tech 2 made in china?
– Is there any software close to Tech 2 to be bought which has access to all hummer h2 modules?
Many thanks all contribution from MixManSC like to share his experience with all.
Purchase:
I bought my Tech2 from China and it works great.
I cannot speak for any on Aliexpress or Amazon. I’ve seen both good and bad reviews on the ones from there.. Regardless it would not matter as again, I have no way of knowing if one from some seller on there will be a good one or not.
It is also worth spending the extra to get the case which does cost a good bit more. These come with a lot of different adapters and parts and the case makes it very nice and easy to keep it all together.
This is the kit that I ordered. It also includes the Candi module which is needed for many newer model GM vehicles.
Newest Vetronix Tech2 Diagnostic Scanner Working for GM/SAAB/OPEL/SUZUKI/ISUZU
Note: China tech2, Palmer ScanXL Pro and EASE
I’ve got 3 different scanners, a China tech2, Palmer ScanXL Pro with enhanced GM software and EASE Diagnostics with enhanced software for both chevy and hummer.
The Tech2 is the best, palmer ScanSL Pro is very good at pulling trouble codes from all GM modules but does not have bidirectional control while EASE is good software its had issues with pulling all codes from all modules but it has bidirectional capabilities. The Tech2 can do it all up to 2013 along with programming modules if you have the software and security key up to 2007 models.
Package:
The “Candi” module is needed for GM vehicles with the newer electrical systems. On an H2 the “Candi” module would be required for an 08/09 model. I’m not sure what years on an H3 and other GM vehicles.
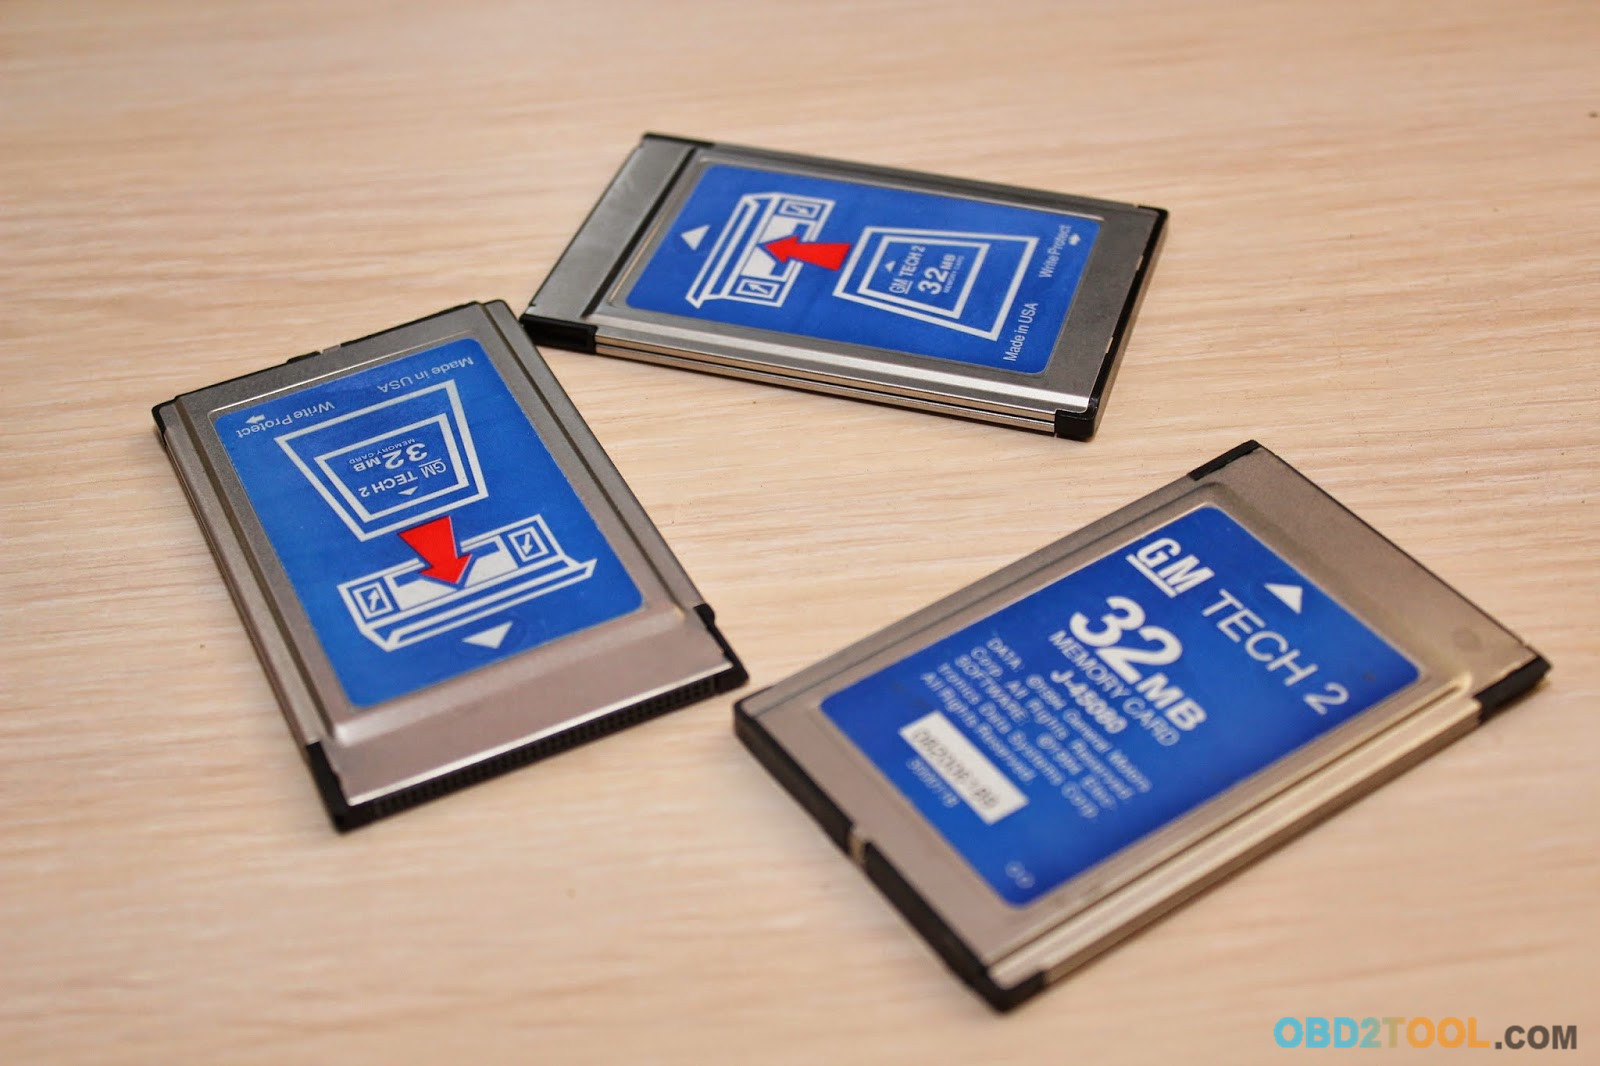
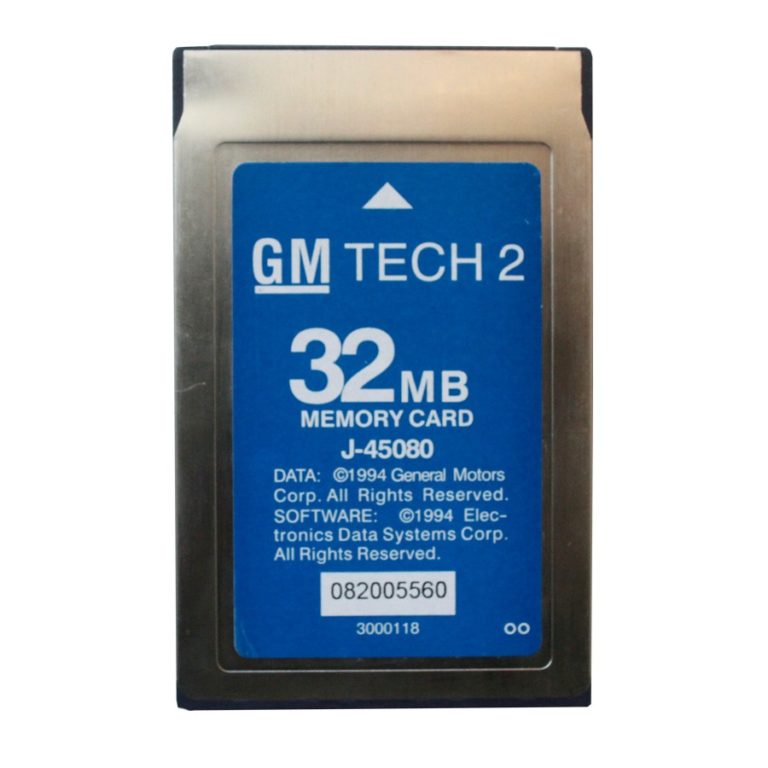
On any of them you must have the 32MB card (GM North America)
The plastic case adds to the cost but is worth it as the full kit is a lot of separate pieces and the case gives you one place in a custom fitted case to keep it all neatly versus all dumped into a cardboard box.
The TIS2000 software/USB Key are really NOT needed unless you want to reprogram ones of the many various computer modules in your vehicle with software updates. To use the TIS2000 software you will need to install it on an older PC running Windows 98, Windows XP, or Windows 7 (32 bit) and will need a serial port to connect to the Tech2. As an example though, my 2003 had multiple modules with updated software which CAN fix problems. One I remember is my air ride module had an update that fixed the compressor running much more often than needed.
Hummer H2 Programming tips & guides:
Actually it does the programming just fine on newer than 2007 GM vehicles BUT you must pay for an ACDelco TDS subscription for vehicles above 2007 and you would use the CANDI module that comes with many of the Tech2’s for working with CAN bus vehicles. You can subscribe for as little as two days for $55.
https://www.acdelcotds.com/acdelco/action/subscribehome
This is ONLY needed if you want to program or update the software in a module. ALL of the build in diagnostics and testing for vehicles up to 2013 works without the subscription or the older TIS2000 software. You only need those for doing actual programming. The older TIS2000 software – that is what has the programming was discontinued in 2007. TIS2000 does have the actual programming for all vehicles up to 2007. After 2007 GM went to the TDS system.
You can also get a newer style MDI or MDI 2 for diagnostics and programming. The catch with those. They have NO screen or built in software and you must pay for a subscription from from ACDelco TDS to use an MDI.
Other brand units, a very select few can do actual programming and use the pass-through method. NONE have the diagnostics that the actual Tech2 or MDI (with the subscription) will have. Check with Autel and see if they have the full diagnostics and re-calibration for the rear air suspension on a Hummer H2. Not going to happen, there is too little demand for them to hack and reverse engineer that particular bit of code in a Tech2 to figure out the diagnostics and then write programming for that for their tool.
For programming you also need to have TIS2000 running on a computer or pay GM for a 24 month subscription for their TIS2WEB (Vehicle Programming) for $40 https://www.acdelcotds.com/acdelco/action/subscribehome
The computer will need a serial port for downloading the programming to the Tech II for programming your vehicle.
The way programming works is you connect the Tech2 to the vehicle and tell it you want to program a module. It interrogates all of the modules on the vehicle for the current versions and the VIN number. You then connect it to the computer running TIS2000, GlobalTIS, or TIS2WEB subscription and select programming in the computer. It reads the Tech2 for the vehicle info and then presents you with a list of software for all of the modules and shows you which have updated software. I recommend only doing one module at a time which is a good bit more back and forth but safer. The computer then loads the update to the Tech2. You take that back to the vehicle and connect it and it then programs the module.
The best, most reliable and safest method is to use a long enough serial cable (its uses 9 pin serial adapters with an ethernet cable to make the cable longer – so you can just use a longer network cable) and do pass-through programming. In that method the process is the same but you leave the Tech2 connected to both the computer and the vehicle at the same time. Once you select programming on the Tech2 then go to the computer and you can immediately update each module right from the computer.
There is a slightly more updated version of standalone TIS2000 floating around on the web which has additional updates that has software updates for vehicles through 2009 as well. I know just using that TIS2000 both my GMC truck and my 2003 H2 both had
a bunch of software updates available to be programmed all of which fix small issues or improve certain aspects. One example in on the older single compressor air ride like my 2003. Those would run and make small adjustments a LOT more often than needed and the software update fixed that. On the H2 the rear air ride is also one to be very careful of for doing software updates though. For example, my 2003 came with the earlier style single compressor but if it were to fail a dealership would replace it with the newer style dual pump compressor. Programming would still think its the original style and would attempt to program it and that would actually cause it to fail. TIS2000, (Global, Web, etc) will warn you about this sort of thing though so just heed all warnings and follow instructions and its fine.
The programming aspect is not needed or required to use the Tech2. The Tech2 still gives you a TON of diagnostics and tests that NO other OBD device has including things like the air ride module, detailed BCM functions, basically you can control and test every computer module in the vehicle.
btw, HUMMER is not shown in the GM vehicle list… because that little short list is incorrect and only shows a few of the earlier than 2007 CAN bus vehicles.
Summary:
Cannot really compare software with a gm Tech2 as that is comparing hardware to a program. That being said, there is a software side of things that work alongside the Tech2 which is the TIS2000 software. Getting that working is a bit of a project in and of itself as the software is old and seems to work best on Windows XP. The TIS2000 software is really not needed to use the Tech2 though – that is needed if you want to update the firmware in the various modules in your vehicle like the ECU, BCM, DDM, etc.
Simply put though. There is no other tool that can do everything on Hummer H2 that the Tech2 can do. It is the only tool with things that are very specific like calibrating the rear air suspension module. Other tools can be very powerful but that are mostly just have features that are common to many vehicles and will not have things that are specific to just one or two vehicles.

Friday, June 28, 2019

Can I use Tech 2 for OBD1

TECH 2 scan tools work with GMs from 1991- 2013
OBD1 is everything before ’96!
If the menu is in the Tech2 for ’91 then that hints that all you would need is the correct 16 – 12 connector/adapter and also likely a provision to power it with the adapter. OBD2 is self-powered from the DLC, OBD1 ain’t. ’94 & ’95 would work without the adapter, they’re 16 pin DLC with pin 16 being B+.
I’ve used my “REAL” Tech 2 Scan Tool with ’95 but not Corvette, compared to my Tech1 on the same car I did have some contradictory comparisons that I couldn’t explain. I don’t recall them now but it did confuse me for a time. I put a JY ECM in a ’95 ParkAvenue for a fellow to resale and it ran well so I worried NOT about it.
FYI, There is a Tech1A OBD1 to OBD2 interface that lets the Tech1a work fine with 96.
I have done it multiple times, you MUST have a Tech1A with correct mass storage module to install a new PCM or CCM to program key fob resistance, mileage , vin info ,LT1 or LT5. You have 100 miles after install to program the module or it becomes non programmable. (this pertains to new or reman module, used module is just what you get and is non programmable)
Edit: The manual says it should work with the OBD I connector:
SECTION VI
TROUBLESHOOTING
2005 Tech 2 User’s Guide VI – 15
IMPORTANT
If not properly grounded, the CANdi module will appear to be defective when it is not. The Professional Diagnostic Tool CANdi module will fail due to improper grounding if you use the 16-pin DLC (J-1962) connector and power the
Tech 2 from an AC/DC power supply. The adapter you use must have a GM part number. Although PVI
adapters are similar to GM adapters, they will not work with the CANdi module.
CANdi Module Troubleshooting Guide
If a CANdi module is not functioning properly, please perform the following tests:
Make sure the CANdi module is properly grounded by connecting to a vehicle or by using the 12-pin
ALDL connector, which has the signal and chassis ground shorted.
loading..

Monday, March 19, 2018

same problem as recording images to the memory card via the Tech 2 and TIS

Hello everyone. A few days ago saw that often face the same problem as recording images to the memory card via the Tech2 Scan Tool and TIS.
4-1
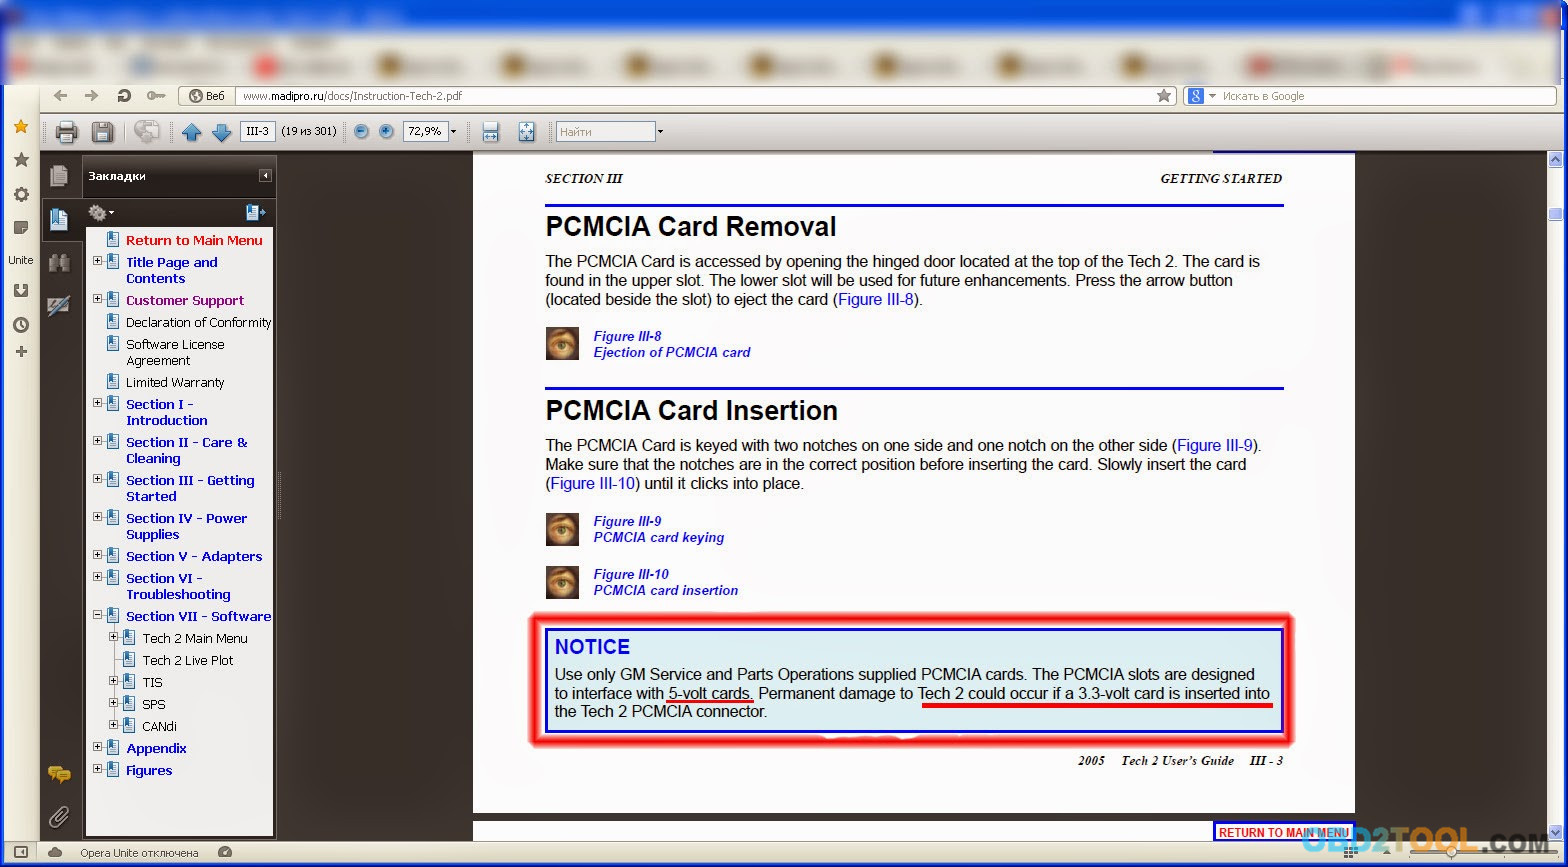
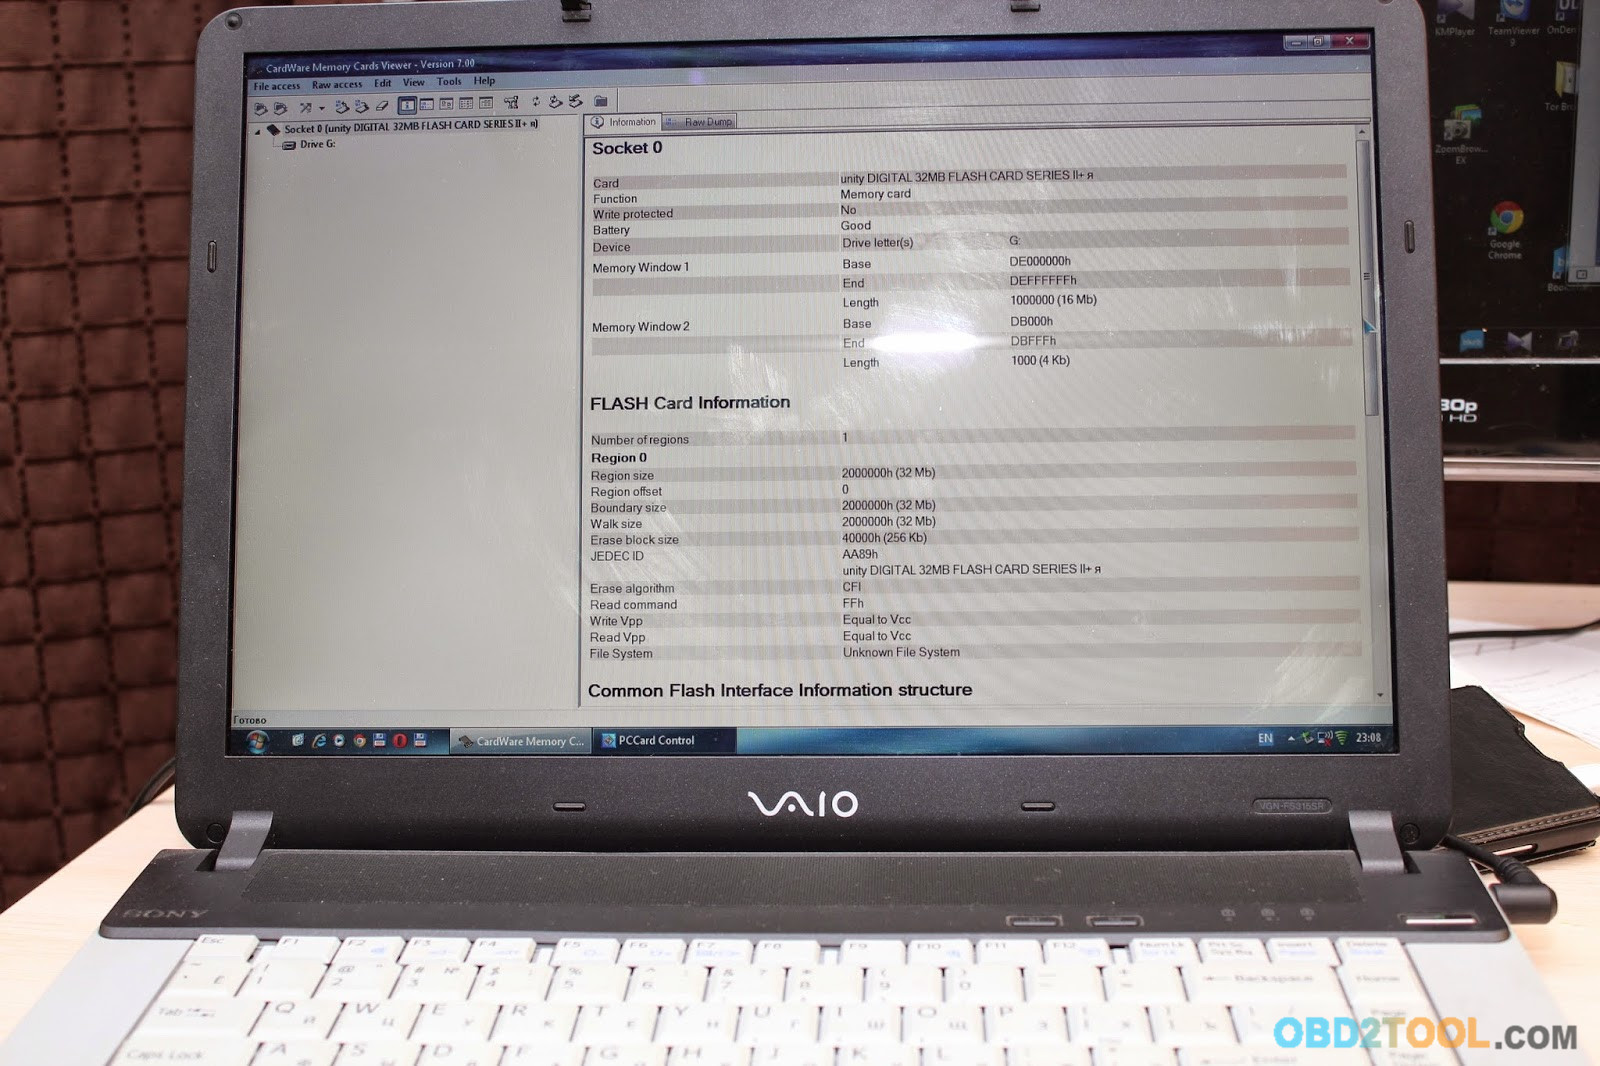
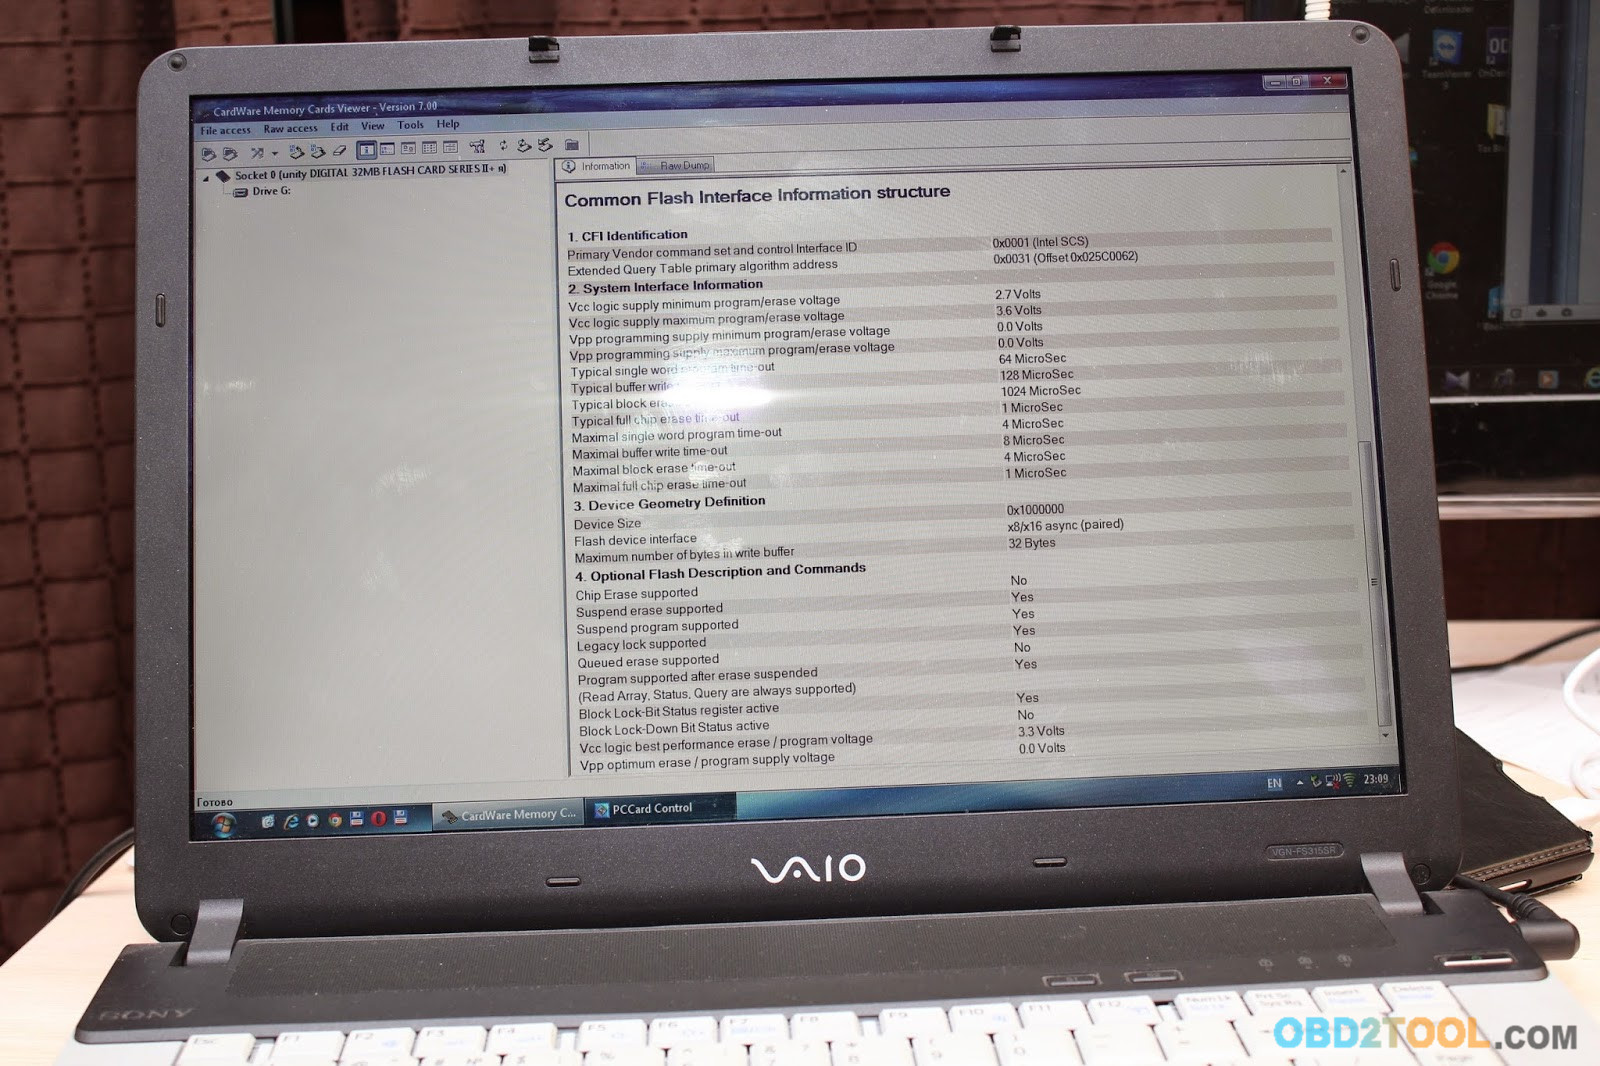
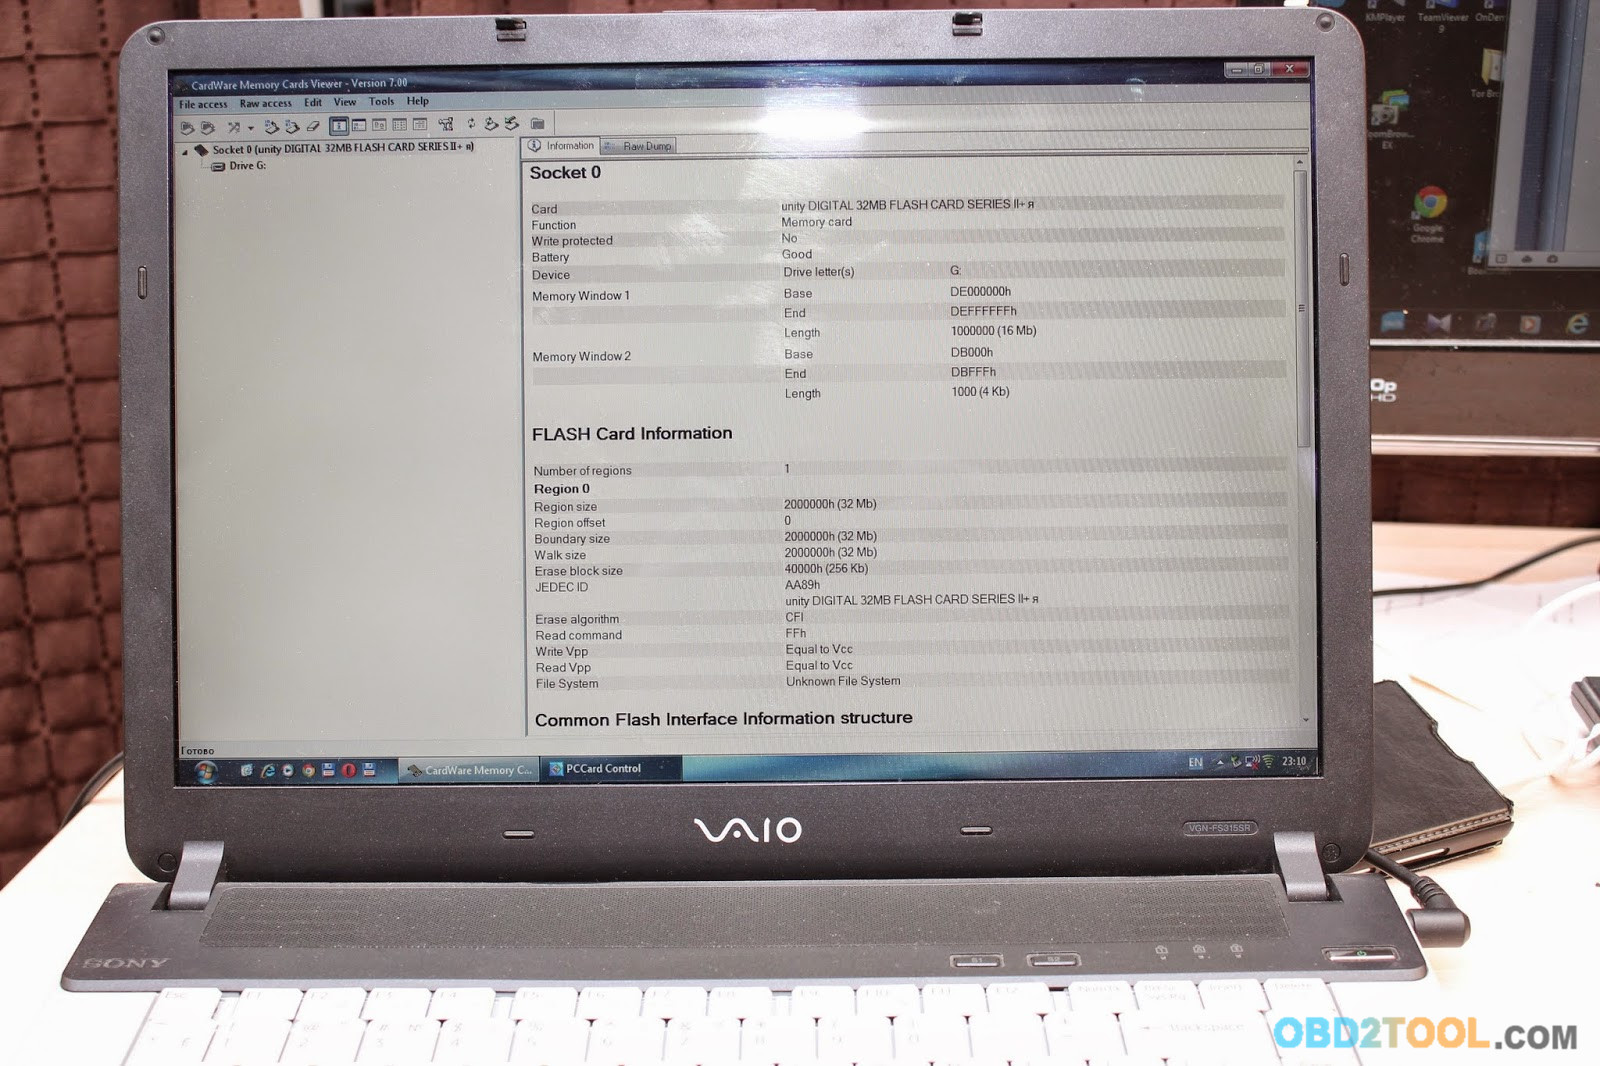
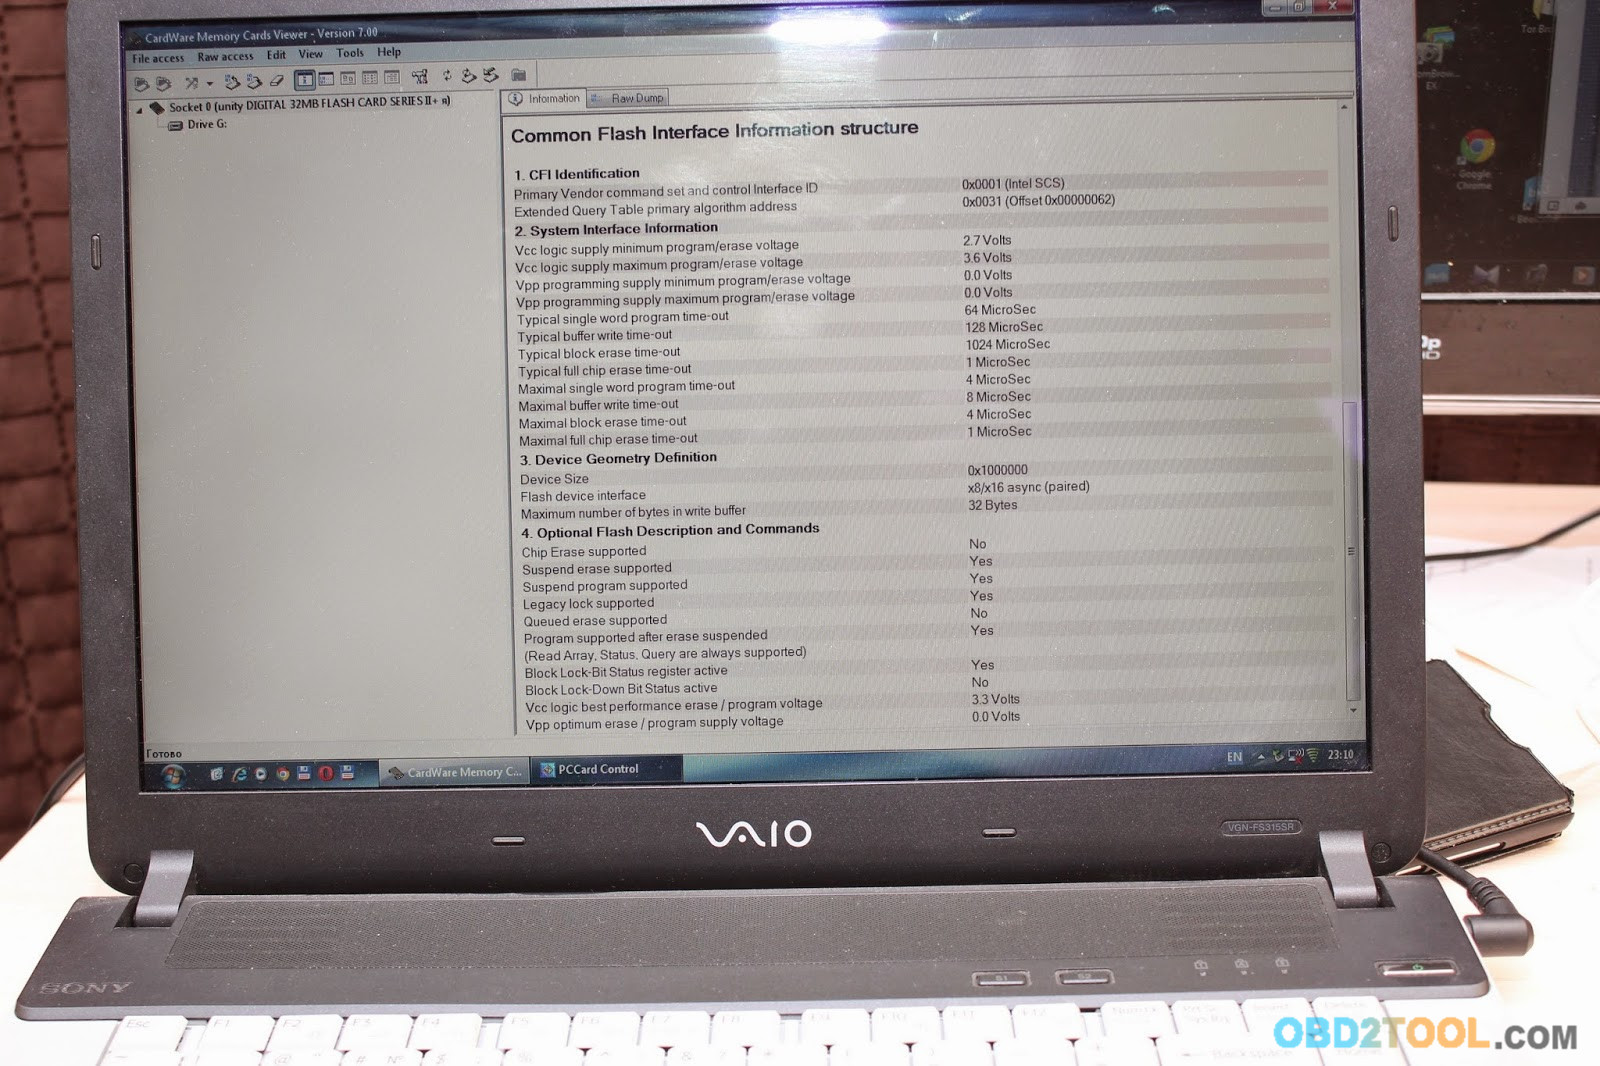
Initially I thought this is a typical problem with MAX232, only a little deeper, I saw that the Tech 2 is well connected with TIS, but attempts to write through it, memory cards, success did not. Having started to study the problem, I found the following that through the card reader in your laptop works, and through TIS not. And that’s what this difference is expressed: the fact that the card reader work with cards with 3.3 Volts and 5.0 Volts. And that is what is written in the instructions to the Tech 2, the photo shows.
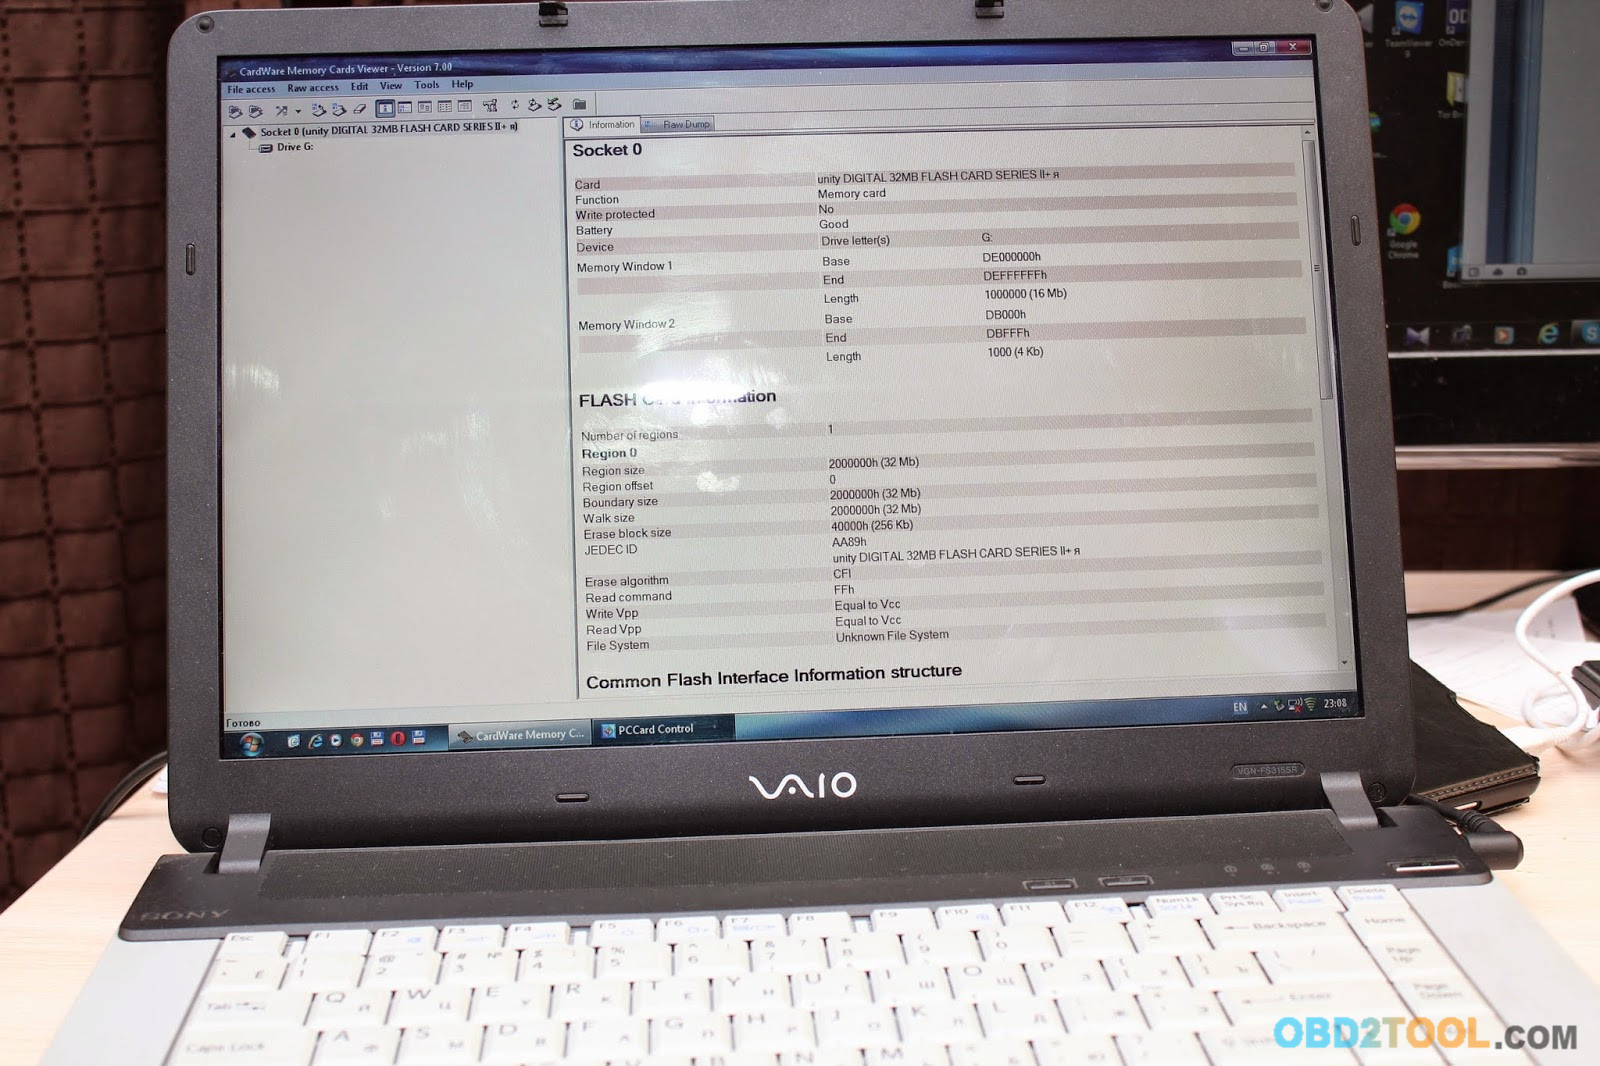
In the end, I checked everything with me in the presence of a memory card, here is their photo:
4-2
As a conclusion, until I found how to solve this problem, it is best card to rewrite only through the card reader in the laptop. Another way to try to lower the voltage in the Obd2 scan tool Tech 2 so that it more accurately worked with credit cards, there is a successful experiment, but there are very few tests that were carried out and what it may cause, or to try to slightly modify these memory cards.
Just want to try another experiment, but I still havent for it is only necessary, as only something I can do, or find a better solution will be described later.
Card No1
4-3
4-4
Card No2
4-5
4-6
Card No3
4-7
4-8
I can’t promise anything, but maybe will write the other day a couple of videos like this Car Scanner Tech 2 works.

Sunday, March 18, 2018

GM Tech2 pass-through or go-between Method to Program A Module

If you’re trying to program a module, there are two methods. One is pass-through and the other is using the tech2 diagnostic scanner as a go-between.
In detail… look here:
The pass-through is to use with a laptop in the vehicle and it just uses the Tech 2 as the connection between. This is the fastest and easiest way to do it.
That is, the data are directly downloaded from the PC to the ECU in the vehicle.
Although the GM Tech2 is still necessary in the mode, the data entry and the download control is done directly at the pc. Altogether, the method is faster, and it is recommended when a pc with TIS2000 software is within 3m of a vehicle.
1.Connect Tech 2 to the vehicle.
2.Connect Tech 2 to the PC switch on Tech 2.
3.Start TIS 2000 on the PC.
4.Select the icon ‘Service Programming System’ (Fig. 1) on the TIS2000 start page.
5.Start TIS 2000 on the PC.
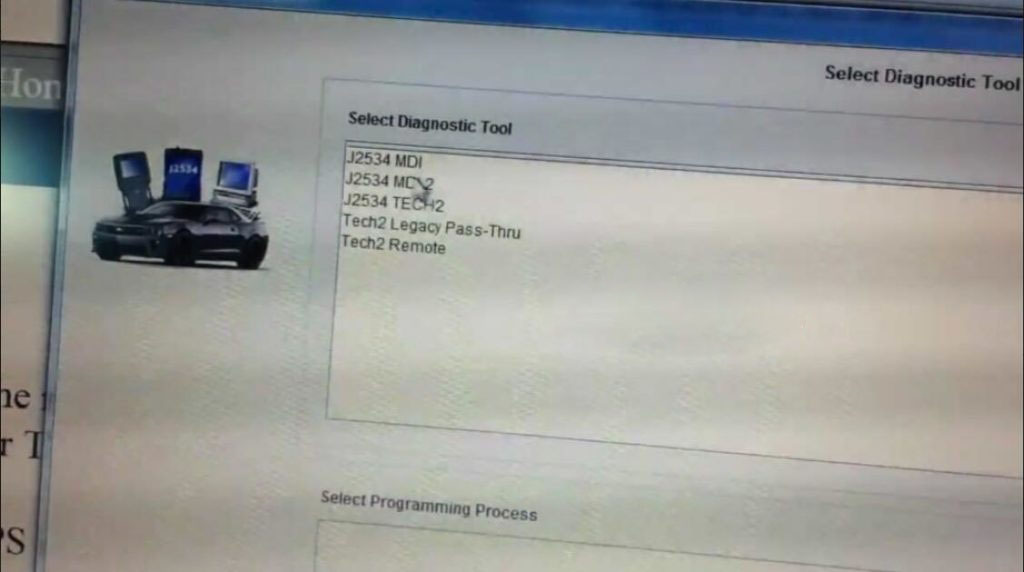
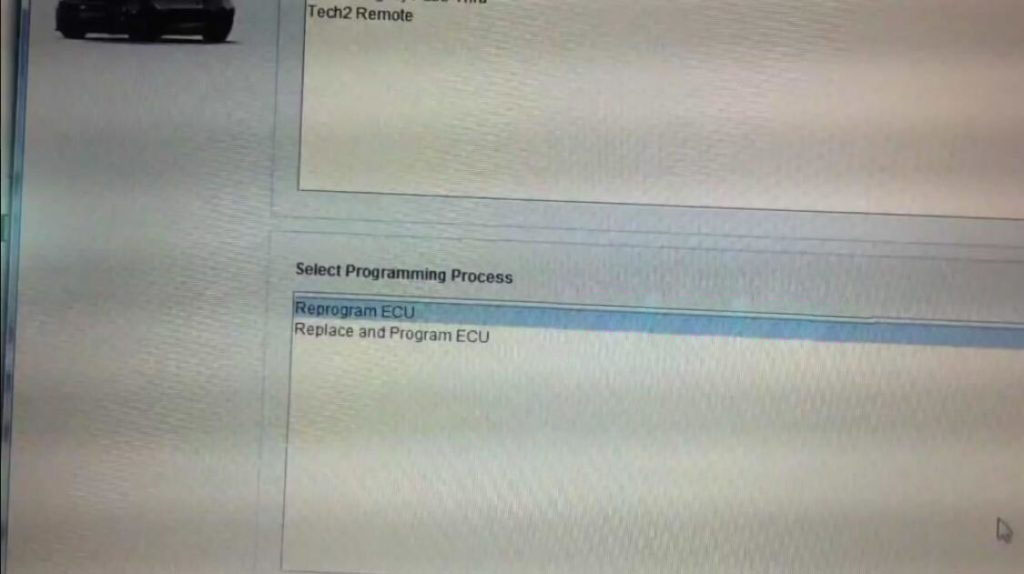
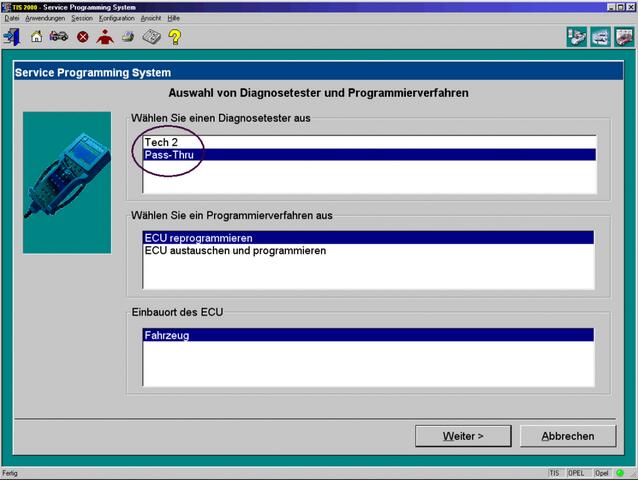
6.On the screen ‘Select Diagnostic Tool and Programming Process’ (See picture below) make a selection for
***Pass-Thru mode
***the reprogramming of an ECU that was not exchanged or the replacement/programming of a new ECU
***the ECU location.
Then clock ‘Next’ button.
16-1
The go-between method is for when you can’t bring the computer into the vehicle and uses the gm Tech2 scanner as a go-between. You connect the Tech 2 to the vehicle and download the module information that you want to program. Then you disconnect, run to the computer running Tis2000, connect it to the computer and download the programming information for that module, disconnect again and run back to the vehicle, connect it and it automatically programs the module. It can take a long time depending on the module (PCM is the longest).
Have fun in professional diagnostic tool GM Tech II programming!
Good luck!

https://app.site123.com/blog/how-to-update-digimaster-3-eboot-and-kernel?w=984065&disableCache=5aae2f8231fd8

Friday, December 22, 2017

How to install TIS2000 and GlobalTIS for GM Tech2 Scanner

Tutorial: GM Tech2 diagnostic scan tool software install for SAAB, OPEL, GM, ISUZU, Suzuki and Holden, esp. how-to’s of GlobalTIS or TIS2000 install and crack issues
Part 1: How to install Windows XP on a computer
Part 2: How to disable Delayed Write for USB drive via Device Manager
Part 3: Tech 2 bin file and software download
Part 4: How to install & crack TIS2000
Part 5: How to install & crack GlobalTIS
Let’s live-stream-ish this.
Part 1: PC requirement and Windows XP install
All of the Tech 2 software is intended to work with Windows XP Professional, 32-bit. It may be possible to use the software using another OS, but results are hit or miss. Broadly speaking, you will probably have good luck with a 32-bit version of Windows 7 and every step you move away from that OS towards current it’s going to be more difficult.
Similarly, all Tech 2 software is intended to be used over a physical serial (“COM”) port. It may be possible to use the software over a simulated serial port such as a USB to serial adapter, but results are hit or miss. There are a couple specific adapters that are generally considered to work better than others (perhaps someone would care to offer ones they have gotten working, and someone can update this post).
For the purposes of this tutorial, we are going to use Windows XP Pro 32-bit running directly on a PC with a physical serial port.
What I have:
1.Dell Vostro 320 – this is a c2010 all-in-one computer that still has native support for Windows XP and has a physical serial port. Mine has an Intel Core 2 Duo E7500 and 3gb of RAM – it’s way more than the Tech 2 software needs but will work great.
2.Dell Windows XP SP3 physical CD that I’m using to install XP fresh.
3.Chinese clone GM Tech 2, from obd2tool.com.
4.Three PCMCIA cards from the same place. Two are Saab-English 148 and one is GM-English 33.004
5.A 16gb flash drive. (Believe me, you want this)
1-1
I need to assume you know how to install Windows XP on a computer.
There are simply way too many variables to explain how to do this. If you don’t know how, there are lots of tutorials out there that can help you.
We are going to pick up right after you’ve done a fresh install of Windows XP on your computer. I would highly recommend you do this – picking up someone’s 10 year old computer and hoping it just works opens you up to world of pain – old anti-virus software, questionable Java installations, corrupted registries, blah blah. XP is old and stupid, you’re best served starting over.
As I write this, I am just finishing up installing Windows XP Pro SP3 on my Dell Vostro 320. When it’s done, the system will reboot and ask me some questions:
1.Do I want to change my display settings? Yes I do.
2.Do I want to turn on automatic updates? No I don’t, not right now.
3.My name? I like User, because it’s non-committal.
It’s then going to log me on. The first thing I am going to do is open Device Manager:
1.Click the Start menu
2.Right click on My Computer
3.Choose Properties
4.Choose the Hardware tab
5.Click Device Manager
and look at all the devices that have yellow question marks next to them, probably hanging out under Other Devices, indicating there are no device drivers. There are two things you are likely going to want to do:
1.Get a video driver installed so you can fully use the various Tech 2 applications and, most likely, WIS and EPC. If you have a Display driver called “Standard VGA” or an Other Device called “Video Controller” you are going to need a driver. For XP-era machines, there are going to be three main sources of video drivers – Intel, AMD/ATI, and Nvidia. You are going to need to know who you need to hit up to get your video driver. I probably can’t help you with that.
2.Make sure your chipset drivers are installed to ensure Windows is managing your chipset properly as otherwise, you could have serial port and USB issues. If you have a bunch of unknown devices called “PCI Device,” you’re probably missing some chipset drivers. As with the video drivers, Intel, AMD/ATI, and Nvidia are the common chipset manufacturers for the aughts. You need to know what chipset you have. I probably can’t help with that.
The rest of the stuff – things like sound devices and network devices, really aren’t important. In fact, to some degree, you really don’t want network devices working – that can potentially hamstring your Tech 2 experience and We The People of the Internet don’t need your dinosaur OS spreading viruses around the tubes. So, you’re in good shape not having network drivers installed.
If you have a Dell computer, getting drivers for your system is easy. Look on the back or bottom of your computer and find the 7-digit Service Tag. Alternatively:
1.Click the Start Menu
2.Click All Programs
3.Click Accessories
4.Click Command Prompt
5.In the black Command Prompt window that appears, type:wmic bios get serial number and press Enter.
6.After Windows installs wmic (it happens automatically) it will return the Serial Number of your PC, which also happens to be your Service Tag. (Yes, I am so lazy I’m not even going to turn this machine around)
ON A DIFFERENT COMPUTER:
1.Visit www.dell.com
2.Click Support -> Support by Product
3.Type in the Service Tag you just obtained
4.Click Drivers & Downloads
5.You will probably need to locate the option “Operating System” and choose “Change OS” to Windows XP
6.Stick that 16gb flash drive into the computer and start downloading drivers
7.Once the drivers you need are downloaded, take that 16gb flash drive into your DeLorean… I mean old computer, and install them one by one. It’s lots of fun!
Part 2: How to disable Delayed Write for USB drive via Device Manager
I would also go ahead and disable Delayed Write for your USB drive via Device Manager:
1.Click the Start menu
2.Right-click on My Computer
3.choose Properties.
4.Click on the Hardware tab.
5.Click on the Device Manager button.
6.Find your in the list, probably under “Disk Drives.”
7.Right-click on the device and choose Properties.
8.Click on the Policies tab.
9.Uncheck Enable write caching on disk.
10.Click on OK.
Why do this? Because delayed writes on removable drives are annoying. While it’s on, you will need to “Safely Eject Hardware” every time you want to remove that USB drive. You’re going to be moving it around a lot, Ejecting every time gets old fast. Microsoft was smart and disabled delayed writes on Vista/7/8/10 by default… which is why you don’t need to Eject drives from those newer OSs. So, seriously, just disable it on your XP machine as well.
Be sure you finish up your installation with a reboot. It’s XP, it never hurts.
At this point, you should have a functional XP machine, c2008, so you have about seven years worth of updates to install. Fortunately, there is an easy way. Take your 16gb flash drive, plug it back into the other computer – the one with an internet connection
Scroll down a bit to the Windows XP Unofficial SP4 Download Locations and download it from Google Drive. Click the Google Drive link, locate the WindowsXP-USP4-v[whatever the current version is]-x86-ENU.exe file, right click on it, and choose download. It’s about 1gb, it will take a while.
Once it’s done, take that flash drive back to your time machine computer and get to installing. Remember, XP only supports USB 2.0 at best, so installation is going to take a while!
I’m going to do that now.
Part 3: Tech 2 bin file and software download
While Unofficial XP SP4 is installing, let’s go ahead and talk about Tech 2 and Saab specialty software.
You’re going to need it, and the downloads total around 5gb so it will take a while.
Tech 2 software download:
All in one: https://1drv.ms/f/s!AuMFf5LIARiPhoFnPRPppeYFz_RnTw  (unknown security)
Tis2000: http://www.obdii365.com/wholesale/tis2000-cd-and-usb-key-for-gm-tech2-gm-car-model.html (tested)
32MB PC Card with all GM software: http://www.obdii365.com/wholesale/32mb-card-for-gm-tech2gmopelsaabisuzuholden-1606.html (tested)
In that onedrive link you’ll find two folders. The first is PDFs, which contains a bunch of stuff you don’t care about. The second is Software, and you care very, very much about the contents of this folder. Click on it. I know you want to.
Inside the Software folder are some more folders, so let’s talk about them:
BIN Files: Contains a bunch of PCMCIA card images. This is the software that makes Tech 2 work. Each BIN file represents one PCMCIA card’s worth of data. Assuming you were smart and ordered a Saab-English 148 card with your Tech 2, you can safely ignore the files in this folder. If you did not, you will want to download the Saab 148.bin file. Hang onto it, we’ll circle back to these BIN files later. (In case anyone is curious, PCMCIA BIN files have nothing to do with bins commonly referred to when tuning cars – don’t get confused) You can almost certainly safely ignore the rest of the contents of this folder.
GlobalTIS: Contains a gigantic ZIP file which includes GlobalTIS and the crack for it. You need this. Start downloading.
TIS2000: Contains a medium sized 7zip file which includes TIS2000 and the crack for it. You need this. Start downloading.
Miscellaneous: Contains two subfolders. Tech 2 Card Writer is a cool little utility that allows you to write the BIN files we discussed earlier to a PCMCIA card installed in your Tech 2. This is great because it means the XP computer you’re building right this second doesn’t need a PCMCIA card slot of its own. ALL WIN. Download the card_writer.exe file from this subfolder. Memory Card Explorer contains a utility that lets you look around on PCMCIA cards. This is probably not useful for most people. You can download it, but you probably won’t use it. Do note that nobody bothered to ZIP up the Memory Card Explorer, so you need to download that entire folder by right clicking it and choosing download. Don’t try to download all those files inidividually. That sounds awful.
User Guides: Man, if people read the manuals we probably wouldn’t need this thread, so don’t start now. Ignore this folder.
WIS: Contains another huge file that is the Saab Workshop Information System installer. This version has been modified so it will run properly on later operating systems. You want this, start downloading.
Depending on your internet connection and Microsoft’s bandwidth generosity, these downloads could take a while. For the big ones – GlobalTIS and WIS – I would highly recommend downloading one at a time for maximum throughput. It really sucks when you have a slow download and something interrupts you…
Download all this stuff to your newer/faster computer – don’t put it straight on the flash drive. We need to do some things to these files before moving them over to Old Faithful.
Part 4: How to install & crack TIS2000 for Tech2 use
If you’re at this point, you should have:
1.A old, awful computer running Windows XP SP3, fully patched and up to date using Unofficial SP4, with potentially a bare minimum of device drivers
2.Your new, wonderful computer with bunch of downloads from onedrive
First up, let’s get TIS2000 running.
To get that going, you need to download and install 7zip. Visit this site:
http://www.7-zip.org/download.html
and download the appropriate version of 7zip for the OS on your newer, internet connected computer. Once it’s downloaded, go ahead and install 7zip.
Once 7zip is installed, find 7zip File Manager on your Start menu and run it. By default, it will open up your Downloads directory, which is probably where you’ve put THE “TIS 2000 Dongle Crack.7z” file you downloaded earlier. If you did not put it in your Downloads directory, you’ll need to go find it!
Once you’ve located “TIS 2000 Dongle Crack.7z” in the 7zip File Manager, double click on it. It will open and a display a folder called “TIS2000 Dongle Crack!” You get to double click on that, too! In there you will find several folders and files.
Plug in your trusty 16gb flash drive. Make a folder on that flash drive called TIS2000, then navigate into your new TIS2000 folder.
Now, in 7zip File Manager select all six items and drag them into the TIS2000 folder you just made on your flash drive. It may take quite some time to finish EVEN AFTER THE STATUS WINDOW DISAPPEARS, be patient and wait for Windows to finish.
Once it’s done, take the flash drive from new computer to old.
We’re going to install TIS2000.
1.Open up the flash drive on the old computer
2.Double click on the TIS2000 folder
3.Double click on the Saab TIS2000 2.2008 folder
4.Double click on the cosids folder
5.Double click on SETUP.EXE (there are several files named setup, or similar to setup – you need SETUP.EXE, it has the icon of a car connected to a Tech 2 which, you know, makes sense)
6.The installer will ask a few questions. CHOOSE ALL THE DEFAULTS. CHANGE NOTHING.
The installer takes a while. Be patient.
After TIS2000 is installed, you need to install the dongle emulator.
1.Open up the flash drive on the old computer
2.Double click on the TIS2000 folder
3.Double click on the Drivers folder
4.Double click on DDINST32.EXE
5.Choose Express installation
6.When it’s done, choose Exit
Now we need to install the crack.
1.Click on the Start Menu
2.Choose Run
3.In the Run dialog box, type c:\program files\cosids\bin and press OK
4.Open up the flash drive on the old computer
5.Drag id.dll from the flash drive window to the c:\program files\cosids\bin window. Windows will ask if you want to replace the existing file. Choose YES.
6.Drag SCAControlUI.exe from the flash drive window to the c:\program files\cosids\bin window. Windows will ask if you want to replace the existing file. Choose YES.
7.Close the c:\program files\cosids\bin window.
8.Click on the Start Menu
9.Choose Run
10.In the Run dialog box type:c:\windows\system32 and press OK
11.Choose Show the contents of this folder
12.Open up the flash drive on the old computer
13.Double click on the Dongle folder
14.Drag each of the files – GOODKEY.SSI and SSIPDDP.SYS – from the Dongle folder to the c:\windows\system32 folder. MAKE SURE YOU DRAG THESE FILES INTO C:\WINDOWS\SYSTEM32 AND NOT ONE OF THE OTHER SUBFOLDERS IN THERE BY ACCIDENT.
You have successfully installed TIS2000.
Part 5: How to install GobalTIS and crack it for use
Okay, now let’s get going with GlobalTIS.
There are more hoops to jump through here, so get ready.
The first thing you need to do is locate the GlobalTIS.zip you downloaded previously from onedrive. We can go ahead an unzip it on the newer computer:
1.Right click on the GlobalTIS.zip file
2.Choose Extract or Extract All (depends on which version of Windows you’re using)
3.Change nothing, just click Extract
When it’s done, a new window will open. This is a new folder called GlobalTIS that contains all the files in GlobalTIS.zip.
First, locate Saab Global TIS 2010-1.iso – This is an “ISO image” of the GlobalTIS install DVD. What we do here depends on what operating system your newer computer is.
If you are using Windows Vista you’re insane. But, if you’ve got that or Windows 7 your easy option is to stick a blank DVD in your drive write that ISO out to a physical disk.
If you are using Windows 8 or Windows 10, you can actually view the content of that ISO without burning it out to a physical disk. One you have access to the content, you can copy them to your 16gb flash drive and install from there. I think – I’ve not tried this, but I will give it a go in the near future. Windows 8 and Windows 10 still have the option to burn ISOs to physical media.
Even if you’re using Windows Vista or 7, you can install software to view the contents. and install the Virtual CD-ROM Control Panel.
Now, all that said – because I do not have firsthand experience installing GlobalTIS from a flash drive and because there are a lot of variables in making that happen, we’re going to proceed by burning that ISO image to a physical DVD… that will be the same experience across all PCs. So, if you know what you’re doing with mounting ISOs and whatnot, go for it. The rest of the class is going to make a future plastic frisbee.
1.Put a blank DVD in your DVD drive (if Windows pops up with an Autoplay window, just “x” out of it)
2.Locate Saab Global TIS 2010-1.iso in the GlobalTIS folder we made a minute ago
3.Right click on Saab Global TIS 2010-1.iso
4.Select Burn Disc Image
5.After the Windows Disc Image Burner loads, click Burn
This process will take a little while, so be patient.
While it’s burning, we can do some other things!
Click on your Start Menu and go find 7-zip File Manager from earlier. Click on it. By default, it will open up your Downloads directory, which is probably where you’ve put the “GlobalTIS.zip” file, *and* where we made the GlobalTIS folder just a minute ago. If you did not put it in your Downloads directory, you’ll need to go find it! In 7-Zip File Manager, double click on the GlobalTIS FOLDER (NOT the GlobalTIS.zip file). Double click on SAAB GLOBALTIS KEYGEN.rar. Inside are two files – KeyGen.bat and KeyGen.class.
1.Plug your 16gb flash back into the newer computer if it’s not already.
2.Open it up, and make a new folder called keygen.
3.Drag the two files – KeyGen.bat and KeyGen.class – from the 7-zip File Manager to the keygen folder you just made on the flash drive
4.Close 7-zip File Manage
Finally, copy the Java 6 for global tis.exe file from your GlobalTIS folder to the flash drive.
Now, we have one last prepatory thing to do. and get yourself a FREE DOWNLOAD of Foxit PDF Reader. Save it to the flash drive.
You should now have:
1.A DVD with the GlobalTIS program
2.A flash drive with a folder called keygen that has two files in it
3.Java 6 for global tis.exe on your flash drive
4.FoxitReader83_enu_Setup_Prom.exe on your flash drive
Take the flash drive from the computer, and return it that old busted XP rig you got on Ebay.
1.Open up the flash drive
2.Double click on Java 6 for global tis.exe
3.Run through the Java installer – it will only take a second.
Note the last screen after Java installs: Java will periodically check for updates. This is one of those reasons you don’t want this computer connected to the internet – you do NOT want Java updating. It’s important.
After Java has installed, let’s run Internet Explorer one time to be sure it works. Click on the Start Menu, click on Internet. You may be prompted to answer some questions – I encourage you to answer those questions and NOT to click “Ask me later.” Just get it over with.
Everything look good? Great.
Now we need to install the PDF viewer software. Open up the flash drive and double click on FoxitReader83_enu_Setup_Prom.exe to start the installation. Don’t change any of the options, just click Next through the entire process. When it’s done, click Finish and Foxit will open. Choose Not Now, exit Foxit.
Place the DVD you just burned into the XP machine’s drive. Autoplay should take over – after a few seconds you will get the InstallAnywhere window and a moving status bar. If you do not, you jumped ahead and turned off Autorun, shame on you. You’re either with me or against me.
Run through the GlobalTIS installer, which primarily consists of clicking OK and Next a few times. Do not change the default install path, don’t change the installation type, don’t change the host, don’t change ports, don’t configure a mail server, don’t add a proxy. OK and Next is all you do UNTIL you get to the Dealer Code. Type in a 6-digit number of your choosing. REMEMBER THE SIX DIGIT NUMBER. I used 599599!
GlobalTIS takes an eternity to install, be patient. Lots and lots of tiny files.
If you’re like me, you probably disappeared a 22oz of Drake’s while you waited for GlobalTIS to install, so things may get a little rough. Stick with it. You can do anything you put your mind to.
At long last you get to click Done, and GlobalTIS is installed.
Now we need to crack GlobalTIS.
First, locate the GlobalTIS icon on your desktop. Double click on it. Internet Explorer will load, and it will probably take a long time before anything happens. Be patient, let it sit there.
IE will eventually respond with a popup advising you information sent over the internet isn’t secure. That’s cool, make sure the “Don’t show this…” box is checked and click Yes.
Look at the top of the screen, and note the warning “Intranet settings are turned off by default….” We need to turn them back on, so click on the banner where it says “Click for options” and choose Enable Intranet Settings. You will get a warning dialog, click Yes.
You will be returned to the GlobalTIS registration page. You need to pay attention here:
1.Click Edit Dealership Data
2.Fill out EVERYTHING. The data is going nowhere, use whatever information you like, BUT note the Dealership ID. Use the same ID you provided earlier. If you’re me, that’d be 599599.
3.Click Save when you’re done.
4.You will be notified the dealer data has been stored, click OK.
5.Don’t change the user count, don’t change the brand subscription
6.Click Email/Fax Registration
7.IE will pop up asking for a place to save a file. The default is My Documents. Just leave it, click Save.
8.Click Close to dismiss the download dialog
9.In the GlobalTIS window, click the Logout button.
1O.Confirm you wish to log out.
11.Close Internet Explorer
Next we need to get some information.
1.Click on the Start menu
2.Click on My Documents
3.Double click on the file called “registration” – this is the file GlobalTIS made just a minute ago
4.Foxit will open and display a PDF with a GM Europe Header.
5.Scroll to the bottom and find the Request ID and the Software Key
6.Click on the Start menu
7.Click on All Programs
8.Click on Accessories
9.Click on Notepad
10.In the Foxit window, select the 64-character Software key.
11.Right click on your selection and choose Copy
12.Click on the Notepad window.
13.Click Edit->Paste
14.Your 64-character Software Key will appear in Notepad.
15.Edit that key so it’s all on one line, and remove all the hyphens.
Now, things are about to get real. PAY ATTENTION.
1.Open up your flash drive, and double click on the keygen folder we made all that time ago. Be sure there are still two files in there – KeyGen.bat and KeyGen.class.
2.Click on the Start menu
3.Click Run
4.Type C:\Program Files\GlobalTIS\tomcat\webapps\tis2web\WEB-INF\lib
5.Click OK
6.Drag KeyGen.bat and KeyGen.class from your flash drive into this window
7.Close the flash drive window. Leave the other window – C:\Program Files\GlobalTIS\tomcat\webapps\tis2web\WEB-INF\lib, titled “lib” – open
8.Click on the Start menu
9.Click All Programs
10.Click Acessories
11.Click Command Prompt
12.Type cd\Program Files\GlobalTIS\tomcat\webapps\tis2web\WEB-INF\lib and press Enter
13.Find your Notepad window, the one where we edited that 64-character Software Key
14.Select that entire 64-character key – BE SURE YOU SELECT THE ONLY THE KEY, NO SPACES OR RETURNS OR ANYTHING ELSE
15.Click Edit->Copy
16.Return to your Command Prompt window
17.Type:keygen
DO NOT PRESS ENTER
1.Press the space bar ONCE
2.In the top left corner of the Command Prompt window, click on the little command prompt icon
3.Choose Edit
4.Choose Paste
5.The 64-character software key should appear on the command line
6.WITHOUT PRESS ENTER, just start typing >> key.txt
Now, finally, press Enter More or less nothing should happen. Type exit and press Enter
Your command prompt window will close. You can also close Notepad. You do not need to save the file in Notepad. We’re done with that.
Now, let’s get back to that registration.
1.Find the C:\Program Files\GlobalTIS\tomcat\webapps\tis2web\WEB-INF\lib window, titled “lib” that we left open earlier. Look around in there for a text document called key and double click on it. There should be a short character string (your Subscriber ID), another 64-character string (your License Key), and “From Russia with Love.”
2.Find the GlobalTIS icon on your desktop again, and double click on it. It should load much faster this time!
3.Scroll to the bottom and locate Section 6, the Subscriber ID and License Key boxes.
4.Copy and paste the strings from key.txt into the GlobalTIS registration window.
5.Scroll down further in the GlobalTIS registration window and click Register License Key
6.READ THE WARNING – it’s going to take some time – then press OK.
7.HAHA – fooled you! It’s done instantly. Press the logout button.
Close all the windows. ALL OF THEM.
You are done. GlobalTIS is installed!
That’s all for Car Diagnostic Tool GM Tech2 software installation.
Hope this helps you out.

https://medium.com/@obd2scanner/how-to-install-tis2000-and-globaltis-for-gm-tech2-scanner-895cec19cbc0
Friday, October 27, 2017

GM TECH2 clone on Corvettes C5 reviews – works like a real one

I have a great knock off GM Tech2, it works great on GM Corvettes!!! I got mine from my good buddy who just bought it. I just sent my money via Paypal to the site to get their Tech 2 unit.. It was a better deal than the other site because The company where I purchased my Tech 2 has been in business for 6 years.
Here is the link to the site that sell the Vetronix units, I still need to buy a case ….I have mine in the box it came in:
http://www.obd2tool.com/goods-1568-GM+Tech2+GM+Scanner+-CANdi++TIS+(Works+for+GMSAABOPELSUZUKIISUZUHolden).html
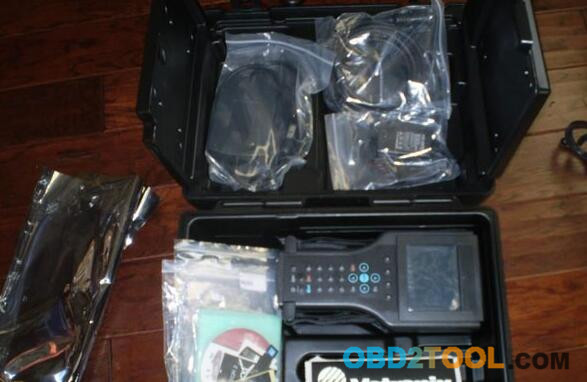
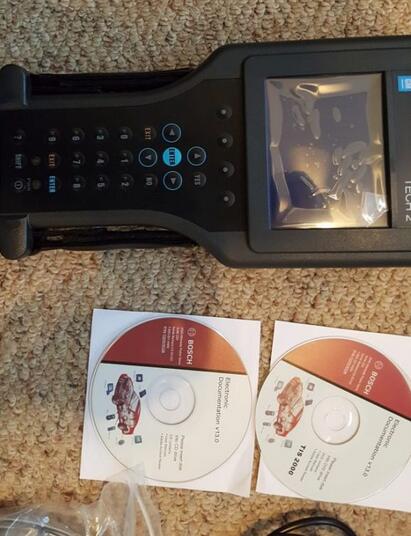
I took several pictures of mine, quality of the cables and connectors and even the discs it comes with. you don’t need to download the manual , it’s on the data disk
The unit itself ….and the software CD’s … pretty good knockoffs, I think it’s like the others stated , it is a TECH II
TECH2-1
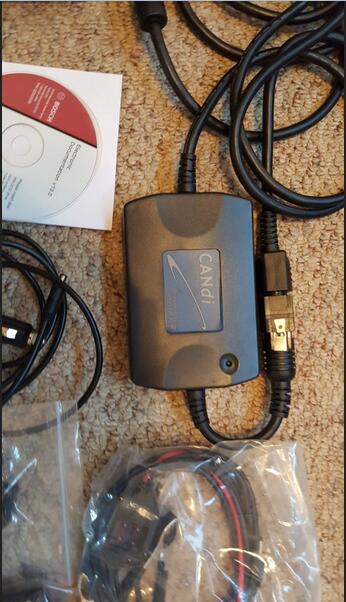
and here is the CANDI unit and cables ….. pretty high quality stuff along with one of the 12 volt adapters
TECH2-2
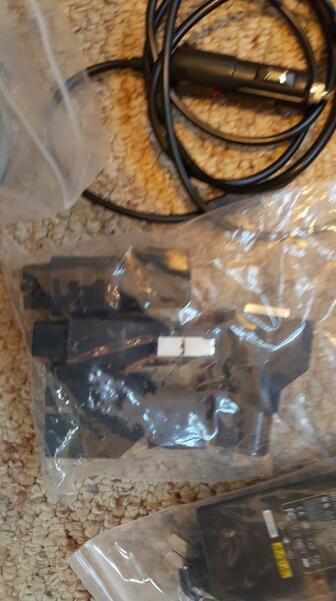
And another shot of the data disks .. as you can see the labels were not made with an INK JET printer … and the a second cigarette lighter 12 volt power cable
TECH2-3
and ….every cable and cable end you would need to connect to any GM car.
TECH2-4
but wait, if you act today there is more …..
TECH2-5
Personally, I can verify that they look to be the real CDs that come with the GM Tech 2 units.
As for the GM Tech2 update:
Not sure why everybody is worrying about UPDATING” it as it is my understanding that Professional Diagnostic Tool GM put its last update for this thing way back in 2011 .
Anything you need or want to do with this thing can be done as it sits with no need to update ……..everything listed in JT’s post about updating is already in mine ….. at least for my 2011 Corvette LS3
As far as updates for my car … I am a firm believer , just like computer BIOS , if it is not broken , don’t try and fix it . My Chevrolet dealer stated that I had all the updates installed already
So far I have use it as a diagnostic tool /TCM reset tool , accessed the ABS and BCM modules and to turn on and off certain toggles etc that only a tech two can access $329.00 gamble, we picked one that we thought we could trust and used the best credit card as far as buyer protection and doubled down by also using PAYPAL then hoped for the best … in my case it worked out for what I wanted it to do.
Another good story to my friend, his software is out of date, but he can get into most everything that he have tried to so far on newer cars. He uses the “Global OBD II” under the VIN info page. He has not tried to program anything this way, but He has been able to access all the different modules on the CAN buss.
But I would suggest him update by getting the newest PC card from one of the online sellers, 2011 is the last update that GM did on the Tech 2 for Corvettes, so the newer units being sold all have the latest software already loaded on the GM card. Below is the latest card for GM for the Tech 2..From their site…
32MB Card for GM TECH2 (GM OPEL SAAB ISUZU SUZUKI & Holden)
Their description: Works with GM TECH2, contain the latest software for GM TECH2. It has six kinds of software, SAAB, OPEL, GM, ISUZU, Suzuki and Holden. Customers can choose one type of software to be loaded to this 32MB Card.
TECH2-6
What about other GM models?
It works for more than Corvettes… I am sure there are a lot of repair shops that are using a knock off . Several users over on C5 have bought them and reports are positive from what I saw…
Failure:
1.didn’t work on certain GM trucks
2.Also if you do a search of people that have actually purchased a Tech 2 recently, you will find that there are very few that aren’t totally pleased with their purchase..
In my option, the TECH II from obd2tool.com is great you are limited to using it on certain GM cars .
Overall, This thing is a priceless tool as far as I am concerned. My $250.00 device does everything that the $5,000 device does …things that make you go ” Hmmmmm”.

http://cheapobd2tool.com/2017/10/19/gm-tech2-clone-on-corvettes-c5-reviews-works-like-a-real-one/

Tuesday, September 6, 2016

The GM Tech 2 tool has more powerful and functions

Have you ever search for GM diagnostic tools? And which kinds of auto diagnostic tool is special for your GM vehicles? Here OBD2TOOL will share you two kinds of professional GM diagnostic tools for your reference.

The original GM Tech 2 was made by Hewlett Packard and used Vetronix software.  Vetronix purchased the Tech 2 manufacturing rights from HP.  In 2003, Vetronix was acquired by ETAS, a supplier of standardized development and diagnostic tools for electronic control units. In 2006, the Vetronix Aftermarket division merged with Bosch Automotive Aftermarket, responsible for supply, sales and logistics of automotive parts for service of the vehicle.  So today the Tech 2 is ‘made’ by Bosch.

The tech2 and CANDI module worked perfect to diagnose my bad HVAC air door actuator. I have an older HP laptop running win7 and it has a serial port so has no problem to install software. Time will tell how this works out.

the GM Tech 2 Scanner has more powerful and functions. Authentic software for GM in the Tech 2 Flash means the most comprehensive diagnostic software available for latest model vehicles for GM. And the removable hardware modules provide insurance against scan tool obsolescence.

The GM Tech 2 tool is ability to view the status of vehicle diagnostic tests as they run and to capture stored Freeze Frame and Failure Record for Tech 2 Flash . In addition , The authentic GM 1992-current year software will provide full bi-directional control when performing power train, chassis, and body diagnostics.

Wednesday, July 27, 2016

GM tech 2 and USB Backlink two at obd2tool.com


OBD2TOOL source an entire range of auto scanners for diagnosing global-known automobiles, including Japanese cars and trucks, American vehicles, German cars and likewise other European and Asian autos. We've got some forms of Major duty truck diagnostic device for common truck diagnostic. below is definitely the element description of GM tech two and USB Website link 2.

The tech ii scanner diagnostic instrument has become close to due to the fact the 1980's. It's been the flagship diagnostic tool and programing unit for several a lot of many years. it carries on to become a worthwhile component of your GM dealership stable because its quick, productive, and functions terrific! Given that other diagnostic plans which might be, for your most aspect, only economically practical for GM dealership experts to utilize (like Tech2WIN) the expense of Tech two has appear down a bit over many years earlier.

It can be simply because the Tech two has been about for as long as it's got that it is this type of copied and cloned unit. Couple this on the advent of Ebay, allowing for rip-off artists environment huge to provide cloned duplicates, the glut of excellent individuals who would like to function on their own very own cars and trucks and want a dealership stage software, and professionals who want to up grade over and above a bit of crap generic scan tool for GM spouse and children vehicles, and that which you are still left with is actually a global market wherever 95% of your stuff becoming marketed here is a clone, or just a person else's headache!

While using the USB Link two, there are actually no messy cables to untangle or get from the way together with the bluetooth purpose. Quick portability improves adaptability for the technician. The USB Url 2 may be used with desktop Computer system or laptop computer.

This can be the direct replacement on the 1st generation USB Website link portion #125032. This is certainly created by Nexiq Systems and is also a PC-to-vehicle interface appropriate with numerous software program purposes, reducing your investment decision in many brand-specific diagnostic interfaces. This USB Website link 2 is Course one Bluetooth , and gives as much as one hundred toes of wi-fi independence. With this particular flexible configuration the consumer is authorized wired or wireless connectivity. The NEXIQ USB Link 2 is appropriate with programs that diagnose engines, transmissions, Stomach muscles, instrument panels plus much more.
http://obd2trade.com/2016/07/27/usb-link-2-bluetooth-edition-installation-and-setup-manual/