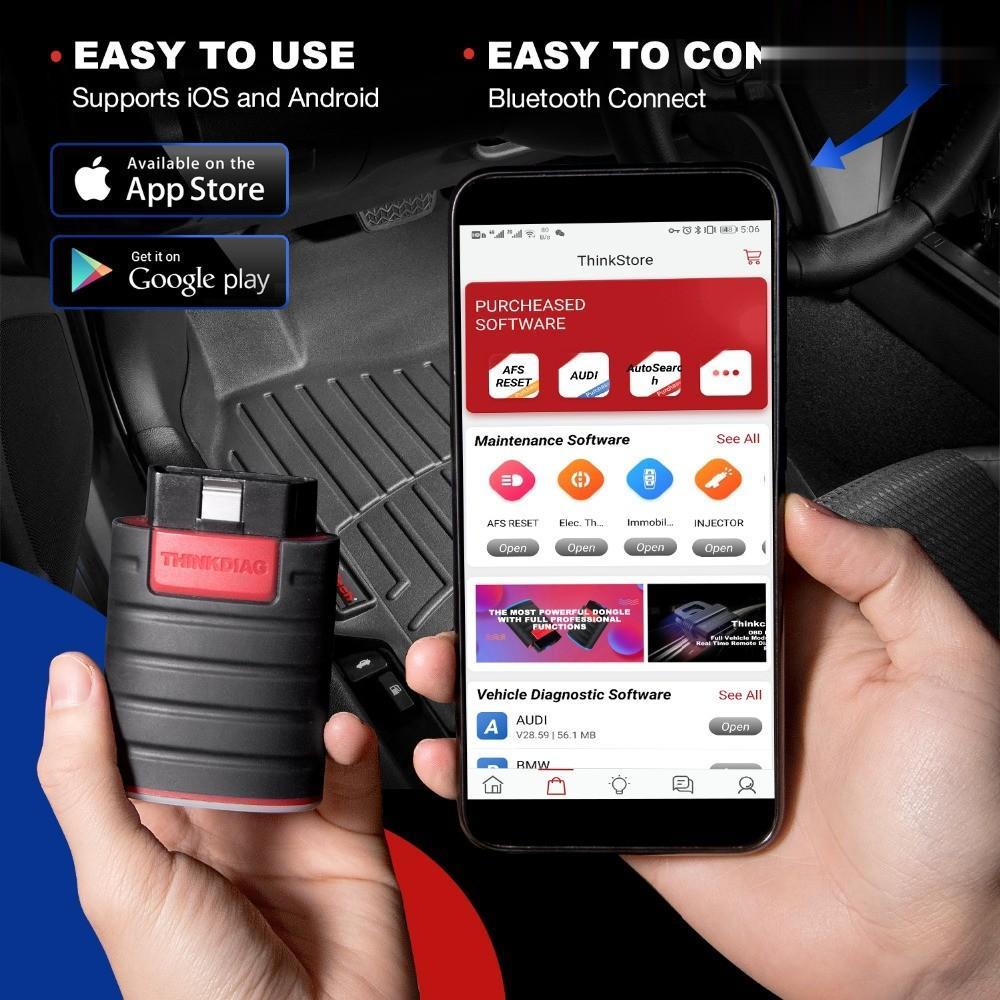
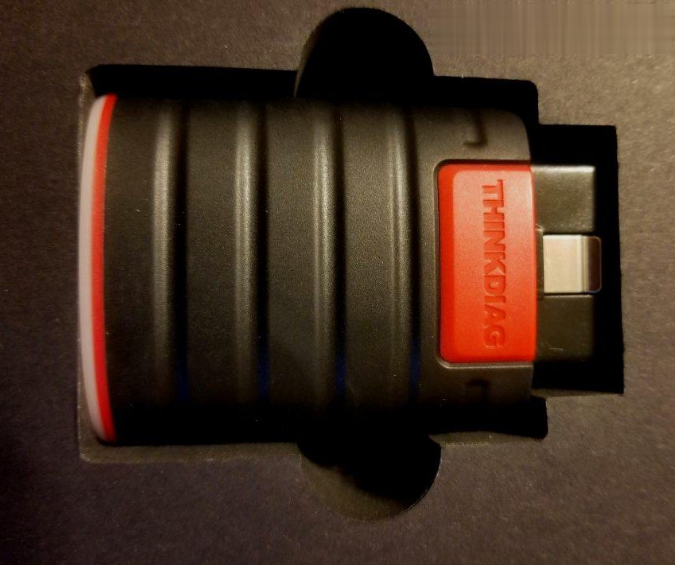
Launch THINKDIAG car OBD2 scanner, with only 0.1kg in weight,
provides full OE level diagnostic functions. Plug ThinkDiag into the OBD
port, open
Launch Thinkdiag App on the smartphone, then you can start your vehicle diagnosis. Check it out.
 Suitable Users:
Car owners
DIYers
Mechanics
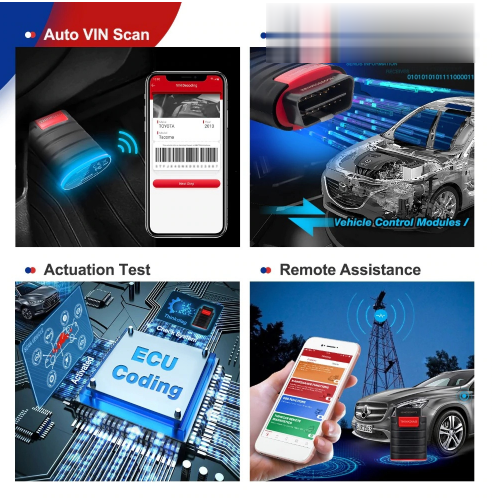
Features:
Supports car full system diagnosis: Airbag, SRS, Engine, Gearbox, AT and more.
Covers up to 115 major vehicle manufacturers in the market.
Performs 15 kinds of reset service.
OBDII, DEMO and 1 car Software free (You can select any 1 of the
manufacturer software in ThinkStore and you can use them free for one
year).
Reads car VIN in one second.
Able to communicate with ECU, doing ECU coding for your car.
Supports action test functions, which a professional diagnostic tool often has.
Price: only about US$109.00

If you’ve purchased it already, you should register and activate this
device first. A step-to-step guide on THINKDIAG APP registration and
activation.
Step 1:
Download THINKDIAG software (ThinkDiag) via Google Play or the APP Store on your phone, install and open it.


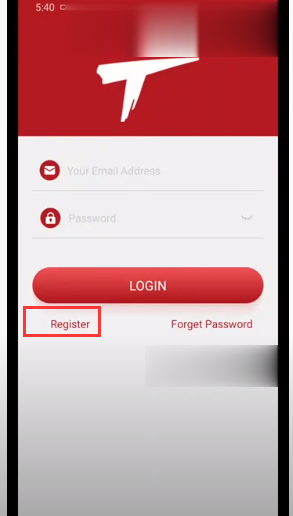
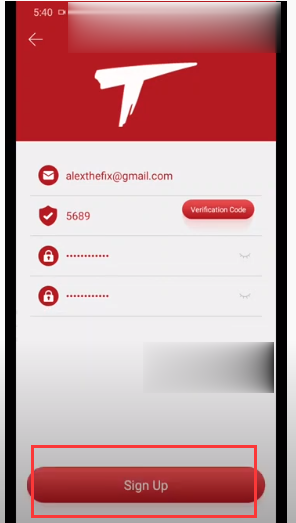
Step 2:
Go to the registration interface, fill out necessary information and tap Sign Up.


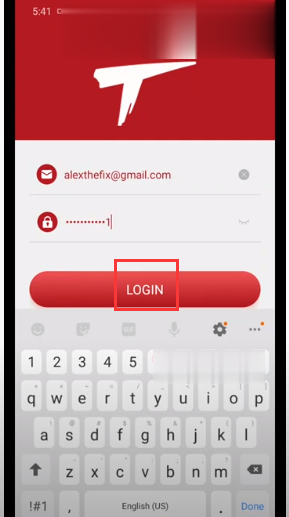
Step 3:
Return to previous screen and enter your info. Then tap LOGIN.

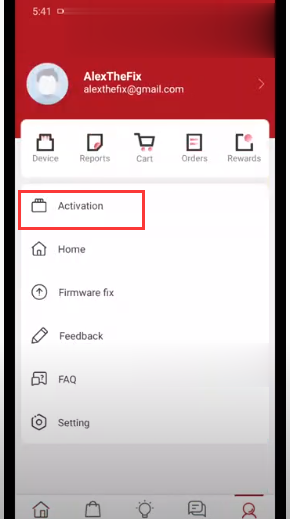
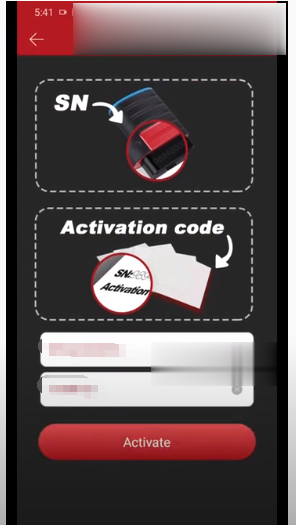
Step 4:
Select Activation, where you should enter the serial number and activation code of your Thinkdiag. Then tap Activate.


The registration and activation process is done.
Simple Steps to use Thinkdiag OBD2:
Step 1. Insert THINKDIAG into the vehicle’s OBD II port.
Step 2. Connect THINKDIAG with smartphones via Bluetooth.
Step 3. THINKDIAG decodes VIN automatically.
Step 4. Start communicating with ECU, scanning fault codes.
Step 5. Select the function to use according to your needs.
Step 6. Generate a diagnostic report.
Reviews:
There’s a user who loves its some most outstanding features. Here’s his sharing about his experience with Launch THINKDIAG:
My favorite feature of this tool is its small size and convenience to
use. I can carry my Thinkdiag in my pocket, plug it in a car, then it
will run a report, which I can check at my convenience. Two years ago, I
bought my daughter a car. It ran well and looked good, no CEL, so I
decided to buy it. A year later, at emissions inspection time, it
failed. The actual LED for the CEL had been removed, the gauge cluster
had been changed and the odometer was incorrect. If I had a ThinkDiag
tool that day, I’d have found out the problem and reported the seller
for fraud. Besides, the product comes with a free subscription for two
manufacturer software packages for a year (during the discountable
period). If you need more, the cost is $39.95 per year. The subscription
gives you access to all diagnostic functions, including the ability to
read & clear codes, access live data streaming, perform actuation
tests and use all service functions of the manufacturer’s own software.


Now here’s my second-most favorite function. That is the diagnostic
report can be downloaded and saved as PDF, which you can share to others
and let them view the data from your car directly.
What’s more, it can actuate the ABS computer and perform an ABS brake flush/bleed without taking my car to the dealer.
He also listed the supported functions and diagnostic systems with a subscription to Nissan software:
Functions: Maintenance Functions, Remote Diagnostics, Special
Function Actuation Tests, Read Fault Codes, Clear Fault Codes, Read Data
Stream
Diagnostic systems: Accelerator Pedal Position Sensor, Active Engine
Mounts, Active Noise Cancellation, Blind Spot Warning, Body Control
Module, Combined Charging System, Controller Area Network Gateway,
Electric / Hybrid Vehicle Systems, Electric Motor Condition Monitoring,
Steering Column Cont Module and many more.
Some other reviews collected:
From Acadia Tom:
That it does a deep dive into all of the separate systems on the
Acadia. It’s also a bidirectional control which gives ability to raise
and lower windows, mirrors and gobs of other devices from thw phone. It
works great in determining if a switch is broken.
The disadvantage is that some functions are add-ons, such as marrying
new keys and fobs, ABS bleed, maintenance resets, etc. But buying the
function you need is cheaper. Overall, it’s a very useful tool.
From Jay:
It looks like a pretty decent and useful device. And not overly expensive even though certain functions are sold piecemeal.
From Roy:
This is a great tool for the DIY automatic mechanics that need to
troubleshoot and isolate fault codes. You get one free vehicle software,
then the license for that software needs to be renewed each year for a
subscription price. Considering the price of other scan tools, it’s very
well worth the money.
From Bearsy72:
Used it to on a 2013 Chevy Sonic to test the cooling fans low and
high speeds. It was easy to use and worked great! I like that they give
you two brands for free for the first year. I chose GM and Ford.
From J&G:
Pros for THNKDIAG:
The price is cheap.
I was able to see data that my cheaper scanner couldn’t do.
Performs true bi-directional testing!
Downloading the app and setup was very easy.
Connecting to the device from my smartphone via Bluetooth and was easy too.
Cons:
You get two makes for free for one year then you have to subscribe.
This thing is not as fast as the pro scanners. This is not an issue for me as I am not doing this for a living.
When I first started using it the bluetooth connection dropped several
times. But after several attempts I had no further issues with it. I was
sitting in the driver’s seat very close to the ODB port so I’m not sure
what the issue was.