Monday, May 4, 2020

Free Download ISTA+ Voltage Control V3

Hi guys,
Node made a small utility suite which allows manual control of voltages which Ediabas sees from the interface such as OBD or CAN. It also includes additional ISTA+ support so it should work with ISTA as well. It’s not dependent on INPA or ISTA versions and should work with any version of INPA, ISTA+ and others as well as it integrates between ediabas and cable driver and is completely transparent to high level software. Additional support for ISTA+ should work with any modern version as long as internal code will not change much. My aim is to make it so all ABLs and other procedures work flawlessly.
The link:
V2:
https://mega.nz/#!AF4TSJqI!NKyh6SWwFIL5eVKd_rSCKYN0NtOO_Br4HyTT0T3yv30
V3:
https://mega.nz/#F!9QQR0YTD!Ex7SqBpwim8_UXb_Z3OkdQ
Installation instructions:1. Go to Ediabas folder. For INPA its normally C:\Ediabas\Bin, for ISTA+ its in Ediabas\Bin folder with ISTA+ directory.
1. If you are using STD:OBD rename existing obd32.dll to obd32.ebas.dll. Users of other cable types rename respective dll (for example STD:CAN users rename can32.dll to can32.ebas.dll).
2. Extract the downloaded file.
3. Copy included obd32.dll to Ediabas\Bin. For other cable types rename it to respective name first (for example can32.dll).
4. For ISTA+ only: copy included NodeISTAVoltageControl.dll to Ediabas\Bin folder within ISTA+ installation.
5. For ISTA+ v4.05 (and above) only:
a) replace existing IstaOperation.exe within ISTA+’s TesterGUI\Bin\Release folder by included one (from respective folder based on ISTA+ version).
b) run included AllowFakeISTAOperation.reg file (choose x86 or x64 depending on your system being 32 or 64 bit respectively).
To manually control the voltage start included NodeEdiabasVoltageControl.exe application. This application can be placed in a different folder if wanted. Voltage can be adjusted by moving sliders or switched off using check boxes. Unchecking check box has the same effect as moving slider to 0V.
New features:
UPDATE V2.0:Version 2.0 of this tool has been released.
New features:
1. It now checks the actual interface type setting in ISTA during runtime, so if you switch from Ediabas to ICOM it will stop interfering and resume operation as soon as interface type is set back to Ediabas.
2. It now supports K+DCAN cables which have an ability to detect clamp states (probably most higher quality cables). To use this feature control application should be closed. It will then read actual clamp states and update ISTA voltage states accordingly without any manual actions required. Starting control application will switch the operation to manual control. Closing it will resume automatic recognition.
UPDATE V3.0:Version 3.0 of this tool has been released.
New features:
1. Control application can now be minimized.
2. Support for ISTA+ v4.05 (and hopefully above).
System requirements:
Visual Studio 2015 x86 runtime must be installed (same as required for last versions of ISTA+).
P.S. This voltage control utility is not designed to and will not influence voltages reported by ICOM.
P.P.S. This utility works without any issues with original ISTA+, standalone not necessary.
Test report:
Tested with K+DCAN on ISTA+ 4.03.31, screenshot attached, works great.
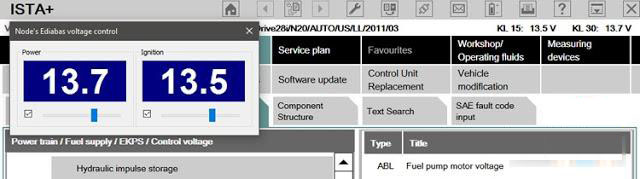
KDCAN-ISTA
Thanks Node.
loading..
Possible to use Older ISTA-D with new DB2.40

Is it possible to use an Older ISTA-D for example 4.15 with an newer DB 4.20 ?
its possible, you have to make a new key in registry:
[HKEY_LOCAL_MACHINE\SOFTWARE\WOW6432Node\BMWGroup\ISPI\Rheingold]
“BMW.Rheingold.Database.CheckAppVersion.Enabled”=”False”
and change product version in registry from your installed new standalone ICOM A2 ista:
[HKEY_LOCAL_MACHINE\SOFTWARE\WOW6432Node\BMWGroup\ISPI\ISTA]
“ProductVersion”=”4.15.16.17369″
loading..

Saturday, April 18, 2020

Launch X431 Reset Porsche Cayenne 2008 Steering Angle 0778 Trouble Code

This is a guide on how to use Launch X431 to reset steering angle for Porsche Cayenne 2008. Fault light illuminated on the instrument panel, using Porsche V21.70 or above. Enter headlamp control unit, there is a fault code: 0778 Steering angle sensor.Follow the DTC “0778 Steering angle sensor” description, perform the steering angle sensor adaptation. More post about Porsche repair,please check here:Porsche trouble repair.
Launch-X431-Reset-Porsche-Cayenne-2008-Steering-Angle-0778-Trouble-Code-1   1
Procedures:
1.Select steering angle reset version V10.44 or above
Launch-X431-Reset-Porsche-Cayenne-2008-Steering-Angle-0778-Trouble-Code-2
2.Select “Porsche” model, turn on the ignition switch, click OK to continue.
3.Select Cayenne (Up to 2010), then follow the prompts, turn the steering wheel 20 degree to the left and to the right, then back to the center, click OK to enter the reset, see Picture 4. After the successful reset, clear fault codes, everything is OK now. (Note: Before successful steering angle reset, “steering angle sensor” fault code is missing.
Launch-X431-Reset-Porsche-Cayenne-2008-Steering-Angle-0778-Trouble-Code-3
Launch-X431-Reset-Porsche-Cayenne-2008-Steering-Angle-0778-Trouble-Code-4
http://chinaobdtool.net/2020/03/25/launch-x431-reset-porsche-cayenne-2008-steering-angle-0778-trouble-code/

Hyundai Santafe 2014 Check BSD SystemBlind Spot Sensor Calibration by Autel4

This is a real customer feedback on Hyundai Santafe 2014 BSD system coding by Autel Maxisys. His Hyundai get fault code:C270354 and the dashboard show “Check BSD System” warning massage.And for more Hyundai repair,please check here:Hyundai Trouble Repair.
Hyundai-Check-BSD-SystemBlind-Spot-Sensor-Calibration-by-Autel-1
Hyundai-Check-BSD-SystemBlind-Spot-Sensor-Calibration-by-Autel-2
Procedures:
Connect Autel MaxiSys device (Autel MK908P recommended) to Hyundai OBD port and perform Auto Scan to find the trouble code show as below.
Hyundai-Check-BSD-SystemBlind-Spot-Sensor-Calibration-by-Autel-3
Back to menu to select “Special Function”
Hyundai-Check-BSD-SystemBlind-Spot-Sensor-Calibration-by-Autel-4
Select “BSD Radar Calibration”
Hyundai-Check-BSD-SystemBlind-Spot-Sensor-Calibration-by-Autel-5
This function set BSD Radar after replacement.
This calibration procedure will clear any ‘Missing Calibration’ DTCs which allows the Radar Sensors to go through the Self Alignment Procedure.
The Sensors continually self-align while the vehicle is driven.
It may take up 30 seconds.
It will not allow cancelation of the process.
Press [OK] button to continue
After the it will prompt you with massage “After IG OFF and IG ON”
Hyundai-Check-BSD-SystemBlind-Spot-Sensor-Calibration-by-Autel-6
Now BSD Radar Calibration coding has been completed.
Hyundai-Check-BSD-SystemBlind-Spot-Sensor-Calibration-by-Autel-7
Now you can back to read the trouble code again,there is no fault codes detected.
Hyundai-Check-BSD-SystemBlind-Spot-Sensor-Calibration-by-Autel-8

http://avdicommander.com/2020/03/25/hyundai-santafe-2014-check-bsd-systemblind-spot-sensor-calibration-by-autel4/

Friday, April 10, 2020

2016 Lexus GS Mileage Correction Tools Reviews

Make: 2016-2019 Lexus
Aim: Mileage Correction
Ideal machine to use and test reports:
1.  Dash has eeprom 93c86….very simple to calculate new mileage.
Most of the eeprom programmer are able to read that chip. Take it apart, desolder, read it and post on forum so someone can help you calculate. There is no tool that will do these by obd port.
2.  The safest way is by Hex editor and good programmer.
3.   Any eeprom programmer mate…even your Digiprog 3 can read this…it’s a simple 93c86 x 16 bits.
4.   Yanhua Digimaster 3 is able to correct the mileage with no problem.
yanhua-d3-2016-lexus-gs-mileage-correction
5.  Carprog Online Dashboard Odometer Programming for Lexus 93C86 successfully.

Tuesday, April 7, 2020

How to setup GM Tech2 Tis2000 patch

This article is on why need to crack Tis2000 software and how to crack TIS2000 for GM / Opel.
Why need to crack GM Tech2 Tis2000?
For GM Opel tis2000: use D630 computer, you can insert the USB dongle to use or use the patch to crack.
For Saab TIS2000: usually use IBM T30, for other computer you may get error message, need to insert the USB dongle, can’t use the patch to crack.
How to crack TIS2000 for GM / Opel:
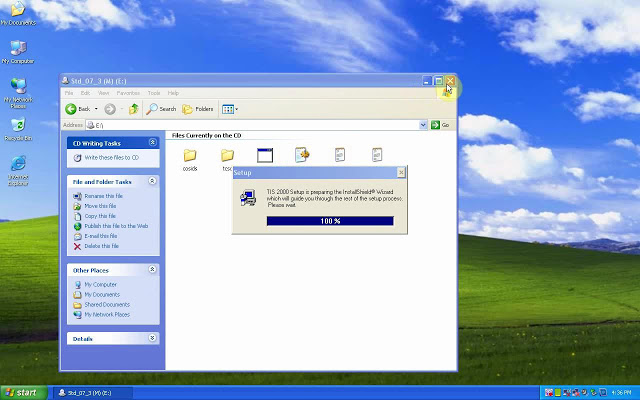
Part 1: Insert CD2.
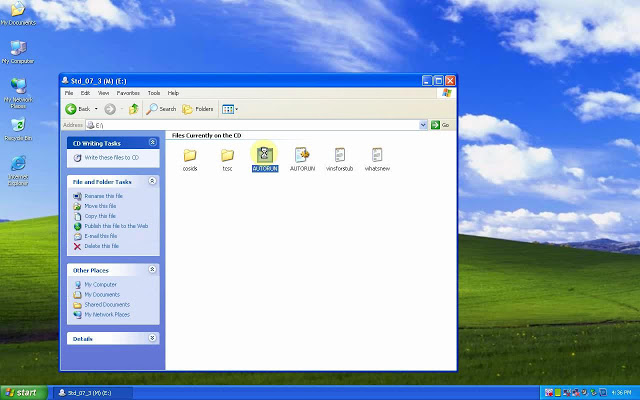
Insert TIS2000 CD into the computer, open DVD.
Open “AUTORUN” to setup.
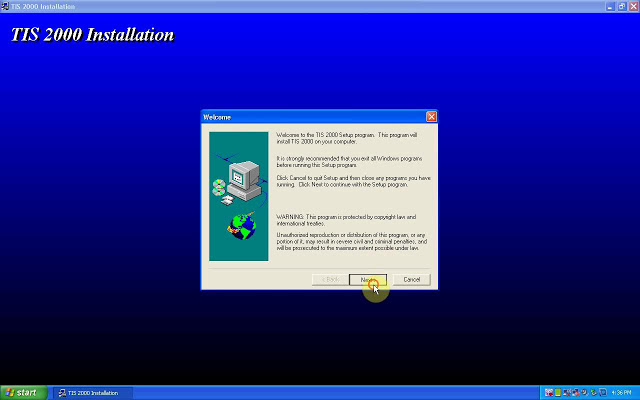
crack-tis2000-01
crack-tis2000-02
Next.
Select language.
Next;
COM1.
Standalone;
NAO;
crack-tis2000-03
crack-tis2000-04
crack-tis2000-05
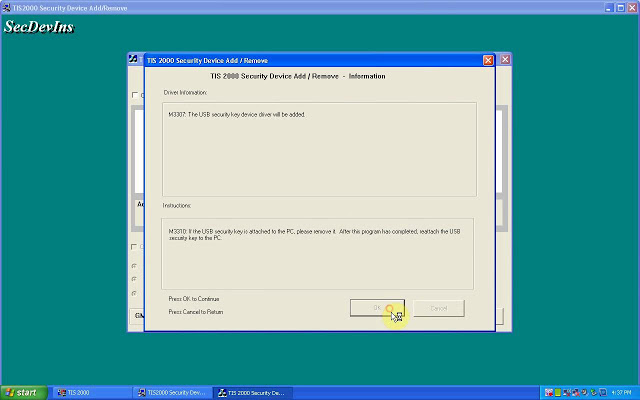
Tick “Click here to add”, then “Continue”.
crack-tis2000-06
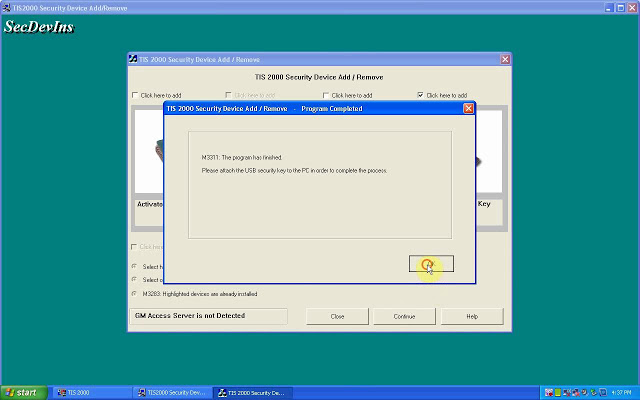
Click on “Ok”.
M3311: the program has finished.
Please attach the USB security key to the PC in order to complete the process.
crack-tis2000-07
crack-tis2000-08
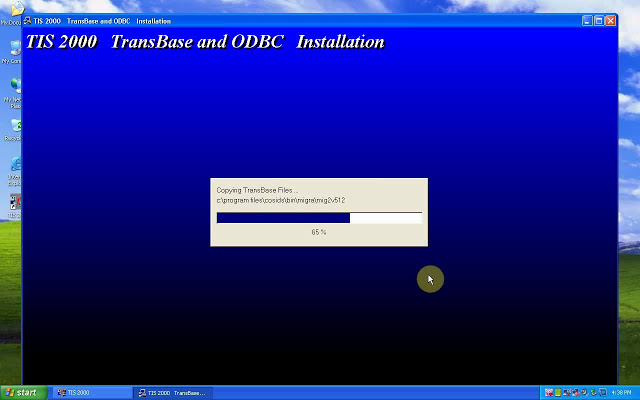
TIS2000 Transbase and ODBC installation.
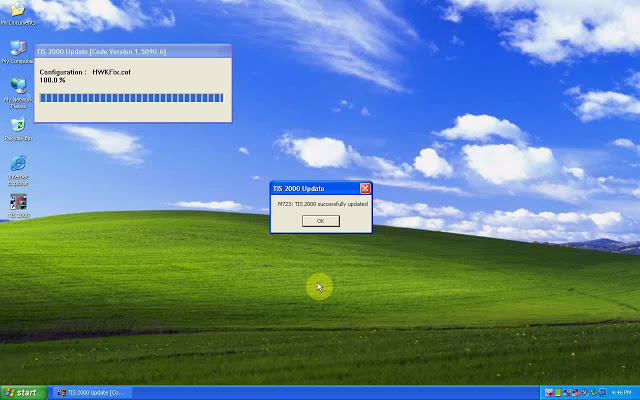
M723: TIS2000 successfully updated.
crack-tis2000-09
crack-tis2000-10
Part 2: Insert CD2.
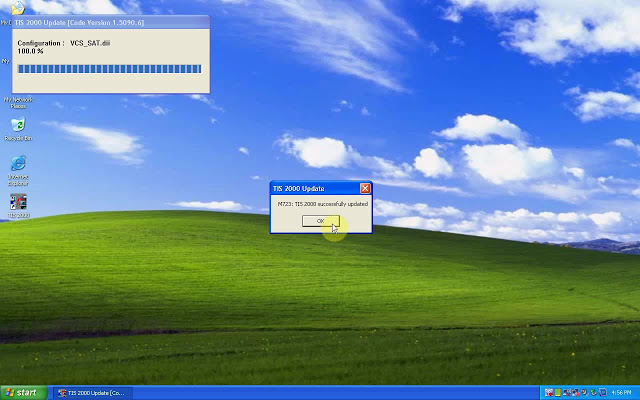
M723: Tis2000 successfully updated.
crack-tis2000-11
crack-tis2000-12
Part 3: Insert CD3.
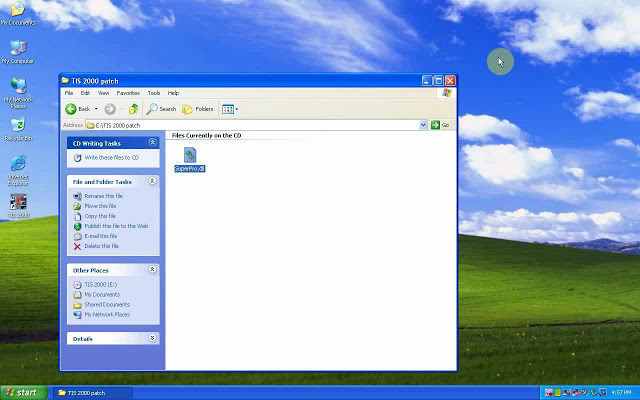
Open the cd, then “TIS2000 patch” to copy “SuperPro.dll”.
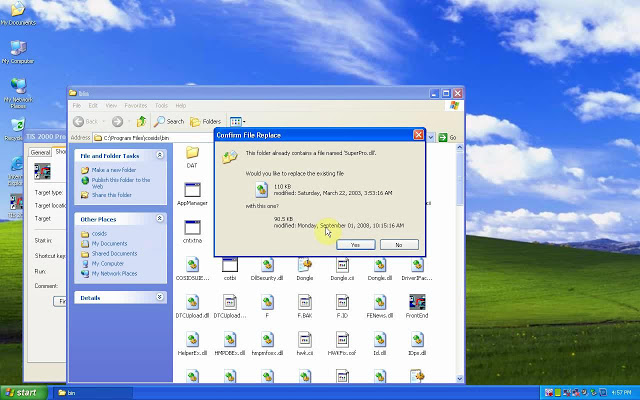
Right-click on “TIS 2000″, then “Find “Find target”, then paste “SuperPro.dll” here.
crack-tis2000-13
crack-tis2000-14    4
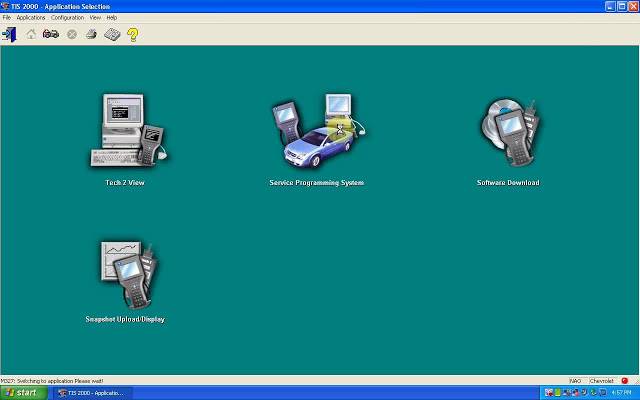
Part 4: open TIS2000.
Enter the “Service Programming system”.
crack-tis2000-15
crack-tis2000-16
crack-tis2000-17
Done.
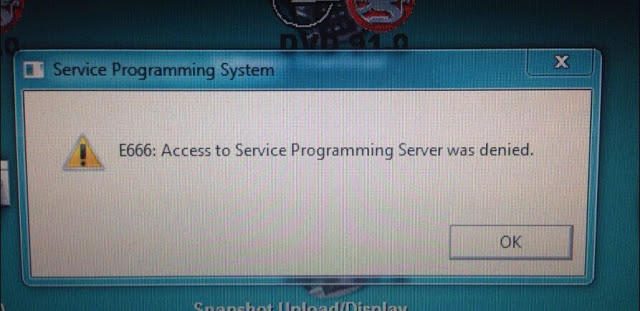
Note: If you done by following the above procedure one by one, you won’t get error ” E666: Access to Service Programming Server was denied”.
crack-tis2000-18
Good luck

Tech2 Clone ensure Corvette C6 steering wheel at zero … and more

Device: GM Tech2 Clone
Car: Corvette C6 2005- 2013
Feedback:
First Impressions
this scan tool is a massive beast, in the pictures it looks smaller but damn! This thing is hefty and looks like one of those TV walkmans’s from the 80’s. hahaha
It can do so so much more than a simple OBD2 Scanner:
Overall technical ability of this GM Tech2 Clone is amazing, I bought it to ensure my steering wheel was at zero after steering rack removal for a harmonic balancer; works great! After pulling DTCs from every single module in the car, I soon realized I had fault codes that a regular OBDII reader would never capture which is pretty awesome!
While playing around with it more, I found where you can adjust the engine idle RPM speed and adjusted it up to 625 from the pre-set 550 RPM. This minor adjustment to the idle speed actually made my Corsa Sport exhaust sound more throaty and aggressive at idle, you should try it. I wouldn’t think this small idle adjustment would damage anything.
FYI, I purchased Tech2 Clone came with the latest GM software version 33. something….This version covers GM vehicles up to 2013. Keep in mind the Tech2 is only a diagnostic tool, used to test different modules and perform numerous tests as well as special functions which are extremely useful. If you want to program or re-flash a module such as the BCM, the Tech2 serves as a pass thru device and you need a subscription from the AC Delco website to perform calibrations or updates to modules.
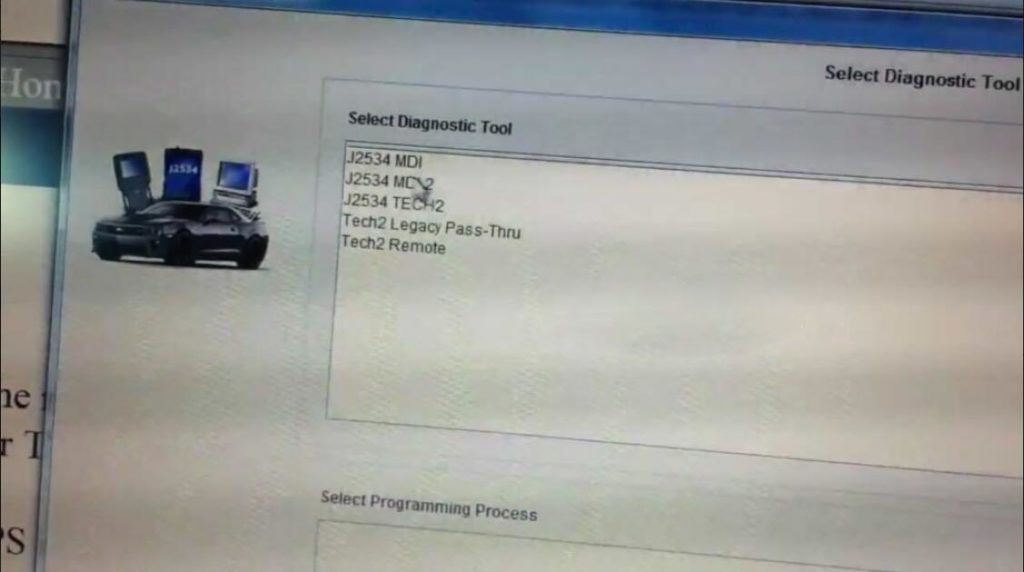
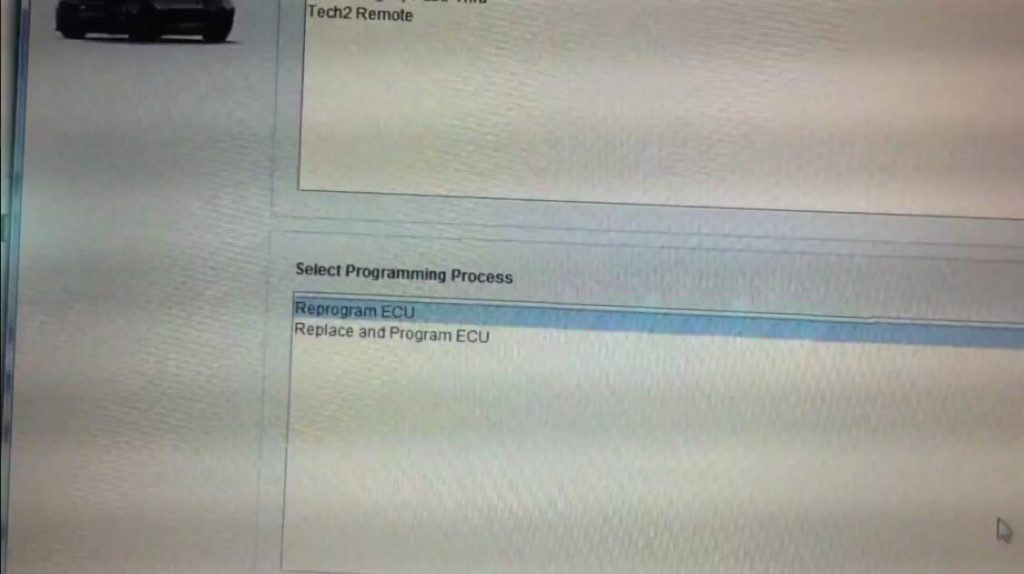
tech2-clone-corvette-c6-sps-programming-01 tech2-clone-corvette-c6-sps-programming-02
A word: Tech2 Clone can do so much more than a simple OBD2 scanner.
Enjoy!